-Puzzle Laboratory Presents
A Guide to Twisting Puzzles
written by Michael Keller
March 2026
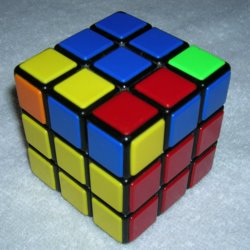
Table of Contents
Introduction
A Microhistory of Twisting Puzzles
A Quick Account of my Cubing History
A Brief Glossary of Terms Used in Twisting Puzzles
Solving the 3x3x3 Cube -- an Intermediate Solution
Picture Cube
Other Coloring Patterns
Shape Modifications
Fisher Cube
Mirror Cube
Twist 3x3x3
Super Skewb
Master Pyramorphix
Fluctuation Angle Cube (Axis Cube)
Mixup 3x3x3
Magic Domino
Cuboid Puzzles (Larger Dominos)
Floppy Cube
A Tactile Cube
The Pocket Cube (2x2x2)
Rubik's Insanity -- a Scrambling Question
Rubik's Revenge (4x4x4 Cube)
The Professor's Cube (5x5x5)
Larger cubes
The 6x6x6 Cube
The 7x7x7 Cube
The 8x8x8 and 9x9x9 Cubes
Pyraminx in 27 Moves
Petal Pyraminx
The Skewb
The Orb
ImpossiBall and Kilominx
Megaminx
Gigaminx
Easiest Twisting Puzzles for Beginners
Disk Pyraminx
Ivy Cube
Dino Cube
Redi Cube
More Solutions Coming
Siamese Cube
Square-1
Square-2
Alexander's Star
The Missing Link
Vertex-Turning Octahedron
Puzzle Roundup
Engel's Puzzles
Top-Spin and Back-Spin
Smart Alex and Galaxy Lock
Masterball
Rubik's Clock
Gripple and Orion
New Shapes for Rubik's Snake
Where to Buy Puzzles
Annotated Bibliography
Encyclopedias
A Survey of Rubik's Cube Maneuver Catalogs
Mastering the Cube Literature: A Short Guide to Books on the Magic Cube
of Ernő Rubik
Sequels to the Cube: Books on Big and Little Cubes, Snakes,
Pyramids, and Chains
Who's Who in Cubology
Appendices
Appendix 1 -- Varasano method for
speedsolving 2x2x2
Appendix 2 -- MES and xyz notation
Some of the material in this booklet appeared in
WGR
(numbers 1-12) between 1982 and 1994. Portions of the bibliography
appeared in Inscape #1 in December 1982, and are reprinted here
in edited form with the kind permission of Donald G. Keller. All of the
photographs and scans herein are from my personal puzzle collection; in
some cases you can see the wear and tear on books and puzzles which are
over 35 years old.
Most of the puzzles discussed herein are protected (or may have been in
the past) by patent, trademark, or both. Rubik and Rubik's
Cube (among others) are
registered trademarks of Seven Towns,
Ltd.
V-Cube is a trademark of Verdes
Innovations S.A.
A Microhistory of Twisting Puzzles
In 1974, Ernő Rubik, a Hungarian professor of
interior architecture, conceived of a new puzzle design, a 3x3x3 cube
with six solid-colored sides, where each of the six outer layers could
turn independently. He named it Bűvös
Kocka (magic cube), and was able
to construct a prototype and solve the puzzle of unscrambling a
mixed-up cube. Within a few years it was being manufactured and sold in
Hungary, and in 1979 Ideal Toys paid 1 million dollars for exclusive
worldwide rights to manufacture it, at which point the puzzle was
renamed Rubik's
Cube. This was the first published item of a genre now known
as twisting puzzles. Although the original patent has
expired, Rubik's Cube is currently a trademark of Seven Towns, Ltd., based in
London, England.
Before the end of 1981, Rubik's Cube
was followed up by a number of puzzles, each of which might be
considered to be a sequel to it in some sense. Rubik himself
created
the Magic Snake, made out of 24 triangular prisms joined by springs,
which allow the snake to be twisted into a large variety of shapes.
Ideal Toy Corporation devised a puzzle called The Missing Link, an
interesting modification of the Fifteen Puzzle popularized by Sam Loyd.
Tomy
manufactured a tetrahedral puzzle called Pyraminx, which was actually
conceived by Uwe Mèffert prior to the cube. In 1982,
Ideal brought out a smaller
version of the Magic Cube called Rubik's Pocket Cube (a 2x2x2 cube)
and a larger version called Rubik's Revenge (4x4x4). A number
of
books appeared in order to help the enthusiast with this new
torrent of puzzles. The Cube was a worldwide craze for
a few years, spawning
dozens of related and unrelated puzzle designs, several bestselling
books, at least three newsletters, and huge media publicity.
It
won numerous awards, including the 1980 Spiel des Jahres for Game of
the
Year. A World Championship for speed solvers was held in June of 1982,
but
not much more than a year later, the bubble had burst and the
craze was over, and it
would be 11 years before a second World Championship was held.
More than a decade after the original Cube
boom
ended, another fertile
period of puzzle development began, fueled by a number of companies
which entered the puzzle field or expanded their operations, several
magazines (most notably Cubism For Fun) providing
coverage of puzzles,
and mail order catalogs offering a greater selection of new and old
puzzles.
A Quick Account of my Cubing History
I bought my first Cube in 1981. I was not able to make any
headway
with it until I read Douglas Hofstadter's first article in Scientific
American. I managed to solve it a couple of times, but
it took a long
time and required handwritten notes so I could undo long
conjugations.
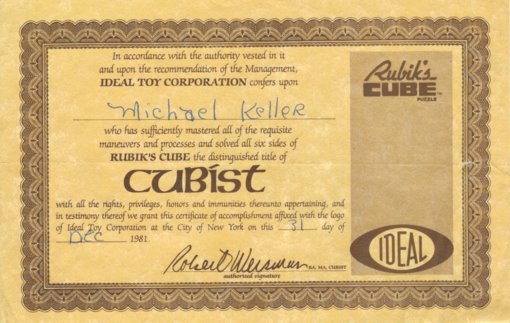
I then learned a complete and reasonably short solution from Don
Taylor's Mastering Rubik's Cube. I was able to
get my solution time under 2 minutes (with my brother Richard as
witness) late
in 1981 and got a
certificate from Ideal Toys (scan above). The
solution I
gradually developed,
which is presented here, roughly follows Taylor's general
outline (with a major addition from solutions by Cyril Östrop and M. Razid Black), and
with some phases combined and many shortcuts added. I
published the first issue
of WGR in November 1982, including a solution to Pyraminx which was the
first twisting solution I worked out without consulting other sources.
My solutions to Skewb, Orb, and ImpossiBall appeared in the next few
issues. I also wrote a short guide to books on the cube which
appeared in my brother Donald's science fiction fanzine Inscape (most of this is reprinted in the bibliography, with much new material).
The Cube fad collapsed during 1983, and a number
of solutions I had written up by hand never appeared in WGR. A
sequel I wrote to the Inscape article also never appeared; most
of the
material from
both articles appears here in modified form.
I had probably not solved a cube in five years or so when I saw
descriptions of the Mirror Cube on the Internet in late 2008. I ordered
one from an eBay dealer in Japan, and while I was waiting, I started
relearning the details of my Cube solution, which I had mostly
forgotten. The arrival of the Mirror Cube rekindled my interest in
twisting puzzles in general, and I started work on this booklet in
mid-2009.
For
speedcubers who'd like to laugh at me, my personal records at the
moment are: 2x2x2 11.50s (but a fluke 9.94s), 3x3x3 47.77s, Icon
1:52.10, 4x4x4
2:20.24, 5x5x5 4:22.61, 6x6x6 8:43.53,
7x7x7 14:01.40, 8x8x8 23:09.22, 9x9x9 40:19.63, combined solves [2x2x2
through 7x7x7] 34:15.37,
[2x2x2 through 8x8x8] 1:00.15.35, one-handed 2x2x2 50.03, Twist 3x3x3 2:06.98, one-handed
3x3x3 2:31.50, Mirror 2:43.81, Fisher Cube 2:46.14, Mixup 3:17.60, cube pattern replication 3:48.72, Tactile
6:04.41,
Shepherd's Cube 11:29.53; Pyraminx
15.41s, Skewb 18.34s (fluke 16.83), Redi
Cube 35.43, Master
Pyraminx 1:48.65, Kilominx 1:48.87, Orb
1:58.62, ImpossiBall 5:00.91, Master Pyramorphix 5.01:53, face-turning Octahedron
7:06.59, Megaminx 6:12.06, Gigaminx 52:19.16, Professor Pyraminx 11:56.53. Fewest
moves (including slice and
multiple turns): Redi Cube 23 turns, 3x3x3 40 turns, Petal Pyraminx, 72 turns, Twist
3x3x3 76 turns,
4x4x4 128 turns, 5x5x5 252 turns, Megaminx 265 turns.
Most of these were timed by hand
with a stopwatch or online timer, and all of them were very thoroughly mixed, and
solved with no
preexamination time.
A Brief Glossary of Terms Used in Twisting Puzzles
The following terms will be used throughout the various puzzle
solutions:
antislice move -- a turn of two opposite layers in opposite directions.
baryon -- a sequence of moves which twists three corners in place 120
degrees in the same direction
center -- a piece located in the interior of a turning layer, usually
with one colored
facet. The
3x3x3 cube has six centers, which are fixed to the central spindle of
the puzzle, and can rotate but not move to other faces. In cubes
with pictures or other patterns on the faces, the orientation of the
centers matters. Larger cubes have more than one center piece per
face; they can freely move to different faces via slice
moves. In shapeshifting 3x3x3 puzzles, a center is the
middle of a turning
layer, and can change orientation but not position. It
has four orientations, and may have one, two, or four colored
facets. Some puzzles, like ImpossiBall,
Pyraminx, Square One, Dino Cube, and Redi Cube, have no centers.
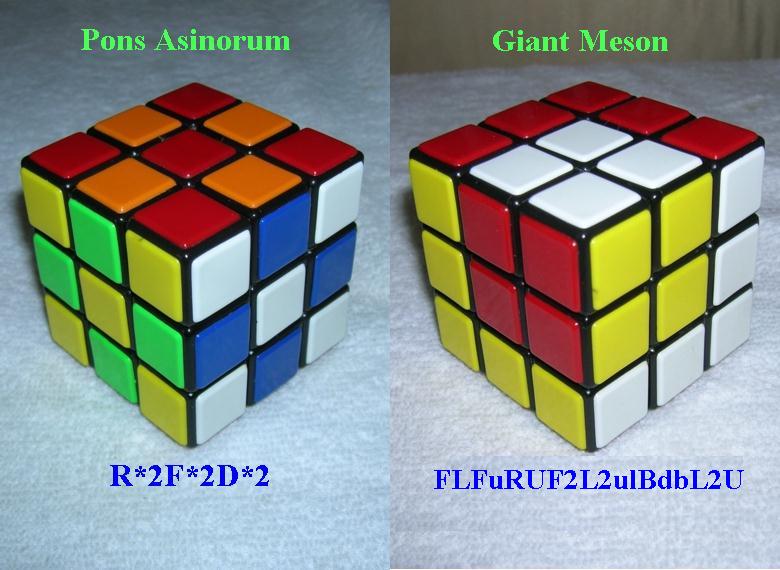
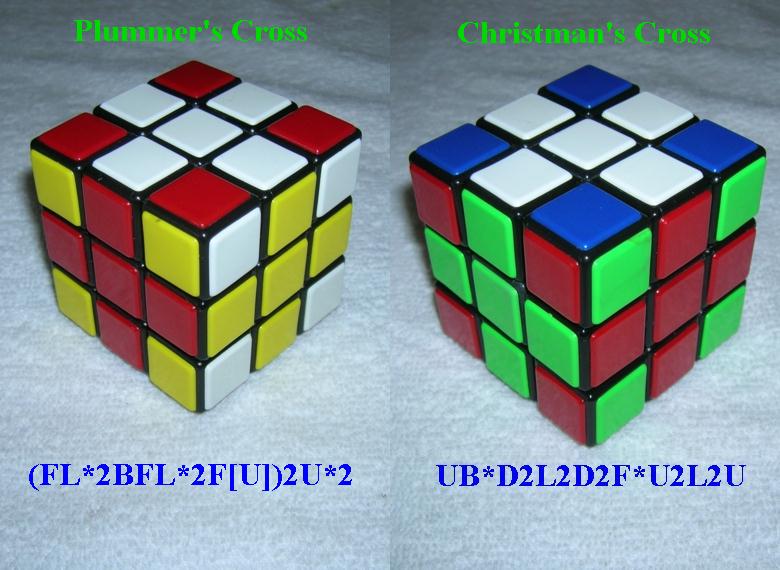
Christman Cross -- a pretty pattern for the Cube in which a cross
appears on
all six faces, with the colors grouped in
threes.
commutator -- a sequence of moves of the form ABab, where two moves (or
sequences)
are performed, then the inverse of both are performed. Longer
commutators are possible; e.g. ABCbac or ABCacb (see, for example, the
Pyraminx solution).
conjugation -- a modification of a sequence by
adding one or more setup turns to place pieces in certain locations.
After performing the main
sequence, the setup turns are performed in reverse order and reverse
direction. This is described in more detail later.
corner -- a piece which is part of three
mutually perpendicular turning layers, and which can be
twisted in 120 degree
increments, so that it has three possible orientations.
On a normal cube it has three colored facets, and cubes (of
any size from 2x2x2 up) each have eight corners. In
shapeshifting puzzles, a corner may have one, two, or
three colored facets, and on some puzzles (e.g. Master Pyramorphix),
the orientations may be visually
indistinguishable.
deep move -- a turn of an outer layer and one or more adjacent parallel
layers at the same time
Dots -- a Cube pretty pattern in which each side shows a center of one
color
surrounded by eight facets of a second color (e.g. R*F*L*B*).
Also
useful as the
basis for routines which rotate centers on picture cubes and
swap centers on larger cubes (4x4x4 and above). Cubes larger
than 4x4x4 allow for a bullseye pattern with a single facet or 2x2
square surrounded by two or
more circles.
double bicycle -- a sequence of moves which swaps the locations of two
pairs of pieces
double edge flip -- a sequence of moves which reverses the orientation
of two edges at once
double meson -- a sequence of moves which twists four pieces, two in
each direction
edge -- a piece which is part of two
perpendicular turning layers, and usually has two orientations.
On most puzzles it has two colored facets which meet along a
line segment. The 3x3x3 Cube has 12 edges, Pyraminx has 6, Square
One 8,
Skewb
and
Pocket Cube zero. On order-3 puzzles edges can be
reversed in place
(flipped). Larger
cubes have multiples of 12 edges: 24 for
4x4x4, 36 for 5x5x5, 48 for 6x6x6, etc. On puzzles with four
layers, edges cannot be flipped in place; their orientation is
determined by their position (e.g. Master Pyraminx; see the diagram in
that section). On the
Mixup Cube, edges can be twisted 90 degrees via half-slice moves.
In shapeshifting 3x3x3 puzzles, edges may have up to three colored
facets, but still only two orientations. In some puzzles (e.g.
Fisher
Cube and octagonal barrel variant cube), some or all edges have only
one color and both orientations look the
same. In others (Master Pyramorphix), edges have one color but
are asymmetric, so flipped Edges stick out from the normal puzzle
shape.
equator (Alexander's Star, ImpossiBall) -- the band of pieces lying
between two opposite faces
face -- a flat visible surface formed by a group of pieces (usually)
sharing the same color. There are
six faces on a Cube of any size, four on Pyraminx, etc.
Occasionally the face is not flat (as in ImpossiBall). In normal cubes,
the face is part of a layer and turns as a unit (but see Skewb and
Square-1 as exceptions).
facet -- an individual segment (of one color) of a center, edge, or
corner piece. A center usually has one facet, an edge two,
and a corner three. Each facet will have a sticker or tile of (or
be painted) a particular color.
flip -- to reverse the orientation (and colors) of an edge while
leaving it in the
same location (a 180 degree rotation). In most puzzles, every sequence
of moves flips an even
number of edges (perhaps zero).
inverse -- a sequence which performs the exact opposite of another
sequence. It is derived from the original sequence by reversing the
order and direction of the turns. For example, the inverse of ruR2
brB2 ubU2 is U2BU B2RB R2UR.
layer -- a group of pieces which turn as a unit (9 in the 3x3x3 Cube)
meson -- a sequence of moves which twists two corners in place 120
degrees in opposite directions
middle -- centrally placed (used as an adjective while center is used
as a noun). In particular, the middle layer of the 3x3x3 cube is
the layer in between the first and last layers to be solved (typically
the Up and Down layers), and middle edges are the four edges in that
layer. On 5x5x5 (and larger odd) cubes, a middle edge
is the centermost of a set of three edge pieces.
orient -- to turn a correctly positioned piece so that its colors match
those of correctly positioned adjacent pieces
parity -- a mathematical principle which limits the possible
configurations
which can occur in a puzzle. For example, the number of edges
which are flipped in a scrambled 3x3x3 Cube is always an even number.
piece -- an outer unit of a puzzle. It usually
has one, two, or three facets, each a different color. The 3x3x3 cube has 26 pieces.
place -- to put a piece in the correct location and orientation at the
same time; usually done one piece at a time
Plummer Cross -- a pretty pattern for the Cube in which a cross appears
on all six
faces, with the colors grouped in pairs
position -- to put a piece in the correct location without regard to
orientation; usually done three or four pieces at a time
Pons Asinorum -- the simplest Cube pretty pattern, formed by half turns
of all six outer layers (L2R2F2B2U2D2 or R*2F*2D*2),
producing a checkerboard
on each face. Also possible on 5x5x5 and larger odd-ordered
cubes, turning every alternate inner layer (or on even-ordered cubes
with the center being 2x2).
pretty pattern -- a sequence of moves which place a previously
unscrambled cube or other twisting puzzle into an attractive
arrangement, usually symmetric
quark -- a one-third (120 degree) twist of a corner
shapeshifter -- a puzzle which often changes shape from turn to turn (e.g.
the Square One and Pyramorphix families; Mirror, Fisher, Twist, Axis,
and
Mixup cubes)
slice -- the subcubes lying between two opposite layers (e.g. 4 edges and 4
centers in each
slice in the 3x3x3 Cube)
speedcubing -- competition solving against the clock, which generally
requires very
complex algorithms, fast reflexes, and a well-lubricated cube
Start -- the unmixed goal position of a twisting puzzle; normally each
face of the puzzle is one color. Always capitalized when used as
a noun in this sense.
Sune -- a very fast sequence which twists three corners while
moving three edges in a tricycle. It can act as a tricycle
tip -- a three-colored piece on tetrahedral puzzles (the Pyraminx
family) connected only to one larger corner. It is
trivially fixed by aligning its colors with the attached corner.
tricycle -- a sequence which cyclically exchanges the locations of
three pieces
twist -- to change the orientation of a corner without changing its
location
twisterflipper -- a sequence which performs flips and twists
simultaneously. Coined by M. Razid Black and Herbert Taylor in their
book
Unscrambling The Cube.
wing -- a two-colored piece on larger Pyraminxes where the two
facets meet only at a point.
wring -- a simultaneous 90 degree turn of an outside and middle layer
together, and an additional 90 degree turn of the outside layer
alone, done in one motion.
Solving the 3x3x3 Cube -- an Intermediate Solution
What Is Wrong With Most Beginner's Solutions?
Almost every layer-by-layer beginner's solution (whether on the
Internet
or in printed books) has at least one fundamental flaw: they recommend
placing all four Up corners before doing the middle edges.
This
requires using long sequences of 7-9 moves (including a setup move
where needed), instead of simple 3-4 move drop or push insertions, to
place the middle edges. This makes the solution longer,
especially when flipped or misplaced edges must be pushed out
of the middle layer and then placed correctly. It is much
easier for
a beginner to place three Up corners, then all four middle edges, then
place the last Up corner using a tricycle or the Upside-down Insertion we will show later. Then you can learn the shortcuts of swapping middle
edges, then placing Up corners at the same time you place or flip a
middle edge.
Beginner's solutions to the Cube often use
pictograms instead of notation to show each move in a sequence
(somewhat like trying to teach someone music without teaching them the
basics of music notation). They are usually slow and inefficient,
frequently requiring a sequence to be applied twice (or more!) rather
than give an inverse version. They rarely use slice moves, and
generally require 100
moves (turns) or more to complete a solution. [A recent trend is an appalling waste of time
called the daisy,
putting all four Up edges in the Down layer without regard to position,
then placing them in the correct Up position by turning the Down layer
to the correct position and making a half turn.]
What is an intermediate solution anyway?
Speedcubing solutions to the Cube normally require the solver to
memorize
more
than 100 different sequences to handle dozens of individual positions
in particular situations, and the individual sequences are often long
and hard to remember (using turns of only a few faces, and few
repetitive patterns). They frequently use a mixture of three different
notations for regular, slice, and whole cube turns, and often
require a
reorientation in the middle of a long sequence. Speedcubing
methods need 57 different sequences just to handle every possible orientation of the last layer; we
will see later how this can be done a little
less
efficiently with three
variants of a single sequence.
The solution we present here is somewhere in
between a beginner's solution and a speedcubing solution. It
doesn't require you to learn 100 or more move sequences in order to
solve the
cube, but allows solving the cube in well under two
minutes, usually taking no more than 80 moves, sometimes considerably
less. I am currently under 1 minute about 40 percent of the time
(recent average 65 seconds) using
this method with an ordinary (not speed) cube, and occasionally have
been under 60 moves. The best time I have recorded since I started
working on this booklet is 47.77 seconds. The move sequences I
use are the ones which I feel are
the easiest to memorize, as they are either relatively short or have a
strong pattern to them.
I count, as some analysts do, both 180 degree turns and slice turns as
single
turns. Others insist on counting by outer layer quarter turns, so
that a 180 degree outer layer turn or a 90 degree slice turn
counts as two turns, and a 180 degree slice turn counts as four.
Even by this more restrictive counting system, I can usually get a
solution in under 100 quarter turns. [There's another system which
counts outer layer turns, but both 90 and 180 degrees count as one; any
slice
turn counts as two.]
Notation
We use the standard Singmaster (English language) notation for the
Cube, where the six faces/layers are designated Front, Back, Left,
Right, Up, and Down, and clockwise 90-degree turns of each layer are
designated by capital letters. We designate anticlockwise turns using
lower-case letters (rather than using a prime or minus sign); I think
this makes the notation easier to read. 180-degree
turns are designated by the capital letter followed by
a 2 (these may be made in the clockwise or anticlockwise direction,
whichever you find more convenient; R2 and r2 have the same effect).
We also designate slice turns
(of one of the three middle layers) with an asterisk indicating a
90-degree clockwise turn of the adjacent middle layer in the same
direction: R* means to move the slice in-between R and L in the same
direction as an R turn. (This is much easier to remember for
non-mathematicians than the MES notation used
elsewhere). The same turn
in the opposite direction is L* (so R*2 and L*2 have the same effect).
Individual
pieces are designated, where necessary, by a single letter for centers,
two letters for edges (UF is the edge shared by the Up and Front
faces), and three letters for corners (BLD is the corner shared by the
Back, Left, and Down faces).
In the rare cases where we show a specific
reorientation of the whole cube in the middle of a sequence, we
designate a turn of the entire cube in brackets, again avoiding the
unnecessarily complex
notation used elsewhere, with whole-cube turns designated with xyz
notation. [F] means to turn the
whole cube in the direction of a Front turn, so that the Front face
stays the same and the Left face becomes the new Up face (this has the
same effect as FF*b). We will often add spaces to notation to
make it easier to
read and to clarify the structure of the sequence. The six main
clockwise turns, and an example of a slice and an anticlockwise turn,
are shown above in a variety of diagrams and photos.
Diagrams
show the color pattern which Ideal quickly made standard on its
cubes (shown in the four small photos above right):
blue is
opposite white, red is opposite orange, and green is opposite yellow.
Why do we want to use slice turns?
Some cubists do not like using slice turns, because they are
slower for speed cubists to perform, and because they complicate the
notation. But slice moves are used in speedcubing, sometimes in
disguise, and they are essential for solving larger cubes (4x4x4 and
up). They also make it much easier to understand and remember many
sequences. For example, a routine to flip all 12 edges can be notated
very concisely as ((R*U)4[UL])3.
An 8-move sequence like
(R*U)4
which flips four edges in place (diagram above) was apparently first
discovered by
Bernard S. Greenberg and named the Spratt
wrench,
in a posting to the Cube Lovers mailing list on
August 10, 1980. (He also noted that a simple, though not efficient,
double edge
flip is (R*U)4(UR*)4.)
Solving methods which do
all of the
corners first (like Thai's and Varasano's: see the Bibliography) make
heavy use of slice
moves.
Some sequences also use an antislice turn,
which
consists of turning two opposite faces simultaneously in opposite
directions (though both clockwise from their point of view). Antislice
moves can sometimes produce short and clever
sequences, such as Thistlethwaite's routine (RLUrlU2)2
to turn a
center
on a picture cube
180 degrees. or the elegant double edge swap
LRU2lr[U]lrU2LR.
A deep move is a turn
of two layers (an outer layer and the adjacent slice) at the same time,
for example RR* or rL*. We will use this in our 3x3x3 solution in
several instances, particularly where a conjugating move
overlaps the beginning of a
standard sequence. (Speedcubers sometimes have a special
notation for deep moves, and often express slice turns as a deep move
followed by a reverse of the outer layer). Deep moves are
used frequently in solving the 4x4x4 and larger cubes.
A faster equivalent of the antislice move is a move is sometimes
called a wring;
it consists of turning a middle slice and outer layer together
and continuing the outer layer turn another 90 degrees,
e.g. R*R2, which has the same effect as RL[R]. This would
actually be performed as either the deep move R*R followed by another
R, or R followed by a deep move R*R, but all in one motion.
An anticlockwise
wring looks like L*r2 (equivalent to rl[L]). A very
clever (though not especially useful)
routine which flips all 8 of the Up and Down edges is (F*F2
R*R2)3 (equivalent to six antislice moves: (RLUDFB)2).
A slight modification of this (done twice, replacing the initial wring
with a deep move) gives a quadruple edge flip (though not the most
efficient one), flipping all four of the
Up edges: (U*U (R*R2 U*U2)2 R*R2)2 U2.
A more useful sequence using wrings is R*R2 B2 L*r2 F*b2 R2 B*B2, which
swaps two opposite pairs of edges on the Up layer (see the Fifth Stage of our 3x3x3 solution).
How do we find good move sequences?
Useful sequences can be found using a number of
techniques. One basic kind of move which is widely used in
solving the first layer of a puzzle is an insertion:
putting a
piece into a target location which is in between two other pieces
already in place. There are two main techniques for
insertions, which we can call drop insertions and push insertions.
For simplicity, we will talk about the 3x3x3 Cube, though the
same principles apply to other twisting puzzles. Consider the
situation in which we are
trying to insert an corner from the Down layer into the Up layer.
In a drop insertion, we turn a side layer to move the target
location from the Up layer into the Down layer, turn the Down
layer to rotate the desired piece into the target location,
and turn the same side layer in the opposite direction we
turned it initially. In a push insertion,
we turn the piece directly into the target position, turn it
away at an angle, then reverse the first two turns. The push
insertion is an example of a commutator,
a sequence of turns of the form XYxy (you may see such a sequence
referred to as a sexy move or sledgehammer).
In solving the Pyraminx and other
puzzles,
we make use of slightly more complex commutators of the form XYZyzx.
Repeating commutators often allows us to build powerful routines with a
high amount of repetition, which makes them easy to remember
(note
these especially in the solutions we'll see later for Skewb and
ImpossiBall). Commutators are useful enough that some easy
puzzles can be solved with nothing else.
Another way of generating sequences is by combining two sequences in a
way that some of the moves at the end of the first sequence are
reversed at the beginning of the second. For example, I found the
Upside-Down Insertion (F2D)2F2D2F2
(described later) by combining two
well-known sequences: the
I-Swap F2DF2dF2,
and the sequence (F2D2)3,
which swaps FL with FR and LD with RD. Joining these, we get
F2DF2dF2F2D2F2D2F2D2.
The middle section dF2F2D2 cancels out and
becomes D, and we drop the last D2 because we don't care about the Down
layer yet. The second half unswaps FL and FR which were swapped
by the first half, and the result is a pure insertion from the Down
layer which has no effect on the middle layer. This
sequence is also useful in solving the 3x3x2 and 3x3x4 cuboid puzzles
we
will see later.
Rubik himself discovered the double edge flip (R*U)2R*U2(L*U)2L*U2. He may
have discovered the Spratt Wrench too, and realized that he could join
it to an almost-mirror image of itself, (UL*)4. If you just join those
you get (R*U)4(UL*)4,
which flips UL and UR once and three middle-slice edges (UB DB DF)
twice, resulting in a pure double-edge flip of 15 moves. But what
happens when you stick U2 in the middle? Now the original UL is
going to be flipped a second time (and UR not at all), and instead of
flipping the original UB a second time, we 're swapping the original UF
instead. Now it becomes R*UR*UR*UR*U(U2)UL*UL*UL*UL*,
and the underlined section mostly vanishes: the four consecutive U's
become nothing, R* and L* cancel out, and what's left is just U2.
Adding another U2 at the end to undo the middle one, we have Rubik's
discovery.
Another kind of sequence alternates turns of two faces, turning one
face the same direction each time (sometimes with double turns) and the
other in alternating directions. The best known of these is
the Sune, RUrURU2rU2, named by
Lars Petrus as part of his 3x3x3 solution. It twists three
corners in the same direction and cycles three edges (on the 2x2x2 it
acts as a pure baryon). Other similar sequences are useful
in solving the Megaminx, Redi Cube, and other puzzles.
Another way of finding sequences is by adapting sequences from one
puzzle to another. The 3x3x3 corner tricycle lURuLUru which can be used on any
size cube, can be adapted to dodecahedral puzzles like Kilominx and
Megaminx.
Outline of the 3x3x3 solution
The solution we describe here has six stages:
(1) Place the four edges in the Up layer -- these are done one at a
time, but with each edge we place, we try to eliminate any problems
with
edges yet to be placed.
(2) Swap any middle edges which are already in the middle layer into
their correct locations, regardless of orientation.
(3) Place the four Up corners while placing and fixing the remaining middle
edges. We use a group of short sequences (3-8 turns) with dual
purposes, with each sequence trying to place/fix an Up corner and a middle
edge at the same time whenever possible.
(4) Flip the cube over so that the unsolved layer is now Up. Place the
corners
in the correct positions, regardless of orientation.
(5) Place the edges in the correct positions, regardless of orientation.
(6) Orient all of the edges and corners simultaneously, using one or
two applications of Benson's
Twisterflipper.
First Stage -- Placing the Upper layer edges

The first stage in solving the Cube is to place
the four Up edges in their correct positions around the Up center.
To do this efficiently, we want to get as many of the
edges into good positions (either in the Down layer with the Up colored
facet facing down, or anywhere in the middle layer), so that we can put
them into the correct Up position with a single turn of a side layer.
The bad positions, in contrast, are in either the Up layer
or Down layer with the Up color facet on one of the side faces.
An edge in the Up layer with the Up facet facing up is good (shown as
beige, above center) if there is only one, or if by chance there are
more than one in the correct positions. A properly mixed cube
shouldn't have any edges matching the center color when you begin
solving, but if you do have
such an edge, you can consider it already correctly placed as the first
edge.
Otherwise the first edge can be placed anywhere in the Up layer; the
remaining edges
must be placed in the correct positions relative to the first edge
placed, regardless of the positions of the centers (we will
save a lot of unnecessary Up turns this way). When moving an edge from
the
middle layer into the Up layer (with a turn of a side face), we
should always try to save moves by converting
bad edges into good edges at the same time. There are two ways of
doing this: pushing out a bad edge from the target position, or putting
a bad Down edge into the middle layer (by putting it under the target
position by turning the Down layer). Sometimes you can do both at the
same time. Since we can place the first edge anywhere, we
should always choose, if possible, to put it somewhere that pushes out
a bad edge (and convert a bad Down edge if possible too).
If there are
any edges in the middle layer which need to go to the Up
layer, we should begin with one of these, but make sure turning it
into the Up layer will not make another middle layer edge into a
bad edge by pushing it into the Down layer). Consider
the example above right: it is tempting to just turn
Front anticlockwise, putting the white-yellow edge into the Up
layer and pushing out the bad green-white edge. But doing this
will make the red-white edge bad by pushing it into the Down layer
flipped the wrong way. Instead we want to place the red-white
edge first by turning Left anticlockwise, putting it
in the Up layer with the white facet Up. But before
we do that, we turn Up clockwise to put the bad green-white edge
into the target location, and also turn Down clockwise so that the
bad orange-white edge is underneath the target location. Now when
we turn Left anticlockwise, we have placed the first edge and converted
both of the bad edges into good ones in only three turns. [It
will actually only take four more turns (fbDR2) to
place the
rest of the edges.]
The diagram above shows the first edge
(white-orange) already
placed, although the orange side facet is not aligned with the orange
center (we will not align the Up layer with the middle edge centers
until the first two layers are completely finished). The
small white and yellow squares show the target location for the
white-yellow edge. We want to get the white-yellow edge into
one
of the three positions shown, so that a turn of F or f or F2 will put
it in the correct spot. If the white facet of the
white-yellow
edge is in a good location, we can turn either the Down layer or the
Down and middle layers together (a deep move) to put it in one of the
three locations shown. If the white-yellow edge is
in the Up
layer with its white facet on a side face, or with its white facet
Up but in the wrong position relative to the first (white-orange) edge,
we can first turn the side layer it is in (F, L, or B) so that
it
goes into the middle layer. If it is in a bad position in
the
Down layer, we can again turn the side layer it is in to put it in the
middle layer. but we must not displace an Up edge already placed, so if
it is underneath one of the edges already placed, we must turn the Down
layer to put it in a different side layer first, before turning that
side layer.
Below are some more examples of placing two bad edges at the same
time. In the first two examples, U* is not a slice move,
but part of the deep move dU*, in which the bottom two layers are
turned together anticlockwise.
Let's
now look at a complete example of placing all four edges when all of
them are bad at the beginning. In the position above left, we have
two white edges in the Up layer but flipped, and two in the Down layer
with their colored facets Down. We begin by turning l
anticlockwise, to pull the bad edge out of UL and bring the bad edge at
DL into the middle layer. Next we turn b anticlockwise, putting
the
white-yellow edge into an Up slot and pushing the bad
white-green edge out of that slot. The white-red edge belongs at
UR, so we turn U clockwise to put the target at UF, then turn F
clockwise to put the white-red edge into its correct location and bring
the last bad edge from FD into the middle layer. Now ul
(both anticlockwise) puts the white-orange target at UL and turns the
white-orange edge into it, and ur (both anticlockwise) puts the
white-green target at UR and puts the last edge there.
We don't need to turn U again to match the Up edges with their
side-center colors yet, because the Up and middle layers will operate
independently in the next stage.
Some utility routines for fixing troublesome edges
If you haven't pushed out all of the bad edges by the time you have
placed the first two or three edges, you may find the last edge or two
in a troublesome position. The routines shown above should help: the
first two show how to fix the last edge when it is in the correct
location but flipped, or in the Down layer in a bad
position. The third routine lets you move an edge in the
wrong place (from UF to UR), and the fourth lets you switch two
adjacent edges.
When two bad edges on the Down layer are adjacent and they need to be
moved into adjacent up positions, they can be placed simultaneously
with one of the two routines above. The first moves each edge to
the position directly above it, but flipping it in the process.
The second swaps their positions and flips them at the same time.
Second and Third Stage Shortcuts in Solving the Cube
Rubik's Cubic Compendium presents a rather
hard-to-learn method
of simultaneously solving the upper corners and middle edges
of the Cube (devised by a group of cubists at Cambridge University).
Speedcubers have developed even more elaborate methods, particularly
the second phase of the CFOP system (this requires 42
sequences
as described in Speedsolving the Cube by Dan
Harris). But it is
possible to achieve reasonably good efficiency without memorizing a
huge set of sequences. The following method allows the solver to solve
the upper corners and middle edges quickly. It was devised by putting
several ideas from books by other cubists together with a few ideas of
my own.
Second Stage -- Preplacing Middle Edges
Stage 2 requires the solver to find all middle edges
which are already in the middle layer, even if in the wrong position or
orientation. These will be edges without the color of the
Down face (in our example, blue). The simple sequences
shown below allow any edges already in the middle layer to be swapped
into their correct locations
(relative to the four side centers).
At this point their orientation is not important -- we are going
to flip edges during stage 3. The bottom diagrams show an X-ray view of
the
middle layer looking down through the Up layer.
The 4th sequence, the I-Swap, also moves a corner from DRF to URF.
This should be used as often as possible; it can be used to get a
headstart on Stage 3 by inserting a corner whose white face is in
the Down layer from the Down layer to its Up position, or pushing
out an Up corner which is in the wrong place (occasionally both at
once). An alternate version of the I-Swap, which moves a corner from
DLF to URF, is faster, but dislodges ULF (actually putting DRF
there). If you want to swap two middle edges without disrupting any Up
corners,
(F2D2)2F2 also swaps FL and FR.
Most of the time you will only find one or two edges which
belong in the middle layer and are already there. A
single
edge can almost always be moved to its correct location with a V- or
I-Swap: turn the whole cube so any correct edges are at LB, or
LB
and RB (the only tricky case is a single or double swap when LB and RF
are correct: this requires a V-Swap
followed by an I-Swap; see the two examples below, where correct edges
are shown as solid black). Two edges can usually both be
swapped
to their correct locations with one of the four routines above (except
in the second case shown below). More complex swaps of three or
four edges need a V or X swap to put two of the edges in their correct
spots, followed by an I-swap to fix the remaining edge or edges.
Third Stage -- Placing Up Corners and Placing and
Flipping the
Remaining Middle Edges
An important point to understand is that although we are going to be
trying to place (or fix) Up corners and middle edges
simultaneously with each sequence we carry out in Stage 3, the
Up layer and middle layer are
independent of each other,
until we finish the stage, when we will align them. Each
sequence in this stage can potentially operate on both an Up corner and
a middle edge (except for the last two sequences which insert the
fourth Up corner without disrupting any of the middle edges).
Since Stage 2 often puts middle edges in the correct position but
flipped, we
first look at move sequences which insert a corner from the Down layer
into the Up layer, while flipping a middle edge already in the correct
location. In the examples pictured below, we want to flip the
orange-green middle edge, while inserting the white-yellow-red corner
into its correct Up position. We first turn the whole cube so
that the flipped edge is at RF, turn the Up layer so that the
white-yellow-red target location is at URF, and turn the Down layer so
that the white-yellow-red corner is in the correct location for the
selected sequence. If the corner has its Up facet (white in our
examples) on the Down face, it should begin at DRF. If its Up
facet is on any side face, it should begin diagonally opposite, at
DLB. Now perform the indicated routine, depending on the
position of the white facet. The Column Flip is actually two
Drop Insertions joined together. The other two routines, which
are mirror images of each other, each bring a corner from the
diagonally opposite location, by reorienting the corner in the Down
layer and putting it in position for a Drop Insertion.
The Column Flip should be used whenever possible; i.e. anytime there
is both a flipped middle edge and a corner in the Down layer with its
Up facet on the Down face. If there are no such corners, but
more than one flipped middle edge, use one of the other two routines if
possible.
If you have an Up corner in the correct position, but twisted,
there is another set of routines to twist an Up corner in place
(clockwise or anticlockwise), while optionally putting a new middle
edge in place. Turn the bottom two layers together so that RF is
either the target for a middle edge, or at least an incorrect location
(remember that we don't want to put the last middle edge in place
unless we are placing or fixing the third Up corner at least). Then
(if you are placing a middle edge) turn the Down layer so that the edge
being placed is in the correct spot (there is one valid location for
any edge, depending on which way it is flipped and in which direction
we need to twist the corner). The first and third twists are
well-known routines, and we will use them again when solving Rubik's
Pocket Cube. The second and fourth routines are the same as the third
and first routines, except that the Down turns are 180 degrees.
Now we use the four routines below
to move any of the corners which belong in the Up
layer, but are currently in the Down layer with their
Up-colored facet on one of the side faces, into their correct
positions,
including orientation. If the edge at RF is correct (or flipped), turn
the whole cube so
that the edge at RF is not a correct one (flipped or not). If
an edge in either of the two corresponding Down layer positions
also belongs in the middle layer, we will also place the new
middle edge at the
same time, though here orientation doesn't matter (Cyril
Östrop's book was
the inspiration for this technique), and we want to turn the whole cube
so that
RF is the target of the edge in the Down layer we want to move. Turn
the Up layer if
necessary so the target for the corner we want to move is at URF, and
turn the Down layer so that the corner we want to move is at DRF,
and do a push or drop insertion as appropriate.
We will continue using these routines to put in Up corners (and
middle edges at the same time if possible), jumping back to use the
Edge-flipping insertions as needed, trying to get at least three Up
corners correct. It is best to avoid putting the fourth
middle edge in place until you have
three Up corners correct.
If there are no corners in the Down layer which belong in the Up layer,
then some of the Up
corners must be swapped with each other. Force one of them out using a
Drop Insertion. You can put a middle edge in too at the same time if
there are not already three in place; in any event make sure that RF is
not correct, so that you don't displace an edge already in its correct
spot. Then put the corner you've just sent to the Down layer
into its correct Up location, which should push out another bad Up
corner.
Once you have three Up corners in place, you should finish
putting each remaining middle edge in place (possibly there is
only one at this point), using whichever insertion will put it
in the correct orientation: turn the whole cube so that the target is
at RF,
turn the Up face if needed so the unplaced Up corner is at URF, and
turn the Down layer so the edge you want to place is in the correct
location, then perform the correct Insertion.
You can actually do Drop Insertions from other positions; e.g. if the
green-orange edge is at FL with its green facet on the left face, you
can insert it via
rD2R. In fact, although we will not show all eight possible positions,
when you are placing edges alone, any middle edge still in the Down
layer will either already be in position for a Push Insertion, or can
be inserted from where it is via a variant Drop Insertion (turn
whichever of the Front or Right faces is the color of the edge facet
not on the Down face, then turn the Down layer so that the edge moves
into the side layer you just turned, and undo the side layer turn.
So the Drop insertions may also be rDR, rD2R, Fdf, or FD2f.
Occasionally the last Up corner and the last middle edge can be put in
correctly at
the same time using one of the four Corner/Edge Insertions, but usually
either they are not aligned properly or the edge is flipped the wrong
way. In this event, it is quicker to put the middle edge in by
itself, but flipped, unless you still have another middle edge flipped.
If all of the other three middle edges are correct, and you want
to put the last edge in backwards, follow the same procedure as
the previous paragraph, but consider the orientation of the edge
reversed. Finally put the last corner in using the Edge-flipping
Insertions
we learned at the beginning of the phase, which should both flip the
last
middle
edge and place the last Up corner.
If you make a mistake and accidentally insert the last corner in the
wrong
orientation while a middle edge is flipped, you can fix both using a
routine we are going to learn soon, Benson's Twisterflipper.
Turn the whole cube so that the almost complete Up layer becomes the
Left layer, and the flipped middle edge is at UF (also turn the new
Left layer if needed so that the twisted corner is at ULF).
Now do ruR2 brB2 ubU2 if ULF needs to be twisted
clockwise, or U2BU B2RB R2UR
if it needs to be twisted anticlockwise.
If you prefer, you can insert the last middle edge correctly, and
use one of the first two routines shown above to put in the last Up
corner
without disrupting the middle layer. These routines also may be used
when you make a mistake, or otherwise end up
in a situation where all edges are correctly placed and oriented
while an upper corner still needs to be placed (you may do this
intentionally, if the sequence which inserts the third Up corner also
inserts the last middle edge correctly). The third routine, which
flips a middle edge without affecting the Up layer, can also be used to
fix a mistake, or when all of the edges are in place (two of them
flipped) with only one Up corner left to insert. In the latter
case, put the last corner in using an edge-flipping insertion, and then
use the Middle Edge Monoflip on the last middle edge. The
Upside-Down Insertion will also be useful in solving the
3x3x4 Cuboid puzzle we
will see later.
Turn the Down face so that the last corner comes to DFR, while its
target location is UFR.
If the last corner is upside-down, we can insert it with a special
sequence (above left) which combines two well-known sequences (removing
an unnecessary move): the I-Swap we learned at the beginning of the
second stage, and
the simple double-edge swap (F2D2)3.
If the last corner has its correct upper face on one of the
side faces, the Corner Tricycle can be used to place it correctly. If
the upper face color is on the right side of DFR, turn the whole cube
so that the target is Right and the corner to be inserted is at ULB
(green in the diagram above middle). If the upper face color is on the
front side of DFR, do d (backwards Down turn) and
hold the the whole cube so
that the target is the Front face and the corner to be inserted is at
UBR (red in the
diagram above middle). Then perform the standard Corner Tricycle lURuLUru,
which we will meet again right away when we begin placing the corners
in the last layer.
Fourth Stage -- Placing the Up layer corners
Most speedcubing methods require dozens of sequences to be learned in
order to solve the last layer (the CFOP system has 57 sequences to
orient the last layer and 21 more to permute the last layer). This is
extremely fast and efficient, but at a huge cost in memorization.
Our system requires only 11 sequences (three of which are inverses and
two minor variants) instead of 78, once you understand conjugation and
learn
how to use Benson's Twisterflipper effectively.
Stage 4 is an easy one and requires performing only one sequence of
seven or
eight turns. Pick one of the Up corners (one with its blue facet
on the Up face if there is one) and turn
the Up layer so that that corner goes to its correct location,
then turn the whole cube ([U], [u], or [U2]) so the correct corner is
at URF. Now either one, two, or all four corners are correct
(disregarding
orientation). If all four are correct, you can
proceed to Stage 5.
If only URF is correct, the corners need to be cycled clockwise (the
corner
at ULF needs to go to ULB), or anticlockwise (ULF needs to go to URB).
Use the Corner Tricycle below far left, or its anticlockwise
inverse, below second left), to put the remaining corners in the
correct position. The
Corner Tricycle is one of the best-known and easiest routines to
learn, alternating left/right turns with up turns in alternating
directions (we just saw this in Stage 3 as a method of inserting the
last Up corner without disrupting middle edges). Proceed to Stage
5. [A version of this without twists, used in
speedcubing, is bRbL2BrbL2B2. Another variation, which twists two corners instead of three, is LFlBLflb.]
If two adjacent corners are correct, turn the Up layer so that
the incorrect layers are at URF and URB (i.e, if URF and URB are
incorrect,
turn U; if ULF and ULB are correct, turn U2), and do the
normal Corner Tricycle, except that the last turn may be absent or
reversed. The diagram below third left shows the Adjacent swap
ULF <==> ULB; the swap ULB <==> URB is
UlURuLUrU. Proceed to Stage
5.
If two diagonally opposite corners (i.e. URF and ULB) are
correct, do
the
Diagonal Corner Swap (below right) and proceed to Stage 5.

Fifth Stage -- Placing the Up layer edges
There are five possible cases after the corners are in the correct
positions.
In one case out of 12, the four edges are all in their correct
positions (though perhaps either two or all four are flipped).
Two-thirds of the time, one edge is
correct and the other three need to be cycled, either clockwise or
anticlockwise. In this case, turn the whole cube (as in Stage 4,
keeping the Up face in place and rotating
around the vertical axis) so that the good edge is at UR. Now use the
Edge Tricycle
or its inverse (below left) to fix the other three edges. The
anticlockwise tricycle is
identical except that the two single U turns are anticlockwise. Speedcubers
prefer a longer but faster edge tricycle which
uses only Up and Right turns: R2URU(ru)2rUr,
which cycles UL=>UR=>UF.
Only the Tricycle is strictly necessary, since double swaps
can be done by doing a tricycle twice, but it will speed up solving to
use the two double swaps, which are easy to learn because of their
strong repetitive patterns. The Edge
Cross-Swap (an elegant palindrome), which occurs in one case out of 12,
is considered fast
enough to be used in speedcubing methods (e.g. Speedsolving
the Cube,
p. 65, case #17). [Another clever routine which does an edge cross-swap
with wring moves is R*R2 B2 L*r2 F*b2 R2 B*B2 (equivalent to R*R2 B2L*r2 [U] L*r2 F2R*R2).] The Edge Angle-Swap occurs
in one case out of 6.
Sixth Stage -- Orienting the Up Layer pieces
Warning: the method described here for the last stage will
seem fairly complicated
at first, and if you have not solved the cube before, you may want to
learn a simpler but less efficient method first. If so, skip
ahead.
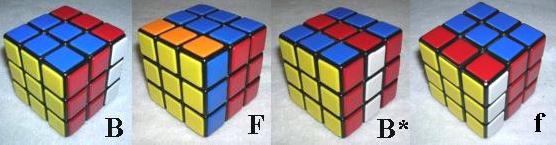
One of the most powerful maneuvers in the world of cubology is a 9-move
twisterflipper discovered by David Benson, ruR2 brB2 ubU2.
This sequence twists the three up corners ULF, URF, and URB clockwise,
and flips the two up edges UF and UR. A flat view
of the cube immediately before performing the maneuver is shown below
left, with its inverse (U2BU B2RB R2UR) below middle
and a conjugated
variant below right. Note that the variant begins with a deep
move, turning two layers in the same direction instead of one, so that
it is actually only ten moves long. You can actually disregard
the variant if you wish, and just treat it as one of the Conjugated
Twisterflippers we'll see in the next set of diagrams, but it's worth
learning for reasons we'll see later.
You can also perform the sequence as a set of the same three turns
performed three times, with a 120 degree rotation around a
diagonal axis in between: (ruR2[BU])3
and its inverse (U2BU[LD])3.
Below each color picture is a skeleton diagram of the top face showing
which corners
need to be twisted (+ = clockwise, - = anticlockwise) and which edges
need to be flipped (+). This maneuver, the shortest known
twisterflipper, is flexible enough
to provide the basis for a complete method of orienting the up layer.
All of the 35 twisterflippers can be produced using one or two
repetitions of this move and/or its inverse or variant. Usually the
first repetition will be the standard version, which we will
designate @, but in a few cases we will need the inverse or variant.
The basic idea is to put ourselves, regardless of what configuration of
twists and flips we began in, into a configuration with three
corners twisted (they will all be twisted in the same
direction) and two edges flipped. We'll call this a three-two
position.
Unless we are already in such a configuration, the method we are using
here will
require two
repetitions. Before we look in detail on how to handle the
two-repetition cases, let's look at the three-two positions; there are
only twelve of these, six with the three corners needing to
be twisted clockwise, and six with the three corners needing to be
twisted anticlockwise. The only difference in these two sets of
six is whether we use the regular or inverse Benson sequence (and
the regular allows us to combine two turns in two cases).
There are six positions of the two flipped edges relative to the three
twisted corners, one of which is the standard shape above left and
above middle. The other five positions are shown below. These will
require conjugation: one or two setup
moves to put the edges and corners into the correct shape, then undoing
the setup moves in reverse order after performing the Benson
sequence. The first two positions require two turns
before performing the Benson sequence, though in the first sequence (if
the twists are clockwise) the second setup turn (underlined) combines
with the first move of Benson to form an R2 turn (I usually do it
anticlockwise
anyway, so the sequence becomes br2 uR2 brB2 ubU2 RB,
12 moves in total. The third and fourth positions need just
one setup move. (The fourth position is a rotated form of the
variant we have already seen above right, and it can be done with a
deep move as shown if the twists are clockwise, but for simplicity
we show it with a simple one-move setup, so that we can do it the same
way if the twists are anticlockwise). The last is the worst
case, and needs two slice setup moves (the second, underlined again,
becoming part of a deep move if the twists are clockwise; i.e., it is
the variant
Benson in between F* and B* slice moves). Remember that if the
three corners need to be twisted anticlockwise, we are going to do the
inverse Benson sequence, above middle, instead of the
standard @ sequence, and we lose the first of the underlined
one-move shortcuts. The fifth case below actually becomes F*
L* U2BU
B2RB R2URR* B*,
with the next-to-last turn becoming a deep move, again for a total of
12 moves.
Now what do we do if there are four, two, or zero corners
twisted, or zero or four edges flipped? We want
to hold the cube (rotating the whole cube around the vertical axis
while keeping the Up layer up) so that the first Benson Twisterflipper
flips
half of the edges which need to be flipped (one out of two, or two out
of four), and twists one corner correctly and two incorrectly, putting
us into a three-two position. It would be possible to show a diagram of
every single case, but it's better to understand the concept rather
than memorizing 57
individual cases.
If all four corners, or none, are twisted (which happens a little
over 1/4 of the time), any of the four positions will
work as far as the corners are concerned. If all four edges, or
none, are flipped, or two opposite edges are flipped (which happens
half the time), again, any position will work as far as the edges are
concerned. If
we're in one of the easy positions, we can then perform the regular or
inverse Benson, choosing whichever one fixes one of the three
corners which we are twisting: if two of them need to be twisted
anticlockwise and one clockwise, we use the normal Benson, if two
clockwise and one anticlockwise, we use the inverse (see example 1
below). If
none of the corners are twisted, we can use either one. In any event,
we
end up in one of the three-two positions already described above.
[There are three cases where it is preferable to use the variant Benson
instead of the normal Benson, to avoid the worst conjugation cases --
see examples 1, 2, and 6
below.]
So the only positions we have to think harder about are three corners
twisted in the same
direction, two corners twisted in opposite directions, and two adjacent
edges flipped. If all four corners, or none, are twisted, and two
adjacent edges need to be flipped, we hold the
cube so that the edges to be flipped are either at UF and UL, or UB and
UR, and
do the normal or inverse Benson as described in the previous paragraph
(see example 3 below).
If three corners are twisted, we're going to hold them in the normal
position so that the untwisted corner is at ULB. If two edges are
flipped, we're already in one of the three-two positions we've already
learned above. If no edges or all four edges are flipped, we're
going to do something odd: we're going to do a Benson Twisterflipper in
what seems to be the wrong direction (the normal Benson if the corners
need to be twisted anticlockwise, or the inverse if they need to be
twisted clockwise). This will reverse
the twist of the corners and flip two of the four flipped edges (or
flip two unflipped edges). In any case, we end up with two edges
flipped and three corners still twisted, a situation we already
know how to handle. See examples 5 and 6: note that we
prefer the variant Benson in several cases, as described above.
If two corners are twisted in opposite directions, we need to hold the
corner which needs to be
twisted anticlockwise at ULB, so the first Benson will twist the
other one and the two untwisted corners all clockwise, leaving us with
three corners which need to be twisted anticlockwise. Again, this
might seem like we're messing the cube up more, but remember that we
want to get to a position with three corners twisted in the same
direction. As long as the edges are not in one of two troublesome
positions, we do the standard Benson, once again ending up in a
three/two position we
know how to finish. See examples 7 and 8 above.
The only two edge positions which cause a problem are the two positions
where
two opposite corners are twisted in opposite directions, and two edges,
which are adjacent
to one of those corners, are flipped. Any way we hold the cube will
either flip both
edges or twist both corners, neither of which we want to do. The
solution is to hold
the cube in the same way we have just described, with the corner
needing to twist anticlockwise at ULB. The two edges to be
flipped are either at UB and UL, or at UF and UR. Now
we use the variant Benson (that's the second and more important reason
we want to
learn it), L*ruR2 brB2 ubU2 R*, beginning with a deep
move and finishing with a
slice move. This will flip the edges at UB and UR,
twist the corner at UFR clockwise (fixing it), and twist the two
untwisted corners at UFL and UBR so that they both need to be twisted
anticlockwise, once again reaching a three-two position.
The orientation phase should take no more than 23 moves, even in the
worst cases, and the cube will be solved.
[It is possible, by the way, to reverse the order of stages 5 and
6, doing all of the orientations first and then fixing the edge
positions. I usually do stage 6 first if the pieces which need to be
oriented are already in the standard V-shaped Benson configuration.]
Additional orientation sequences for the last layer (four
elegant routines)
If you want a little more efficiency at the cost of learning some extra
sequences, you can learn some more sequences which do corner rotations
alone or edge flips alone at the end. The most useful of these are two
which
were discovered by Ernő Rubik himself. These can actually be used
as an alternative to the Benson method, though you will still need to
understand how to conjugate the two Rubik routines.
Rubik's Meson (above left) twists the front-right corner clockwise and
the back-left
corner anticlockwise on the Up layer. Note that the first six turns
are simply repeated to complete the sequence, and that the six moves
consist of three moves and a sort of mirror image of those moves. This
is a pretty easy sequence to learn, despite being 12 moves long, since
it is a six-move sequence repeated twice. If the
corner which needs to be twisted anticlockwise is the front-left
corner, do an L before (to put it at the back-left position)
and an l
afterwards; if it's the back-right corner, do a B before and a b
after.
If you need to twist three corners in the same direction, you can
do Rubik's Meson on two of them, leaving you with another (conjugated)
Meson, or you can learn Thistlethwaite's Baryon, shown below left.
This is one of the longest and hardest sequences we present in this
book, and
if you learn it, you also need to learn the anticlockwise (inverse)
version as well (BRbr
U2 (lB2Lb)2 U2).
Rubik's Flip flips the front and back edges on the Up layer.
Note again the pattern: the first three slice moves are in
one direction, and the last three are in the opposite direction.
The Up turns are all in the same direction, with the third and last
being 180 degree turns. If the two edges to be flipped are
adjacent, hold them at the front and left, do lb to put the
left one
at the back, so the same routine as above, and do BL to
finish.
Rubik's Flip will be essential to know if you eventually
learn to solve the 5x5x5
and
larger cubes, since it never disrupts center pieces and can be modified
to flip similar portions of two edges. [Speedcubers
on 3x3x3 may prefer a slightly longer but faster version:
(R*U)3R*U2(R*U)3R*, but this disrupts centers and isn't useful on
larger cubes.]
If
you need to flip all four edges, you can do Rubik's Flip twice, or use
the Quadruple Edge Flip shown below, center. The Quadruple Edge
Flip also has a strong pattern, but note that the first and second half
end with quarter turns rather than half turns. The
Quadruple Edge Flip unfortunately does disrupt centers somewhat if you
use it on larger cubes to flip partial edges; we will later show a
routine based on the
Spratt Wrench which can flip
four partial edges without disrupting centers.
Monoflips and
Monotwists -- a simpler but slower method for Stage 6
An alternate sequence for double edge flips is: FD* F2D*2 Fuf
D*2F2
U*fU,
which flips FU and FL. The advantage of this sequence is that it can be
used to flip FU and FB as well, by changing the quarter Up
turns in the middle and at the end to half turns: FD* F2D*2
FU2f D*2F2 U*fU2. This is a modification, using
slice moves, of a sequence described in Donald Taylor's book Mastering
Rubik's Cube (pp. 28-29). It is an example of a technique
called a monoflip (also sometimes called isoflip),
a
sequence of moves which flips one edge in a layer (in this
case the Up layer). The flipped edge is then replaced by another edge
by turning the Up layer, and the sequence of moves is then reversed,
which flips the second edge and returns the rest of the cube to its
original state.
A corresponding technique for corner twists is a monotwist.
The
monotwist (RfrF)2
and its inverse, described in Christoph Bandelow's book Inside
Rubik's
Cube and Beyond, can be built into a complete set of
routines for Up
corner twists. Start with any corner which needs to be twisted at URF.
Each corner in turn is twisted clockwise using (RfrF)2
or
anticlockwise using (fRFr)2.
After twisting a corner, turn the Up layer (not the whole cube) to put
the next bad corner in position, and continue using the correct
twist.
Any combination of twists (meson, baryon, or double meson) in any order
can be fixed. Each monotwist disrupts the two lower layers, but
the combined effect of opposite pairs or three of the same kind leaves
the rest of the cube in the same position it began in.
A shorter (but a bit slower) monotwist pair, rDRFDf
for clockwise twists and FdfrdR
for anticlockwise twists, must be used in opposite pairs to keep the
lower two layers correct. This has the disadvantage, in the
case of a baryon, of requiring that one of the
three corners must be twisted the wrong way twice.
Pretty Patterns
There are hundreds of these; we will show only a
few of the most elegant ones. The crosses were first
discovered by David C. Plummer and David Christman
respectively.
Picture Cube
Almost since its inception, many versions of the Cube have been made
with pictures on the
stickers. Solving such a cube is essentially identical to the standard
cube except
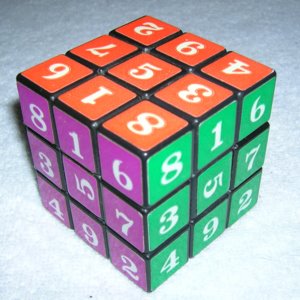
that you may have centers which are rotated at the end. The photograph
above shows a cube with numbers in the form of a 3x3x3 magic square
(nowadays you can also find Sudoku Cubes). The orange 5 needs
to be rotated 180 degrees and the purple and green 90 degrees clockwise
and anticlockwise respectively. We will notate this as {U2Fr},
indicating that the Up center needs a double turn, the Front center a
clockwise turn, and the Right center an anticlockwise turn. So we need
routines to rotate centers independently. Christoph Bandelow's book Inside
Rubik's Cube and Beyond has a detailed set of routines
performing center turns, but two routines are sufficient to get all of
the centers turned correctly. The sequence R*B*L* F R*F*L* f,
using a modification of the Dots pretty pattern, turns {fR}. This will
allow
you to finish all of the centers except perhaps one. The neat routine
(RLUrlU2)2, discovered by Morwen B. Thistlethwaite,
turns {U2} (the
equivalent version using wrings is (R*R2BL*r2U2)2. A
third
routine, a variant of the first, might speed up the process: R*B*L*
F2
R*F*L* F2 does {F2R2}. A double Spratt Wrench, (R*U)8, does
{U2B2F2D2}. Some speedcubers prefer the longer but faster ((rURU)5) to
turn {U2}.
Cubes with full pictures on each face add another layer of complexity,
as it is necessary to figure out which pieces go on which layers, like
solving six separate jigsaw puzzles.
Other Coloring Patterns
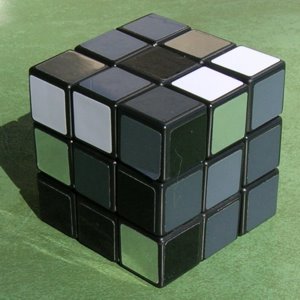
Rubik's Icon (above left) is a new edition of the
Cube, published by Winning Moves.
It has a normal coloring pattern, but an unusual selection of colors:
black, white, mirrored (silver), and three different shades of gray,
and is hard to photograph well. It's brutal to solve
quickly; my best is 1:52.10, and I'm usually around two and a half
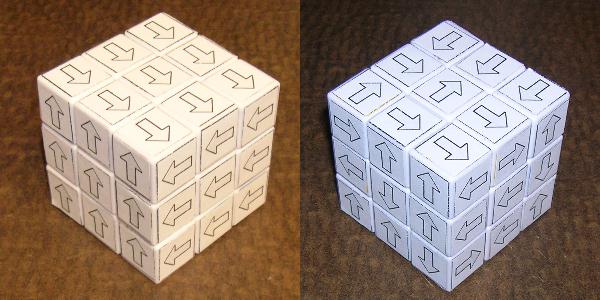
minutes. Shepherd's Cube
is a pattern devised by
Alistair
Shepherd, with black and white arrows pointing in six different
directions. The photo above center shows my handmade model in
the Start position; arrows on opposite faces point in opposite
directions (Left arrows point toward the Back face (I messed this up
when I first put on the stickers), Back arrows point toward Down; Down
arrows toward Left). The photo above right shows the scrambled
Shepherd's
Cube.
I have managed to solve this several times, but I'm just starting to
get the hang of what I'm doing -- it's the worst puzzle I've ever seen
for trying to
visualize what's going on. You can even end up in an apparently
impossible position where everything is solved except for one center
turned 90 degrees. My first timed solve was 11:29.53.
Shape Modifications
A good number of variant puzzles have been designed by altering the
shape of the outer pieces, often by making cuts through the cube at
angles different from 90 degrees.
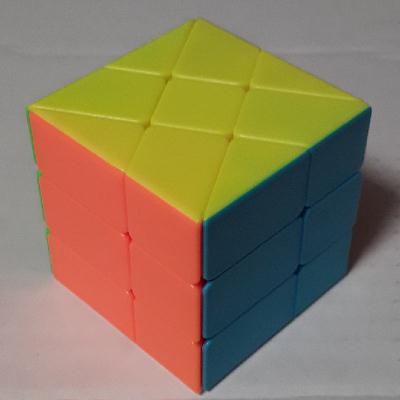
Fisher Cube
The first true shapeshifting puzzle
was invented by Tony Fisher in the 1980's. By
cutting through the
cube at 45 degree angles in two directions, he created a puzzle in
which edges, corners, and centers interchange their
functions (solved cube above left). When scrambled, it
produces a very erratic shape (above center). The Fisher
Cube has 12 pieces which appear to be
edges, but eight of them (those in the Up and Down layers) act as the
eight corners of a normal cube. The other four (in the
middle layer) act as centers for the four layers which turn at 45
degree angles. The Up and Down layers turn normally; their
centers are true centers. The eight house-shaped three-colored
pieces act as eight of the 12 edges; the one-colored pieces on the side
faces (which look like centers) act as the other four
edges. Keeping in mind that edges and corners on the Up and
Down layers swap roles, the Fisher Cube can be solved by basically the
same method as the normal 3x3x3, with the addition of the Picture
sequences above which turn centers. The first two layers
can be solved as usual; if any middle layer centers are twisted, leave
them for the end, since some last-layer sequences disrupt middle layer
centers. For example, Rubik's Flip, (R*U)2R*U2(L*U)2L*U2,
twists the the Front and Back centers 180 degrees, while the standard
quadruple edge flip twists the Back center 90 degrees clockwise. It is possible to end up with one center twisted 90 degrees,
which looks
like an impossible position, but it can be fixed by simultaneously
turning either a yellow or white center 90 degrees in the opposite
direction using the same sequence R*B*L* F R*F*L* f described
above. You can also have a single edge flipped; this can be fixed
with a conjugated Rubik's Flip (third diagram above).
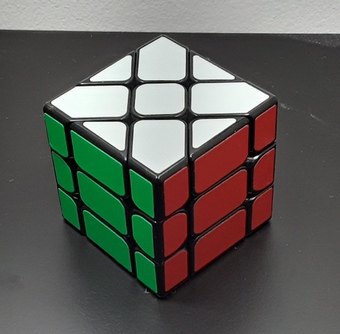
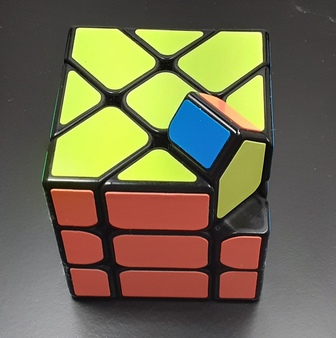
Windmill Cube

A different cutting pattern, at 30/60 degrees, produces
only six pieces on each of the vertical faces. The corners and Up
and Down edges have only two facets, while middle edges have only one
facet. This is solved in the same way as the Fisher Cube.
Mirror Cube
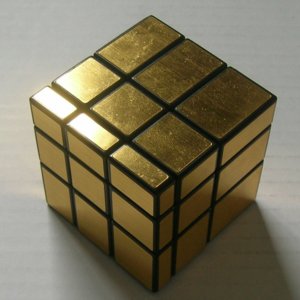
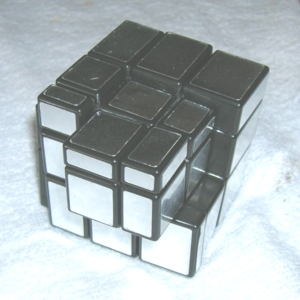

Originally known as the Bump Cube, it was invented by Hidetoshi
Takeji,
and submitted to the Puzzle Design Competition for the 2006
International Puzzle Party (shockingly, it did not win a prize, being
beaten out by the much less interesting Floppy Cube among others).
The Mirror Cube is essentially a 3x3x3 Cube, but each of the six outer
layers is a
different thickness. When the faces are turned, the cube turns into a
jumble of differently sized rectangular prisms. Three of the photos
above show
the gold version I bought recently (there are also
pointless six-colored versions, designed by someone who didn't
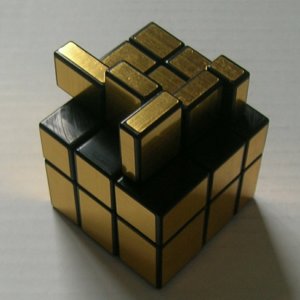
understand the concept of the puzzle). The Mirror
Cube can be solved by most of the usual methods, but it is hard to see
quickly where each piece goes (push insertions work better than drop
insertions). There should be a lot of scope for
making interesting pretty patterns with the Mirror Cube (the third
photo shows a Giant Meson, on the original silver model I bought in
2008). It
is possible to solve the Mirror by touch, as with the Tactile cube
shown
below,
but it is much harder, because it is difficult to get the oddly shaped
layers aligned exactly without looking (my first try took nearly half
an hour).
Twist 3x3x3
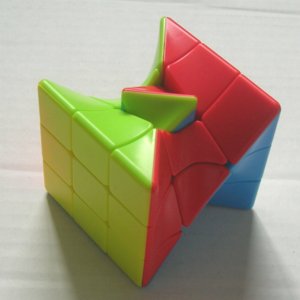
First made by Eitan Cher, this is a standard
3x3x3 cube distorted in shape by twisting the top
half of the cube 90 degrees clockwise. The Up and Down layers are
solidly colored, and the four side layers are bicolored: the middle
centers have two colors and the middle edges only one. This makes
the puzzle a (partial) picture cube; the photo above shows a puzzle
laying on its side with one center twisted 90 degrees, exactly
analogous to the Fisher cube. Like Fisher, you
can use the standard
solving sequence, leaving rotation of the four middle centers for last.
There are also positions which appear to have an
odd number of edges flipped, but the middle edges have no visible
orientation: a Spratt Wrench ((R*U)4)
with the puzzle held sideways (with the middle layer running around the
F/U/B/D faces) flips
LF and also invisibly flips three middle edges (it also turns all four
middle centers 90 degrees clockwise).
Super Skewb
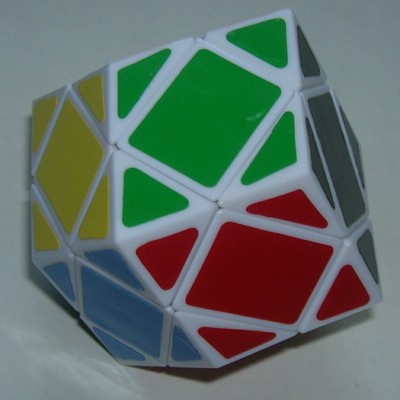
Although this puzzle (a rhombic dodecahedron with 12 diamond-shaped
faces) looks like an expanded Skewb with 12 faces
instead of 6, it is once again a cleverly disguised 3x3x3 Picture
Cube. The three-colored corners are still corners,
but what appear to be centers are actually edges (with no orientation:
flipping them has no effect), and the four-colored corners are actually
face centers. It can be solved in the same way as the
Picture Cube, using one center to place four edges correctly, and
keeping in mind that opposite faces are always the same
color. But it's much harder to visualize than
any other 3x3x3 variant, because of the rotating centers and the fact
that there are
two identical edges of each color, and two corners of each color
pattern in reverse order. You may end up with a position where it
appears that
two edges need to be swapped: this is fixed by doing a conjugated edge
tricycle with two edges of the same color.
Master Pyramorphix
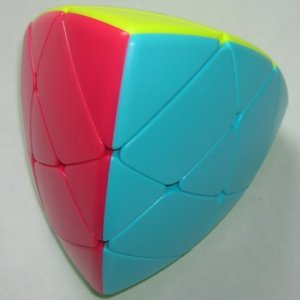
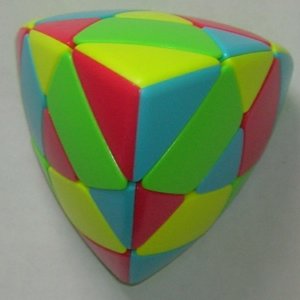

Yet another disguised 3x3x3 Picture Cube is the four-colored,
three-layer
Master Pyramorphix (also called Mastermorphix). Like many
larger puzzles, the faces are not flat, but slightly rounded, as if the
puzzle had been inflated slightly (such puzzles are usually called
pillow-shaped). The photos above show an unscrambled
puzzle, the Pons Asinorum pretty pattern (still retaining its original
shape, but showing all four colors on each face), and scrambled (it is
a shapeshifting puzzle). The
two-colored pieces which appear to be edges actually act as the centers
of the six oblong outer layers. The four corners are true
corners, while the triangular face centers also act as corners (but
without visible
orientation). The twelve trapezoidal pieces act as
edges.
Although they are one-colored, they have orientation (i.e., they can be
flipped) because of their shape. Despite being a shapeshifting
puzzle, it is somewhat easier to solve than the Super Skewb: it is not
necessary (nor even helpful) to restore it to its original shape before
finishing the solution. Having only four colors makes it easier
to visualize than the six colors in pairs of the Super
Skewb. Because there are three trapezoidal edges of each
color, you can end up, as with the Super Skewb, with two edges which
apparently need to be swapped. You can also end up with a
single corner twisted (or even two in the same direction), which can be
fixed by twisting a corner and a triangular face center (pseudocorner)
in opposite directions (or three in the same direction).
Fluctuation Angle Cube (Axis Cube)
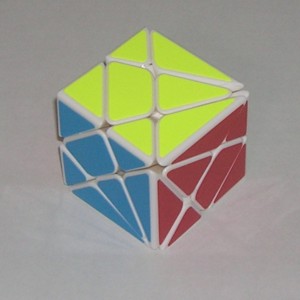
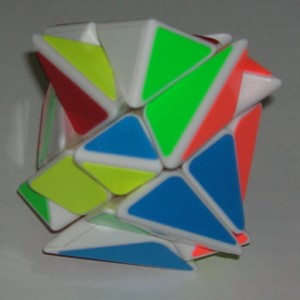
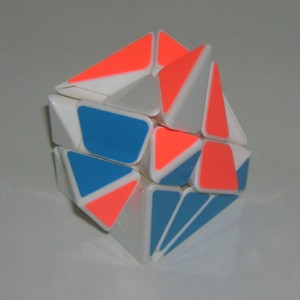
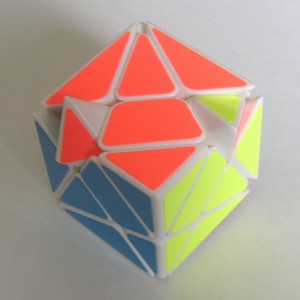
This puzzle has six cuts through the cube at 30 degree angles, dividing
each colored face into seven pieces (above left). This
produces six small two-colored pieces which are the actual centers of
the six turning layers. Two of the corners are normal; the
other four corners are the six one-colored isosceles triangles.
Six of the twelve edges are elongated two-colored pieces; the other six
are one-colored trapezoids. When the puzzle is scrambled,
it becomes an irregular shape (above second left). The third
photo shows a partial solution with one layer left to fix. The
fourth photo shows a center twisted 90 degrees clockwise (leftmost) and
another twisted 180 degrees (rightmost); there is a hidden center
twisted 90 degrees anticlockwise. If you have solved some of the
other 3x3x3 shapeshifters, this one solves
basically the same way, but it takes a lot of practice to visualize
what
pieces go in each slot.
Mixup 3x3x3

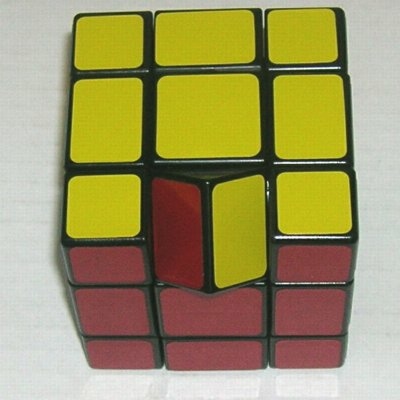
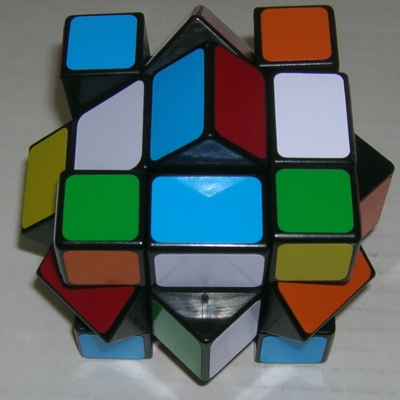
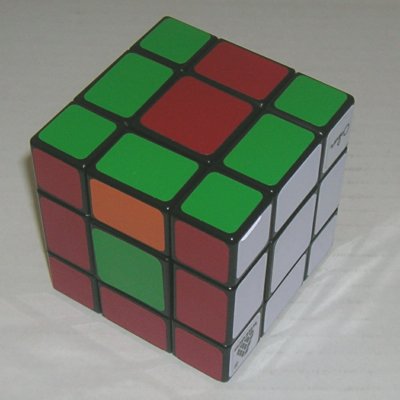
In 1985, Sergey Makarov conceived and patented a
shapeshifting 3x3x3 variant in which the edges are slightly
elongated so that their cross-section equals their length.
Oskar van Deventer later built a more robust design, and WitEden
mass-produced it. The Mixup Cube
allows slice turns of 45 degrees, and thereby allows edges and centers
to be swapped. Making eighth-slice turns changes the shape
of the cube. We will denote a 45 degree turn of a slice
with
the suffix & (R& turns
the left-right slice 45 degrees in the direction of an R turn; R*
is a 90-degree slice turn as usual). The
eighth-slice moves allow other odd-looking maneuvers, even edge
twists (photo above, second left): L&D*RU*R&D*rU* twists
the edge at UF 90 degrees clockwise (plus a usually-invisible turn of
the F center 90 degrees anticlockwise).
Solving the Mixup involves
two problems: returning the cube to its original shape, and then
completing the solution. Restoring the cube shape is not
difficult: the simple algorithm D&RurU&
swaps a vertical edge currently in the center of the F face with a
center currently at UF. If there are only twisted edges left, a shorter edge twist L&D*RU*R& will fix a twisted edge at UF.
Restoring the original color pattern is a little harder, since the
centers (even after restoring the cube shape) can be swapped, and
several parity problems can happen. The sequence R&U2L&U2 swaps the F and U
centers (and also the UF and UB edges, flipping the latter), as in the
rightmost photo above. [(R&U2L&U2)2
is a short double edge flip for UF and UB).] Often an odd
number of edges are flipped: a single edge at UF can be flipped via L&D*R2U* R&D*R2U* (photo above, top left)
The hardest problem to fix is a single pair of edges swapped: the long
sequence (R&RUruR&URur)4
swaps UB and UR: note the half-wring at the start of each
repetition. This
is the longest sequence in this book, and it is
very easy to make mistakes while doing it.
Magic Domino
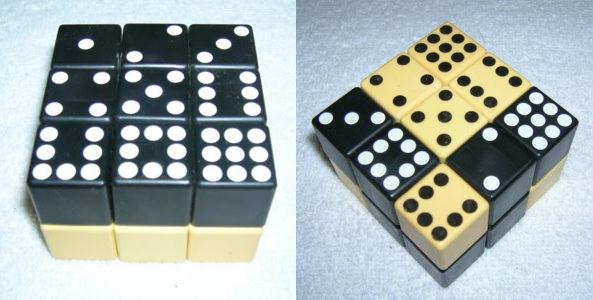
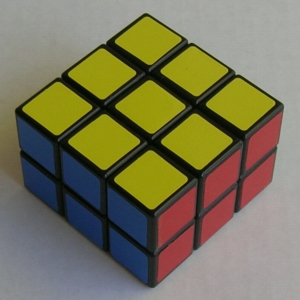
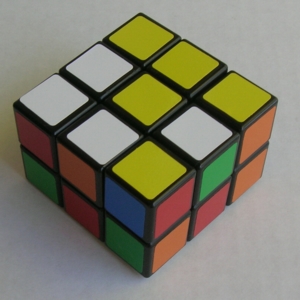
Another invention of Rubik himself (patented in 1983), this is a 2x3x3
reduction of the standard cube, with a similar mechanism. The bottom
half, concealed in the first photo above, has white pieces numbered
identically to
the black pieces directly above them (so that the unscrambled bottom is
the mirror image of the top). The Up and Down layers can be turned
normally; F/B/L/R can only be turned 180 degrees at a time. It's a much
easier puzzle than the 3x3x3 Cube, since edges cannot be flipped and
corners cannot be twisted: as long as a piece is in the correct
layer, it is automatically oriented correctly. The parity laws are
different
on the Magic Domino: since there are imaginary middle edges, a single
pair of edges
or corners can be swapped.
You can also swap the Up and Down centers by (R*2F2)2D2R*2D2.
The total number of positions is (8!)^2/4 =
406,425,600.
It is almost trivial to solve the Up half: putting a edge
which is in the wrong layer under its proper position in the top layer
and turning that side layer 180 degrees allows the four top edges to be
placed around the 5. The I-Swap we learned earlier, F2DF2dF2,
lets us move a
corner from DRF to URF. The bottom (flipped over to become the Up layer
of
course) is only a little harder: the elegant corner tricycle B2(L2uR2U)2B2
(a form of sequence 3.10.15 by Gerzson Kéri from page 141 of Rubik's
Cubic Compendium)
does the same as our normal clockwise tricycle on the 3x3x3 Cube (ULF
==> ULB ==> URB ==> ULF). [In fact, this could be used
when solving the normal 3x3x3, but it doesn't gain anything in our
method, since we orient corners after we place them in the correct
position. It would be rare to be in a position where this saves
us a step. Speedcubers use a slightly shorter sequence rFrB2RfrB2R2, which cycles URF
==> ULB ==> URB ==> URF without twists.]
A
modified routine using two UDIs creates an edge tricycle: ((R2u)2(R2U2)2)2
moves the edges from positions UB, UR, and UF clockwise to UR, UF,
and UB respectively [anticlockwise is the same but with U instead of u:
((R2U)2(R2U2)2)2. If a single pair of
edges need to be swapped, the
maneuver (U2R2)3,
a version of the Middle Edge Column Flip we saw in solving the standard
cube, swaps
the two edges UF and UB (along with two imaginary middle edges).
[A well-known variation of the full tricycle, (R2U)2(R2U2)2R2UR2uR2, swaps UF and
UR
directly. There are shorter routines in Rubik's Cube Compendium for the
edge routines, but they're
slower to perform and harder to remember.]
The Domino is no longer in production (you can find them
readily on
eBay, but they're somewhat pricey), but you can buy 2x3x3 Cubes with
the standard
six colors instead of domino markings (third and fourth pictures
above).
These are solved in essentially the same way as the Domino, though if
you don't have the positions of the colors memorized you may put in two
initial Up edges reversed. You will see this when you try to
insert
the first Up corner. If you have UF and UB backwards, you can
swap them as described above. If you don't want to buy a new
puzzle, you can simulate it on a regular 3x3x3 cube by mixing
carefully, only making double turns of the outside
(L/B/R/F) layers. (You'll usually have to
fix the
middle layer when you're done.)
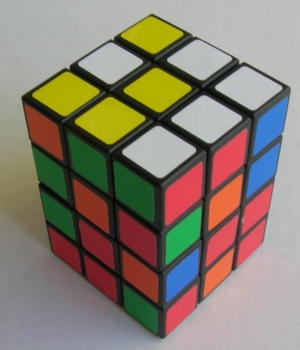
Cuboid Puzzles (Larger Dominos)
Some non-cubic twisting puzzles have been created by essentially
stacking Dominos on top of each other. A 3x3x4 puzzle, for
example (photo above), is a double Rubik's Domino, with four layers
which act like
layers of the Domino. It has double centers on the F/B/L/R faces,
which are once again restricted to half turns. The two outer
layers can be solved exactly like the Domino. The inner
layers can also be solved like the Domino, but the inner layer edges
act like outer layer corners and the inner centers act like outer layer
edges. You can insert an edge from the third layer to the
second layer using the Upside Down Insertion (not the I-Swap, which
disrupts
the Up and Down layers)
There are some parity issues which can be solved by applying
(R2 12U2)3, where 12U2
means to turn the top two layers together a half turn. If you
need to swap one double pair of middle edges, 12D2 R2 F2 2D2 F2 R2 12D2 swaps FL
and FR in both middle layers (this is a relative of the Single Edge
Swap we will see later on the 4x4x4 cube).
Some layered domino puzzles are also being made in cube shapes by
slicing some of the layers thinner: a 3x3x4 has normal Up and Down
layers and two half-thickness middle layers; a 3x3x5 has a normal
middle (third of five) layer and four half-thickness layers, including
the Up and Down layers. They go up at least as far as
3x3x9. I don't have any of these yet, but you can see pictures of
them by doing an image search, and buy them from sites that sell
twisting puzzles. The particularly interesting feature of these
variations is that quarter turns can once again be made in any
direction, and the thin layers will inevitably be split up and turned
at different angles, adding a complex new problem to be solved.
Floppy Cube
A 1x3x3 cube has been developed by
Katsuhiko Okamoto.
This won First Prize (which is actually second prize, since
there is a Grand Prize) in the 2006
Puzzle Design
Competition. It
seems prizes are awarded in these competitions based on the ingenuity
of the mechanical design rather than how interesting a puzzle it
makes: the Floppy Cube beat out the much more interesting Bump Cube
in the 2006 competition. The Floppy Cube has only four possible
turns, equivalent to F2, R2, B2, and L2 on the standard cube, and only
192 possible positions. The hardest position (a sort of quadruple edge
flip with a checkerboard pattern)
takes 8 turns to
solve (FBRBRLBR). Jaap's
Puzzle Pages have a very
detailed page on this puzzle.
A Tactile Cube
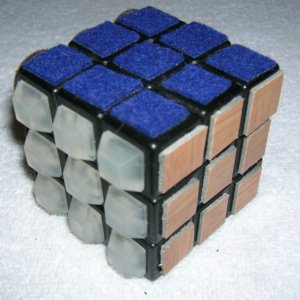
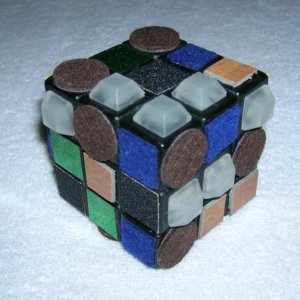
I made a rough mockup of a textured 3x3x3 Cube,
to see if it could be solved by touch alone. This version has raised
rubber bumps, sandpaper, vinyl floor tile, soft felt squares, hard felt
circles, and glossy contact paper. It's not an ideal selection, but
served well enough as a proof of concept. It took an hour of shopping
at a home supply store and a crafts store, and another two hours or so
to strip the old stickers off of a battered 1981 vintage Ideal cube and
cut
and glue the new stickers (everything had sticky backing except the
sandpaper, which I had to superglue on). My first try at solving
without looking at it was successful, but took 18 minutes. I got a
little faster each of the next few times I did it. I'm now consistently
getting under 10 minutes, so far getting as fast as 6:04.41. The
superglue didn't work very well: several sandpaper squares have fallen
off and
I had to reattach them with double sided cellophane tape.
The Pocket (2x2x2) Cube

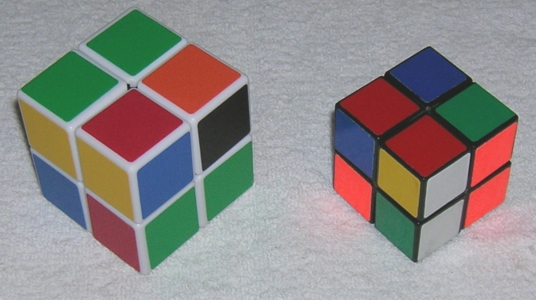
The Pocket Cube
is a 2x2x2 version of the standard cube (with a
different mechanism, also invented by Rubik). Once you can solve the
3x3x3 Cube, you can solve
the Pocket Cube, which works like a corners-only version. But if you
want to solve the Pocket Cube faster, there are quicker routines for
most situations which take advantage of the fact that there are no
edges. (Also, if you want to learn a 3x3x3 solution where all of the
corners are placed first, the first stage of the solution is
almost exactly like solving the Pocket Cube). The photos above show a
brand new 2x2x2 Cube and a 1982-vintage Pocket Cube; today's models
are considerably larger (about
5 cm wide, versus 4 cm for the older cubes). The
2x2x2 cube has (8!)*3^7/24 = 3,674,160 possible configurations,
disregarding rotations of the whole cube.
The solution described here is in three stages, and
takes a maximum of 32 moves and an average of about 24 moves (38 and 27
measured in quarter turns). In Stage 1, the four Up corners are placed
to complete half of the puzzle. Since
there are also no centers, we can start by considering any corner to be
correct, and holding it at ULF. We then place the corner which belongs
at UFR. If that corner is in the upper layer in the wrong position (at
URB or UBL) or at UFR but twisted, turn either R, r, B, or b, to put
it in the Down layer. Turn the Down layer so that its Up-colored facet
(blue in the diagrams) is at one of the positions shown (bottom of DRB,
or left or front of DRF), and use the move or moves shown below to
place it.
The first two turn the edge directly into its correct location without
disturbing
ULF or ULB. The third is the same sequence we learned for the
same situation when solving the 3x3x3 Cube.
Turn the whole cube so that
the correctly placed corners are at ULF and ULB, and place the third
corner at URF in exactly the same way (if the corner is at UBR, or at
URF but twisted, turn R2 to put it in the Down layer).
The fourth Up corner requires slightly different handling.
If it is in the Down layer, turn the Down layer so the last Up
corner is at blue facet is in one of the three positions shown, and
perform the maneuver shown. The last two are the same
routines
used in the 3x3x3 Cube (and the third is identical to the 2nd
and 3rd
corner case). The first sequence is the same one we use in
solving the Magic Domino.
If the last Up corner is already at URF but twisted, we need to use one
of
the corner twists we learned for the 3x3x3 cube to fix it. Don't
worry about the arrows right now: they show which Down corners are
being swapped, for a trick you can learn later.
In Stage 2, the cube is flipped over and the
completed layer becomes the bottom half. Turn the new Up layer if
necessary so that the correct corner goes to URF, and use the
standard 3x3x3 routines to position the rest of the new Up corners, not
worrying about orientation yet.
In Stage 3, the corners could be oriented using the standard 3x3x3
routines you already know
(e.g. Benson's Twisterflipper works fine as a baryon), but we suggest
using faster routines which take advantage of the lack of corners, such
as the lightning-fast baryon now known as the Sune, which
speedcubers can perform in under a second (Singmaster credits Katalin
Fried with the original discovery of this sequence; the name was coined
by Lars Petrus). All of
the
sequences have been selected to use as many Right and Up turns
as
possible; only the first double meson uses turns of any other faces.
Note that
if you seem to be in a meson position which is the vertical
mirror
image of
the first one shown below, just reorient the cube so that the Right and
Up faces trade places (that is, [BU2]), and you will be in the correct
position. Note also that the second meson has the same moves
as
the first, except that the sixth and last turns are 180 degree turns
(instead of 90 degree turns) of
the Up face.
An advanced trick --
twisting the fourth Up corner
When the fourth Up corner is already in place but
twisted, it is possible to bypass the second stage by
simultaneously twisting that
corner in place and positioning the Down corners. Two-thirds of the
time, the Down corners are in a configuration where swapping two
adjacent
corners will put the corners in the correct relative positions. If the
last corner needs to be twisted clockwise, turn the Down layer so that
the corners which need to be swapped are at FDL and FDR, and do the
normal twist rDRFDf (below far left). If the corner needs to be twisted
anticlockwise,
put the corners to be swapped at FDR and BDR, and do the twist FdfrdR
(below second left).
Even if you only learn this part of the trick, you will save
time whenever this case occurs (in fact, when the fourth corner has its
blue facet on the Down face, or in one of the other positions which
take more than three moves, you can deliberately put the
fourth corner in wrong, then fix it using this trick).
In one case out of six, two diagonal corners need
to be swapped (and it doesn't matter which!). In this case, do the
special twisting sequence FD2FdfRF2rF
(above second right) to twist the fourth corner
clockwise, or fRF2rFDfD2f
(above far right) to twist it anticlockwise (this was a hard
sequence to discover: it took several hours of twisting and notetaking,
trying every way of twisting one corner I could think of). In each one
of these cases, the Down corners will be correctly positioned with an
appropriate turn of the Down layer (turn so that one corner is in the
right spot and the others will be too), and after flipping the cube
upside down, one of the six twisting sequences will finish the
solution.
In one case out of six, the Down corners are
already in the correct relative positions, and you can perform a skewed
double meson which twists the last Up corner and three of the Down
corners. Turn the whole cube via [U] so the corner which
needs to be twisted is at ULF. The routine rF2RF2R2Fr
will
twist the ULF and DRB corners
clockwise and the FDL and FDR corners anticlockwise. The reverse
sequence RfR2F2rF2R
does the opposite. Again, one of the six twisting sequences
will finish the solution.
Speedcubing methods for the Pocket Cube
Once you understand the basic method here, if you want to
learn to speedcube the 2x2x2, you can graduate to the Varasano
method, a version of which is described in Appendix 1.
Unlike speedcubing methods for the 3x3x3 Cube which usually have over
100
sequences to learn, the Varasano method needs only 12 sequences to
solve
the 2x2x2. The basic outline is to put the four Up corners in
the Up layer with the correct colored facet up (but not necessarily in
the
correct positions), turn the cube over, orient the new Up corners
(again regardless of position), and then position the top and bottom
layers simultaneously, using one of a set of only five
routines. There are much more complicated methods, including the
Guimond and Stern-Sun methods.
Optimal Sequences for Up Corner Insertions
The diagrams below show sequences as short as possible for placing each
of
the Up corners, depending on the location of the Up-colored facet (in
the examples here, dark blue). Light blue shows the target
location of the next blue facet. For example, if the third corner to be
placed has its
dark blue facet on the right side of the URB corner, the correct
sequence to place it is RdR. Becoming familiar with as many of
these as possible will speed up your solutions to the first half of the
puzzle. Note that many of the 2nd and 3rd corner sequences
are the same for corresponding positions (and a few of the 3rd and
4th).
A Peculiar Position
Computer analysis
shows that any position on the 2x2x2 cube can be
solved in no more than 11 turns (or 14 quarter turns). Jaap
Scherphuis was kind enough to send me the fascinating position below,
which is one of 108 positions the maximum distance from
Start. Despite having the bottom half of the puzzle
complete and the Up face all one color, there are no positions which
take more moves to solve. Note also that the position is
symmetric (and the sequence shown has the same effect as its own
inverse): make the 11 moves shown from an unscrambled 2x2x2, and you
will see the diagrammed position. Do the same 11 moves again, and
you will be back at Start (try it on a 3x3x3 to see something
different). It is possible to reach this
position when solving either using a standard or Varasano method
(though
you'd prefer not to in the latter).
Rubik's Insanity -- a Scrambling
Question
The well-known puzzle Instant Insanity consists of four cubes with
colored sides, the object being to arrange them in a row of four so
that every row has four different colors. We can do this with the
Pocket Cube: what is
the shortest routine
to get the 2x2x2 Cube from its Start position to a position in
which every face shows four different colors? Ideal's
solution booklet gives a simple five move answer: RBLFR,
but even faster is e.g. RU2B (below
right). Actually, any three turns along different axes will work, as
long as the first and third are quarter turns (in either direction) and
the second is a half turn.
We can do a six-color version with any larger cube: what is
the shortest routine
to get the 3x3x3 Cube from its Start position to a well mixed-up state
in
which every face shows all six colors, with no edge or corner facets
matching the centers? When I first wrote this section in 2010, I mixed
up a cube until I had a valid position, and used Herbert Kociemba's Cube
Explorer to find a 19-move solution: UF2lBURUF2L2buF2D2RfbU2dR2.
This is much too long and hard to remember. On November 30,
2011, I attacked the problem again, using my 2x2x2 solution as a start,
and found a nice six-move maneuver:
RD2BL*D*F* (below left). I usually scramble the cube by doing
Pons Asinorum (R*2F*2D*2),
then making a bunch of random turns until the cube looks mixed up
enough
(with, at least, the face I'm going to start on having no matching
pieces of that color).
For
larger cubes, we could ask for more complex arrangements (e.g. on a
5x5x5 cube, exactly four facets of each color on each face, not
counting the exact center).
4x4x4 cube
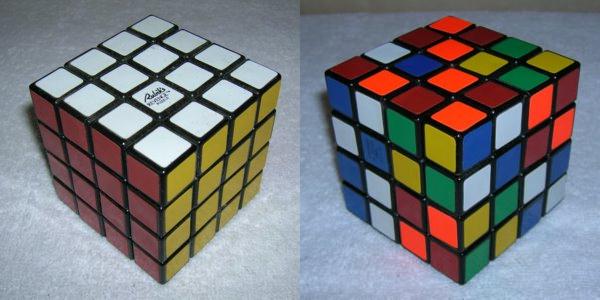
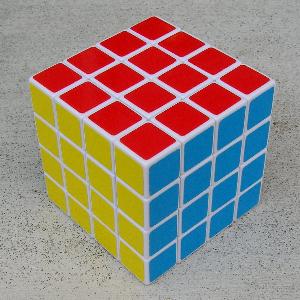
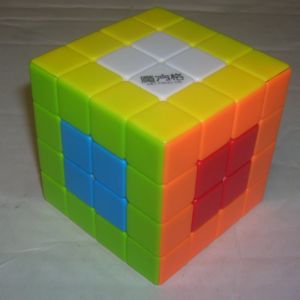
Rubik's Revenge (photos above left and (scrambled) above
second left) is one of the original names for the 4x4x4
cube, using
a mechanism designed
by Péter Sebestény. In
Europe it
was originally marketed as Rubik's Master Cube. There are
now alternate designs made by various Asian manufacturers. East
Sheen Industrial Company of Taiwan
makes cubes of much lighter plastic: their 4x4x4 (second right) weighs
about 110 grams, compared to 133 g for a 3x3x3
Deluxe Rubik's Cube,
187 g for a new 4x4x4 from Winning Moves and 230 g for a vintage
Rubik's Revenge. Eastsheen also has new designs for
the 2x2x2 and 5x5x5 which, like their 4x4x4, allow for
smoother turning and are preferred by some speedcubers, but the
internal edges are sharp and the stickers wear
quickly.
Like most cubes made today, the Eastsheen cube is built
with stickers or tiles on a white base
instead of a black one, and uses a different coloring
scheme from the old Ideal standard: instead of white opposite blue and
green
opposite yellow, white cubes use yellow opposite black and
green opposite blue (sometimes white stickers are still used, with
white opposite yellow). In the colored diagrams below, we use
white/yellow and blue/green.
Shown far right is a new cube made by Mo Fang Ge. It has no tiles
or stickers: the pieces are molded of plastic, and each piece appears
to be solid. They must be glued together, because I
can't see any evidence that the sides are painted with different
color combinations, but the gluing is skillful and
seamless. This is the wave of the future: light,
smooth-turning,
and durable, and is my current favorite 4x4x4 and 5x5x5. The
pattern shown, with each face having a 2x2
center of the opposite color, is impossible on a 3x3x3 (on a
5x5x5 you can make equal signs). The sequence (23R2 B2)2 (23R2 12B2)2 swaps the
2x2 centers of the U and D faces; you can then reach the pattern shown
using an extended version of Dots (23R
23B 23R2 23F 23R), or by repeating the first sequence on the
other two pairs of faces.
Notation for the individual centers, edges, and corners of
the 4x4x4 cube
Although we prefer diagrams, when we need to designate
individual pieces on the 4x4x4 cube, we use three letters for each
piece. A corner is designated by three capital letters,
indicating the three faces it lies in. An edge is designated
by two capital letters, indicating the two faces it lies in, and a
lowercase letter showing which half of the cube it lies in (the edge
DRf is the edge in the front half of the cube, on the intersection of
the Down and Right faces). A center is designated by one
capital letter, and two lower case letters (the center Ful is on the
front face, in the upper left quadrant). See the diagram
above for examples.
Notation for turns on the 4x4x4 cube
We want a notation which is relatively easy to read, does
not require subscripts or superscripts, resembles the 3x3x3
notation as closely as possible, and is extendable to larger cubes
later on. The problem is that the moves we want to make
involve a mixture of outer face turns and inner slice turns, sometimes
at the same time (it is much faster to turn an outer face and the
adjacent
inner slice together than to turn the inner slice alone, so we will do
so whenever possible). One way we are are going to make the
notation a little cleaner is to
eliminate designations of anticlockwise turns entirely: instead of
using r to designate an anticlockwise turn of the Right layer, we are
going to say 4L, indicating that the fourth Left layer is
turned clockwise. Each turn will
consist of an optional number prefix indicating which of
the four slices is being turned clockwise (omitting 1
in the case of a clockwise outer layer turn), a capital letter
indicating the layer(s) involved, and an optional 2 suffix if the turn
is 180
degrees. Since turns may now begin and end in numbers,
we will put a space after every turn.
A simple solving method -- reduction to the 3x3x3
cube
Since we already know how to solve the 3x3x3 cube,
if we can get the centers of the 4x4x4 correctly arranged, and the
edges paired up, we can then finish solving the cube as if it is a
3x3x3, except for a couple of potential parity problems which
may need
to be fixed near the end. Three advantages of this method are
that it builds on knowledge we already have (requiring only a few
extra routines), it is very fast in placing the centers (which are
much slower to fix if they are left until the end), and it can later be
extended to solving the
larger cubes (5x5x5 and up). The routines for fixing centers are
mainly based on
Stefan
Pochman's page.
The centers are fixed in three easy stages. The first stage
is complete a 2x2 center by putting all four centers of a chosen color
(red in the diagrams below, but any color will do) into position on the
Up face. We will use half-cube turns (12R)
to move each center
from the Front
to the Up face. The first two diagrams below show two red centers
in position to be joined. Pick a center (say red) on the Up face,
and turn the whole cube so another red face is on the Front face. Turn
the Up and Front faces if necessary to get the centers in the
correct positions, and turn
the right half of the cube clockwise to pair up the two centers. Turn
the whole cube so that the paired faces are on the left half of
the Up face, and turn the bottom three layers to bring a third red
center to the Front face, and turn the Front face if necessary to put
it in the right half of the front face. Turn 12R
again to bring the third red center to the Up face (shown in the third
and fourth diagrams below). [Once you see how to align the first
three centers correctly, you can bring edges up from any side, or even
(by turning, for example 12R2)
from the Down face.]
The fourth center is placed using a simple drop insertion. Turn
the whole cube so that the missing center needs to go to Urf, and turn
the bottom three layers to bring the last red center to the Right face,
then turn the Right face if necessary to put it at Rfd (diagram below
left). Then the drop insertion 34L 34U 12R,
still turning half the cube on each turn, places the last red center in
place. If the last red center is on the Down face, a
different routine is needed -- turn the Down face so that the last red
center is at Dfl, and do 12R2 D 12R2
(below right). The first stage of solving the centers is finished.
The second stage of solving the centers is to complete half
of the
four side faces. Turn the whole cube so the completed center is
on the
left face, and turn any one of the side faces so that one of the red
corners comes to the Left layer with a red facet on the Left face
(always possible with a single turn). Turn the whole cube
so that
corner is at ULF, which shows you which color of center goes on each of
the other five faces (in the example above, diagram third left, the Up
face must be yellow, Front must be green, and the other three faces the
correct opposite colors (Down -- white, Back -- blue, Right --
orange). The goal of the second phase is to put two centers of
the
correct color in the left half of the Up, Front, Down, and Back faces
(diagram above center).
We do this using the same idea we used to align the first two red
centers. To put the two yellow centers in the left half of the Up
face, find a yellow center. If it is already on the Up
face, turn the
Up face if necessary to put it in the left half. Find a second
yellow
center, putting it in the right half of the cube if necessary by
turning the layer it is in (Front, Down, or Back). Turn the right
half
of the cube until it comes to the Front face, turn Up if necessary to
put the two yellow centers in the correct relative position, align them
by turning 12R, and turn Up
anticlockwise to store them safely in the
left half (so that later turns will not dislodge them). Turn the
whole cube so that the yellow centers go to the Back face, and repeat
the process with the new Front face, putting two green centers there in
the same way. Do this twice more, putting two white centers
opposite
yellow and two blue centers opposite green.
Sometimes you will find two centers of the desired color already
adjacent. If they are already on the correct face, you can
immediately turn them into the left half. Otherwise, turn the
face
they are in so they both go into the right half, and bring them
together to the correct face (still turning the right half of the
cube), then store them in the left half again. Rarely, three or
four
of the desired color are stuck in the Right face. If so,
turn the
Right face so that two of them are in the back half of the Right face,
turn the Back half clockwise to bring them into the Up face, turn the
Up face a half turn, turn the Back half anticlockwise (to restore the
Left face), then turn the Up face clockwise to store them as normal
(see above right).
Once all of the faces except the Right are half filled with
centers of the correct color, the second of the three center phases is
complete. Turn the right half of the cube to get a third
center correct on at least one or two of the U/F/D/B faces, to get a
small headstart on the third phase. Turn the entire cube so that
the red face is Down, then turn each of the four side faces
if necessary so that the completed centers are in the right half of
their face (as the green faces in the diagram above, far left). Turn
any faces with three complete centers so that the missing center
spot is at Ful (third diagram above). Now we want to
swap
centers between the Up face and the Front face, until all four side
faces are completed, which will also complete the Up face (orange in
our example).
Whenever the Up face has
two adjacent centers of the same color, as in the first diagram above,
you want to choose that color next. Turn the
Up face so that the double center is at Urf and Urb, turn
the whole cube so that the target is the Front face, and put
them
both in with a single maneuver 34L F2 12R,
turning the Front face a half turn (instead
of a quarter turn as in the standard maneuver shown second, third, and
fourth right). Otherwise choose any non-orange center
on the Up face (green in the second and third diagrams above,
though you'll eventually do all four colors) on the Up face, turn
the whole cube so that the green target is the Front face, and turn the
Up
face so that the green center is at Urf. Turn 34L F 12R
in
the second or third case, to bring a third or fourth green center to
the front face.
If two centers of the same color are diagonally adjacent, as
in the fourth diagram above, choose a different color if possible
(yellow in our example) and do it in the normal way. This will
bring the two green centers together so you can do them as in the first
diagram. You should use the maneuvers in the fourth and first
diagrams as often as possible, enabling you to put in two centers at a
time. If it is not possible to do a different color (usually because
the other two colors are the sixth color, as in the fifth diagram above),
you will need to put them both in using
a double version of the basic maneuver, 34L F 12R U2 34L
F 12R.
Usually seven swaps should complete all six center quartets.
Occasionally you will find that the four orange centers are in place,
but some of the side centers are still out of place. You
can swap centers between two adjacent side faces by turning the whole
cube so that the faces you want to swap become the Up and Front
faces. Make sure the centers are aligned as in one of the
diagrams above, and do the usual swap. The ugliest case is
when centers need to swap between opposite faces (e.g. one green center
is on the mostly blue face, and vice versa. The easiest way
to fix this is to push the green center from the blue face into the Up
face (using
the third routine above), place the green center on its correct face
(pushing the fourth blue center to the Up face), and then placing the
blue center (which refixes the orange face).
Matching up the 12 edge pairs
The general idea is to match up two pairs of edges at a time (it's too
slow to match only
one at a time). Dave
Baum's solution page has a neat eight-move tricycle of edges,
2R 4D R U 3L 4D 4L U,
which sends three edges in a cycle FDr ==> UFr ==> FRu.
This is easy to learn and does not
disrupt any centers. Since the last three moves
are outside turns and only affect where the matched pairs wind up, we
will speed up solving by using only the first five moves, also turning
the fifth into a deep move (half-cube turn). We
want to bring an edge from the right side of the Down-Front
edge to match its partner on the left side of the Up-Front edge, and at
the same time bring an edge from the upper half of the Front-Right edge
to match its partner on the left of the Down-Front edge. We find an
unmatched edge and hold the cube so that
it is at UFl. Now we find its partner and bring it to FD
using outer layer turns. If it ends up on the wrong (that is, left)
side
(first diagram below) we do a three-move adjustment and reorient to get
it to the right side. Now we check the edge to its left and
find its partner and bring it to FR. If it is on the lower
half (second diagram below) we do a similar adjustment to get it to the
upper half (third diagram). Now the four edges are in the correct
position, and we do the five-move
tricycle 2R 4D R U 34L, giving the result shown in
the fourth diagram. The two edges left
at UF (marked in brown) probably won't match, until we get down to
pairing the last three pairs of
edges simultaneously.
Since it takes time to search for the correct edge and
bring it to the correct spot, we can always bring an edge to
FRd which
is the partner of UFr, so that the tricycle will match up UF and UR
(and probably not FD). If the partner of UFr is at FRu
instead of FRd
(first diagram below), we do the usual adjustment to put the pieces in
the correct position (second diagram), then do the same tricycle, which
results again in two matched edges (third diagram). Note that
the edge at UFr (blue-red in the diagrams below) appears to flip over
as it rotates 90 degrees clockwise from UFr to FRu. Once you have UFl
and FDr in position, look for the partners of UFr and FDl at the same
time and bring the first one you see to FR, then adjust if needed and
do the tricycle.
Pairing the Last Two Edges
Frequently we are going to end up with two pairs of edges
left to match up on the last iteration (sometimes more than one such
pair may even occur). The first diagram below shows a typical
case where one two edge pairs remain to match up. If they are
in position so that the edge tricycle would fix one, we want to do our
usual three move adjustment, which switches the relative positions of
the two Front-Down edges (second diagram below). Now we do the routine
shown below center, 12R U 4B L 4D F
34L, which matches up the pairs
correctly as shown in the third diagram (it also moves some complete
edges and
corners around, but we don't care about those yet).
Solving the 3x3x3 (Parity
Problems)
At this point the 4x4x4 cube has been reduced to a 3x3x3 cube, and can
be
solved by the 3x3x3 methods we have already learned (make only single
outer
layer and double inner slice turns, treating each pair of
double inner layers as a single
unit). There are two potential edge problems which may come
up near the very end (each occurs independently about half the time, so
about one time in four there are no problems and
one time in four we
need both
fixes). If we see that an odd number of edges need to be
flipped, apply the Single Edge Flip to flip the UF edge. This takes a
little work to memorize, but there is a nice pattern to the
moves. If we see that the edges cannot all be
placed using our normal 3x3x3 edge tricycle or double swap, it must be
the case that two edges need to be swapped. The Single Edge
Swap (another nice palindrome) is quick and easy to learn, and swaps UF
and UB. Once the parity problems have been fixed, any 3x3x3
method for finishing the last layer will work. These
routines are widely known; I learned them from Dave
Baum's page.
If you need to swap two adjacent edges, swap one of them with the
opposite edge using the Single Edge Swap, then do the standard edge
tricycle. [An alternate version
of the Single Edge Swap, 2U2 2R2 12U2 2R2 U2 2R2,
is
shorter but slightly
slower (because it has four slice turns instead of one). It
has the exact same effect.]
A version of the Single Edge Flip will be used on the 5x5x5 and
larger cubes; it can be modified to flip any symmetric parts of a
single
edge. The Single Edge Swap will be used on 6x6x6 and larger cubes
of even order only; it is not needed on 5x5x5 and actually has a side
effect there of
swapping two opposite centers.
Confessions of a heavy-handed cubist
I learned to solve most of the older twisting puzzles back in the
1980's before speedcubing was commonplace. I never worked with a
highly lubricated cube until recently, and have not learned any of
the finger tricks that experts use nowadays. I tend to turn hard,
and sometimes cut corners. On a Rubik's Cube, which has a very
robust design, this is no big deal, since the worst that is likely to
happen is that some pieces will pop out and perhaps the whole cube will
come apart. On rare occasions I have twisted a single corner by
accident, but in almost 40 years I have never broken a 3x3x3
cube.
Other puzzles are a different story. I did all
right with the V-Cubes: the 5x5x5 is fine and I never had any problems, and have only once or twice had a
center
pop out of a 7x7x7. The 6x6x6, which tends to stick along
the center axes (which must have something to do with having even
order), has come apart many times, and it is not easy to reassemble
-- the internal mechanism is quite complicated -- but I have not broken
it. I had a tiled 5x5x5 become too loose to use and could never
figure out how to get it tightened again.
I have broken an Ideal 2x2x2
or two (I prefer the larger 2x2x2's made nowadays), but my worst
luck has been with 4x4x4's. I tried at least eight different models of
4x4x4's, from the original Ideal
Rubik's Revenge to models by various Asian
manufacturers. I
have broken several of these, some
of which have corners which are glued onto the interior mechanism
(though these can be glued back on). Even worse, some have eight
interior face plates (you might call these demisemihemispheres)
which are glued
to the central spindle. I have not been able to
repair these when they have broken, and I had
to send
two unfixable ones back for replacement. I even had a 4x4x4 break
while it was sitting in my gym bag -- one of the thin pieces which hold
the centers to the spindle broke, and the cube came apart inside a
plastic bag. My view is that a good
twisting puzzle should not have any parts glued together -- this is the
lesson of the superb original design by Rubik, which consists of 20
solidly molded pieces). The 4x4x4's by Maru and Lan Lan were OK,
but I was actually having good results with a Winning Moves
4x4x4 which I lubricated myself
(its worst fault is a slight tendency for edges to partially pop
out).
Some of the 4x4x4's (and 3x3x3's too) had
inadequate color
schemes, where red and orange (or green and blue, or both) are hard to
distinguish in dim light.
Goodbye to stickers
Everything changed when I got a
stickerless 4x4x4 made by Mo Fang Ge: the colors are better, it turns
smoothly without jams or popouts, and there are no stickers to wear
out. I've had it for years with no problems. For a long time I could not find
a 3x3x3 designed for speedcubing that I liked all that much;
my best results were with lubricated Deluxe Rubik's Cubes (the tiled
model made by Ideal in 1982). Now there are many excellent stickerless 3x3x3's, including magnetic ones. Now I use nothing but stickerless cubes: I have several
2x2x2's, a 4x4x4 and 5x5x5 made by Mo Fang Ge, a 6x6x6
by QiYi, a
7x7x7 by 55Cube, and an 8x8x8 and 9x9x9 by ShengShou.
Many of my other twisting puzzles are also stickerless, including
Pyraminx, Skewb, Megaminx, Square One, and Redi Cube.
The Professor Cube (5x5x5
Cube)
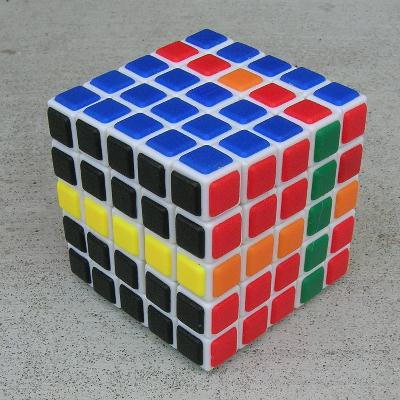
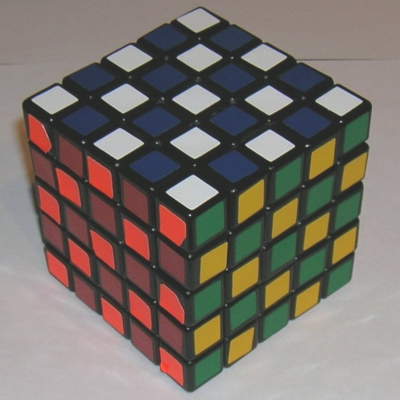
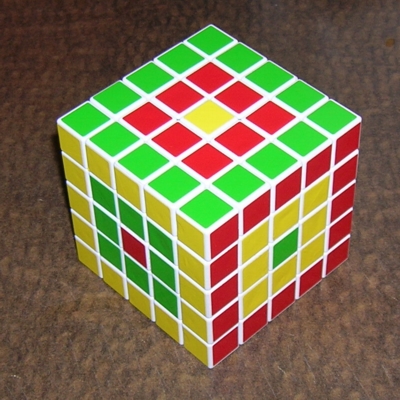

The original design for the 5x5x5 Cube, also known as Rubik's Wahn
(Illusion), was by Udo Krell. Like the
original 4x4x4,
this is a somewhat fragile mechanism and breaks easily; I bought a
couple, made by Ideal,
from collectors in about 1983. Both eventually lost some stickers and
other stickers
became badly
worn (for some unexplained reason, all of the missing and worn stickers
are orange). I also have a 5x5x5 made by Mèffert (photo far left)
which has tiles (like a Deluxe Rubik's Cube) instead of plastic
stickers. This is somewhat heavier (346g versus 309g) but turned
more smoothly; however, it eventually came out of alignment somehow and
became unusable. Eastsheen has an alternate 5x5x5 design for
speedcubing,
similar to its 2x2x2 and 4x4x4 cubes. The 5x5x5 cube can be solved by
combining techniques used on the 3x3x3 and 4x4x4 cubes; in fact it is
actually conceptually a little easier to solve than the 4x4x4 because
the centers are fixed (though the solution still takes longer because
of
the larger number of pieces).
The photo above, second left, is a 1983 cube, showing Pons Asinorum
(checkerboard pattern on all six faces); this can be done quickly by
1234R2 345L2 12R2 5L2 [U] 1234R2 345L2 12R2 5L2 [B] 1234R2 345L2
12R2 5L2.
Note the badly worn orange stickers. Second right is a V-Cube 5, showing a Bullseye pattern with two different sizes of Dots (234R
234F 234L 234B 3R 3F 3L 3B).
Far right is the superb stickerless 5x5x5 by Mo Fang Ge, showing quaduple nested
Mesons
(do a Giant Meson turning only outer layers, another turning double
outer layers, then two conjugated Rubik's Twists in the same manner).
The 5x5x5 cube can be solved using the same basic technique as the
4x4x4, with the addition of a few extra routines. The basic
outline is:
(1) Solve the 8 outer centers on one face.
(2) Solve two-thirds of the centers on each of the four side faces by
attaching 1x2 blocks of center pieces, assembling the 1x2 blocks when
necessary.
(3) Solve the remaining center-corners on the remaining 5 faces using
the same
techniques as the 4x4x4.
(3) Solve the remaining center-edges using the two swaps (actually
tricycles) shown below. The sequence below left swaps a
center-edge from the Up face (Ur) with a center-edge from the Right
face (Rd). The red starred center moves to the location
shown by a circle, that piece moves on the same face to where the
yellow starred center is, and the yellow starred center moves to where
the red starred piece started. If two center-edges on
opposite faces need to be exchanged, the routine shown below center is
used instead (orange star goes to circle, circle to red star, red star
to orange star).
(4) Match up the outer edges with their corresponding middle edges
using the Outer Edge Tricycle (the same routine used in the
4x4x4 solution). But
don't break up any matching outer edge pairs, instead placing the
correct middle edge using the Middle Edge Tricycle (a
similar five-move cycle, except that the last move is a slice move
rather than a
deep move). As in the 4x4x4, you are trying to
match two pairs of edges at a time.
Parity is fixed during this phase. You may find that
the last two middle edges need to be swapped; this is fixed by using
the Single Edge Swap from the 4x4x4 solution, which actually swaps the
outer edge pairs. This will also disrupt one pair of
opposite centers, which can be fixed using the Opposite Center Swap
again. You may also find that some of the middle edges are
flipped. You can fix two at a time using Rubik's Flip ((3L U)2
3L U2 (3R U)2 3R U2). If you have one flipped middle edge
left
over, you will actually flip the two outer edges using the Single Edge
Flip.
(5) Once you have 12 solid edges, you have no more parity problems and
you can finish as if it is a 3x3x3 cube, turning only the outer layers.
Larger Cubes
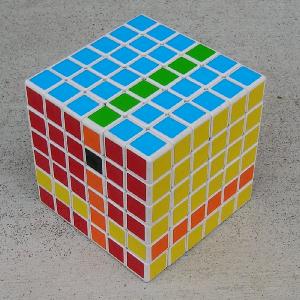
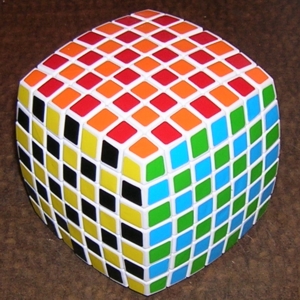
The original mechanisms for 2x2x2 through 5x5x5 do not allow for larger
order cubes, as the corner pieces of a 6x6x6 would fall out when a
layer was turned 45 degrees. Panagiotis Verdes invented a new mechanism
which allows for cubes from 2x2x2 through at least 11x11x11, and his
company
Verdes
Innovations SA
currently
manufactures cubes from 2x2x2 through 9x9x9. The
2x2x2 through 6x6x6
are normal cubical shapes, while the V-Cube 7 and larger cubes have a
slightly
spheroidal shape. Shown above left is a 6x6x6,
showing all 6 colors; this is about the same size (about 69 mm) as an
Ideal 5x5x5, and actually a bit smaller than the tiled Mèffert
5x5x5. It's difficult to see in the photo, but the edge
pieces of the 6x6x6 have
slightly rectangular facets (and the corners are slightly larger than
the centers). Shown above right is the 7x7x7, in a checkerboard pattern
showing all six colors.
The 6x6x6 Cube
The 6x6x6 cube is solved in a manner similar to the 5x5x5,
through the centers now take an extra phase. The edges are also
matched in two phases: first the inner edges are
paired up, then the outer edges are matched to the inner pairs. The
Single Edge Swap for the 6x6x6 is 123U2
123R2 U2 23R2 U2 123R2 123U2. The modified routine 123U2
123R2 U2 2R2 U2 123R2 123U2 swaps only one pair of outer edges;
unlike the 5x5x5 and 7x7x7, this does not disrupt centers (123U2
123R2 U2 3R2 U2 123R2 123U2 swaps a pair of inner edges instead).
Shown below is my modification of the Spratt Wrench which flips four
inner
edge pairs
(UF, UL, UB, LB) without disrupting any centers: (34R U)4 U2 L (6D 34L)4 6R U2.
The 7x7x7 Cube
I got the V-Cube 7 (shown further above in checkerboarded Pons Asinorum
pattern) on October 27, 2010. My first
solve was
50:09.38, with lots of mistakes. My second try was 39:26.44, and I've
since occasionally gotten under 15 minutes. The solution is similar to
the
6x6x6 (though the centers take even longer), with two phases to
matching the edges. Like the
5x5x5, parity is fixed at the end of the edge-matching phase, and the
solution finishes exactly like a 3x3x3. The pictures below show a model by 55Cube.
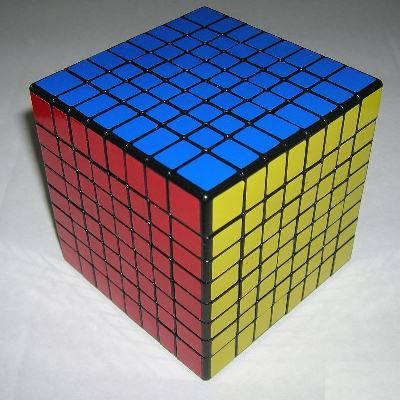
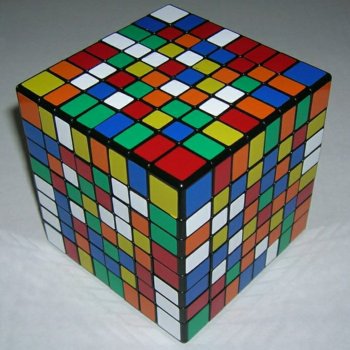
The 8x8x8 and 9x9x9 Cubes
The Shengshou Company in China is now making 8x8x8 and 9x9x9 cubes,
which are cubical, rather than the pillow shape of the V-Cube
7x7x7. I have the 8x8x8 and 9x9x9 cubes (available from
Amazon; see
the 8x8x8 photos above). My first try on the 8x8x8 was full
of mistakes again,
and took 49:17, but within a few tries I got it under half an hour, and
I am now consistently under that even when I make mistakes, though most
of my times have plateaued around 25 minutes. The centers, for
me,
take about 60% of the solving
time. The solution is similar to the 6x6x6, except
that the center and edge-matching stages each have one extra phase.
My first try on the 9x9x9 was mistake free until I made a wrong turn
during the single edge flip in the parity phase. This cost
me several minutes, but I still finished in 52:08. It is
remarkable how well the solution method for the 7x7x7 scales up in
solving the 9x9x9.
Cubes up to 13x13x13, some with the newest magnetic technology, are
being made by various companies; these have very large corners,
elongated edges, and small center pieces. Shengshou has
puzzles up to 19x19x19, once again using pillow
shapes. Cubes of any size can be solved with the same
techniques, so solving is more a matter of endurance than skill.
Pyraminx in 27 Moves
[This was my first published solution, which appeared in the inaugural
issue of WGR in
November of 1983. It has been considerably edited for this booklet.]
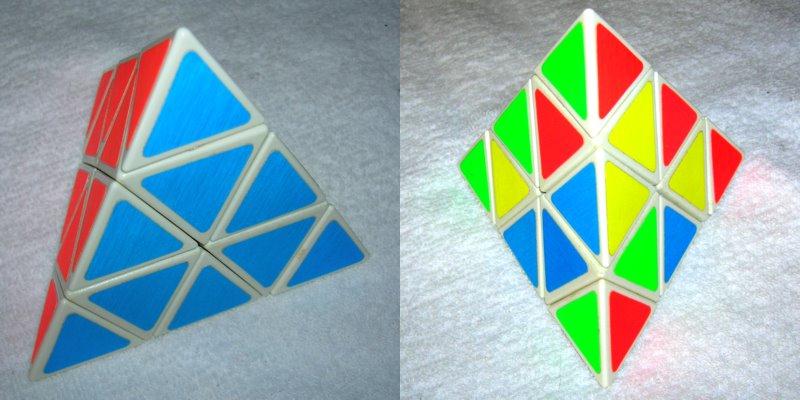
Pyraminx is a tetrahedral twisting puzzle devised
by a German inventor, Uwe Mèffert, and originally manufactured by Tomy
Corporation. Though conceived earlier, it was only
manufactured in the wake of Rubik's Cube. Pyraminx is composed of 14
visible parts: four small corners (sometimes called tips),
four
large corners, and six edges (see
photos above). It is a much easier puzzle: the Cube can be twisted into
over 43 billion billion positions, while Pyraminx has only 75 million
[75,582,720 = 2^5x3^8x6!/2], and once the small corners are (trivially)
twisted into their correct positions, there are less than a million
possible positions [933,120]. The object as usual is to return a
scrambled
Pyraminx to its original condition (called Start), in
which each of the four faces is a single color. (There
is now a truncated version with no small corners,
sold under the name Tetraminx.)
The diagram above is a flattened aerial view (with
the Down face hidden), showing the various parts
of the Pyraminx.
The large corners are shown in darker shades. Note that, from a
vertical view, you can see all three facets of the Up corner and two of
the three facets of the Left, Back, and Right corners. You
can
see both facets of the Left-Right, Front-Left, and Front-Right edges,
and only one facet of the Front-Down, Left-Down, and Right-Down faces.
Shortly after the puzzle was manufactured,
published solutions began to
appear, some extremely difficult or tedious. The most efficient
(claiming 28 moves) of these was by Benjamin L. Schwartz (Pyraminx - An
Improved Solution, Journal of Recreational Mathematics,
Vol.15, Num.
1, pp. 31-38.). It is one of the most difficult solutions I have seen.
A speedsolving method devised by Michael Z. R. Gottlieb,
involving almost 100 sequences, is described on
his website.
Computer
analysis has shown that any scrambled
Pyraminx can be solved in 15 turns (including the possible four small
corner twists).
I believe that the solution we present here is
reasonably efficient,
and is fairly easy to learn and use. Two tricks, explained at the end,
add some
complexity, but bring the maximum number of turns required down to 27.
We will use the notation above. The four large corners (from now
on simply called corners) are called up, left, right, and back. Edge
locations are named by the capitalized initials of the two faces they
lie on. Edges are named by the two faces they should lie on when
Pyraminx is solved, in lower case initials (fd is the edge which
belongs at location FD). The faces are called Front, Left, Right, and
Down. Clockwise turns of the four corners are named by capital letters
U, L, R, and B. We will also use a turn of the base (the part of the
Pyraminx which is not part of the Up corner), holding the Up corner in
place. This is called D (Down). The five corresponding
anticlockwise
turns are named by lower case letters (u, l, r, b, and d). We
only use the D and d turns during Phase 2, to keep the position of the
Up corner (and its two adjacent edges) fixed. We will only
need 8 turns in Phases 3
through 5.
We will solve Pyraminx in five phases. Phase 1 turns the small corners
so that their colors match the corners they are attached to. Phase 2
puts the two front edges fl and fr in place. Phase 3 turns the left and
right corners, and Phase 4 finishes the front face by placing the edge
fd. Phase 5 reorients the Pyraminx so the front face becomes the down
face, turns the up corner, and finishes the solution by simultaneously
placing the fl, fr, and lr edges.
Phase 1 is the easiest one. Simply turn each tip (small corner), if
necessary, in the correct direction, so that its three colors match
those of the corner it is connected to. After all four small corners
are turned correctly, Phase 1 is finished, and we will not need to turn
the small corners again. Phase 1 can take as many as four turns. (I
usually don't bother twisting the small corners when scrambling the
Pyraminx, since this phase is trivial anyway).
In Phase 2, we place the correct edges at FL and FR so that their
colors match the up corner. We will assume that the Up corner is
correctly placed. The color of the Up corner which shows on the Front
face will be called the front color. For the rest of the solution, we
will assume that the front color is blue, but of course you may
choose any of the four colors in an actual solution. First find fl, the
edge which
belongs at FL (check the colors of the Up corner on the Front and Left
faces -- blue and orange
in our example -- and find the edge
which has those colors). If fl is already at FL and it shows
blue on the Front face, continue with the edge fr. If not, we still
have work to do.
We need to get fl to one of the two target
positions (above left) from
which it can be
placed correctly by turning the Left corner. We need to get fl either
to FD with its blue side on the Down face (from where an l turn puts it
in place), or to LD with its blue side on the left face (from where an
L
turn puts it in place). See the diagram above. If fl
is at LR
or FR, or already at FL
but with the colors flipped, make a turn (B from LR, r from FR, or L
from FL) which puts it at FD or LD. Half
of the time, B from LR or r from FR will put it in a
good position directly. Once fl is in the bottom
layer, turn the base if needed so
that fl goes into one of the two good positions described above.
The base turn is always
necessary always when fl starts at FR,
and is
also needed when fl is at FD or LD, but with blue on the wrong
face. Once fl is in the correct position, make the Left turn
that places fl in FL. The process of
placing fl may take as many as three turns. The edge fr is now placed
in the same way. The two key
positions to aim for (above right) are FD with its blue side on the
Down face (R now
puts fr in place), and RD with its blue side on the Right face (r now
puts fr in place). If fr is at LR, turn r to put it at FR
(where either r or dr puts it in place). If it is at FR but
flipped, rdR fixes it. If it is already in the Down layer, turn that
layer if needed to put it in a good position and then turn R or r.
Placing
fr can also take up to three turns. Phase 2 has now been completed,
taking a maximum of six turns. The Front face is now all blue except
for
the bottom row.
In Phase 3, we turn the Left and Right corners so that
they also show blue on the Front face. But we must find which face is
really the Front face. Look at the Left, Right, and Back corners. Two
of these will have blue on them. The face these two corners share is
the correct front face. For example, if the Left
and Back corners both have
blue on them, then the Left face (shared by the Left and Back corners)
should really be the Front face. (Back and Right blue corners
means the Right
face should really be the Front face). If the Left and Right
corners both
have blue on them, then we already have the correct Front face.
First let us handle the case where the current front face is correct.
Now we need to turn the left and right corners so that they show blue
on the front face, but without displacing the edges from FL and FR. We
don't care yet which edge is the third edge on the Up corner; we show
this edge in gray in the examples above. We
must turn the Up corner so that this gray edge is on the Left or Right
corner which is being fixed, so that turning the Left or Right corner
does not disrupt one of the two edges already placed correctly on the
Up corner. If the Right corner needs to be turned, make turn
U first (getting fr
out of the way), and turn R or r (whichever brings the blue side of the
right corner to the front side). Now if the left corner needs
to be turned, turn U again (getting fr out of the way again), turn L or
l, and turn U a third time to finish phase 3. The diagram above
left shows an example. If only one (Left or Right) corner
originally needed to be turned, only two turns of the Up corner are
needed -- the first away from the corner needing to be fixed, and the
second in the opposite direction (uLU or ulU to fix the Left corner,
Uru or URu to fix the Right corner). [When you need to fix
both
corners, you can actually fix either one first; the upper left diagram
can also be solved by the sequence uluru.]
Now we handle the case where the Left or Right
face should really be
the front face. In either
of these cases, we turn the whole Pyraminx so that
the
other two blue corners are Left and Right, regardless of whether their
blue facets are on the Front face or not.
Let us assume that it is the Left face. After we turn the
whole
puzzle, the blue portion of the Up corner is on the Right face.
We should fix the Left corner first if necessary, since the
Up
corner is already in the correct position to do so.
If
the Right corner needs to be fixed, turn u, fix the Right corner, then
turn u again to finish. If Right does not need to be fixed,
turn
U to finish. See an example in the above center diagram.
Possible sequences are LU, lU, Luru, LuRu, uru, or uRu (you don't need
to memorize these, just understand the process).
If
the Right Face is the correct Front face, turn the whole puzzle again,
putting the blue portion of the Up corner on the Left face. Now
we should fix the Right corner first if necessary. If Left
needs
to be fixed, turn U, fix Left, and U again. If Left is correct, turn u
to finish. Possible sequences are Ru, ru, RUlU, RULU, UlU, or ULU.
Summarizing the procedure for Phase 3: find the correct Front face,
hold the pyramid so that the correct face is on
the Front, turn Left and Right corners
to show the Front color (blue in our example) on that
face, moving the Up corner out of the way as necessary. The
Front face should
have eight (or nine if we are lucky) of its
facets showing the same color. Phase 3 can take up
to
five turns. In one case out of eight, we are lucky
and FD
is correct too, and we can go directly to the last step, Phase 5.
If not, we go to Phase 4 to place fd at
FD.
In Phase 4, we need to find and place edge fd.
If fd is at LD or RD with blue on the Down face, turn b or B
to get
it to LR. If fd is at LD with blue on the Left face, place it with the
sequence of turns rBR. If fd is at RD with blue on the Right face,
place
it with sequence Lbl (the mirror image of rBR). If
fd started at LR, or you moved it there as instructed, you can place it
with LBl if its blue side is on the Left face, or with rbR if its blue
side is on the Right face.
If fd is at FD but
flipped (i.e., with blue on the Down face), fix it by turning rBRLBl.
The diagram above summarizes these
sequences. Phase 4 is completed in a
maximum of
six
turns.
Phase 5
Finally we come to Phase 5. The Front face is all blue, so we
are finished with it. Turn the entire Pyraminx so that the blue face
becomes the new Down face. Now turn the new Up corner so that its
colors match those of the base. We are faced with four possibilities.
We may be finished solving (an 11-to-1 longshot). If so, mix it
up and solve it again -- practice makes perfect. If we are
not so lucky, we need to find
out whether we need to move the last three edges (FL, FR, LR)
cyclically, and whether two of the edges need to be flipped. The
easiest way to tell whether an edge needs to be flipped is to observe
whether either of its facets match the color of the adjacent Up
corner facet. An edge in the wrong position needs to be
flipped if one of the
colors match; an edge which does not need to be flipped does
not match on either
facet. (If an edge is in the correct position, both
colors match, of course, if it does not need to be flipped; the colors
are reversed if it needs to be flipped).
If one of the three edges is completely correct, the other two need
to be flipped (this happens about a quarter of the time). If none of
the three edges is correct, then a
cyclic exchange of the three edges is needed (a tricycle, which happens
about 1 time in 6).
Decide
which direction this cycle must be in by visualizing whether the
clockwise turn U or the anticlockwise turn u will put at least one of
the edges in the
correct place with respect to the base. If it is U, you need a
clockwise tricycle. If it is u, you need an anticlockwise one. If all
three edges are put in the right place by your trial turn, you do not
need to flip any of them. If only one edge is put right, you need to
flip the other two. If two of the edges need to be flipped (whether you
need a tricycle or not), hold the Pyraminx so that they are at FL and
FR.
Now we need five sequences. The first sequence flips the edges at FL
and FR without a tricycle. This sequence is rUluLuRU. This is a
somewhat longer sequence than we have seen so far, but it is not hard
to memorize, since it has a natural rhythm similar to the corner
tricycle used in solving Rubik's Cube. It is actually another example
of an monoflip. The second and third sequences perform tricycles
without
flipping
edges. The clockwise tricycle is ruRuruR.
The anticlockwise one is
rURUrUR. Note that these
sequences are identical except for the
direction of the Up turn, and you don't even have to remember which is
which; just make the first Up turn in the direction which will cause
the second Right turn to put an edge in its correct slot, and keep
turning the Up corner in the same direction; each Right turn (after the
first one) will place
an edge correctly. These three crucial sequences are shown in the
diagrams above. In fact, you now have enough sequences to solve the
whole Pyraminx: the rest of the solution consists of shortcuts.
The fourth and fifth sequences are not absolutely necessary, since they
handle the cases which can be be solved using a tricycle followed by a
double edge flip. But they are short and not too hard to remember, and
considerably shorten the solution when you need to perform a tricycle
and flip the
edges FL and FR simultaneously (which happens about half the time).
When you
are in one of these situations, hold the Pyraminx so that the edge
which does not need to be flipped is at LR (note again that the edges
which
need to be flipped will each have one of their facets the same color as
the face it is on). The clockwise tricycle is LURurl; the
anticlockwise
is RBUbur
(this may be easier to do if you turn the whole Pyraminx in the
direction [U], so that the right face becomes the front face, then do LRUrul). Note that both sequences
have three clockwise turns
followed
by three anticlockwise turns, in slightly different orders. When you
have chosen and performed the correct sequence from these five, the
Pyraminx is solved. Phase 5 takes a maximum of nine turns. The total
maximum length of the basic method is therefore 4+6+5+6+9, or 30 turns.
The average length, not counting the Phase 1 tip turns, is
about 17 turns. Practice solving Pyraminx until you can do it fairly
easily.
Going from 30 to 27 Moves
If you wish to shave a few more moves off of 30, try these two
shortcuts. They were found by looking at the worst situations in Phases
2 and 4, and looking for shorter ways to handle them. The first one is
fairly easy, and cuts Phase 2 from six turns to five. There are three
positions for fl which take three turns to get to FL correctly. The
first is FL, flipped (Ldl). The
second is FR with
the front color on the right face (rdL).
The third is LR with the front
color on the left side (BDl).
Similar positions exist for fr. Phase 2
takes six moves when both fl and fr are in bad positions. There are
three such situations. If fl and fr are in the correct locations, but
flipped, RLdRL will put them
both into the correct positions. In the
other two situations, one of the two is at LR and badly oriented, and
the other is in its correct location but flipped. If it is fl which is
at LR and fr flipped, use the sequence rbDrL.
If fr is at LR and fl is
flipped, use LBdLr (this is
the mirror image of the previous sequence).
All three sequences (shown above) are based on the idea of
moving both edges to the base and making only one down turn instead of
two. All other positions can be handled in the usual way. If fl and fr
are swapped and badly oriented, fixing fl will push fr into a good
position, so fixing fr only takes two turns. If fl is at FR and fr is
at LR, and both are oriented badly, fix fr first, thereby pushing fl
into the base where it can be fixed in two turns. If fl is at LR and fr
is at FL, fix fl first (you would do this anyway). Phase 2 can always
be done in five turns or less.
The second shortcut, much more difficult, is based on the fact that
Phase 4 takes six moves only when fd is flipped at FD.
To remedy this,
I developed an alternate Phase 5, which I call Phase 5A. When fd needs
to be flipped in Phase 4, skip Phase 4 entirely, and use Phase 5A,
which solves the last three edges while simultaneously flipping fd.
Phase 5A is a maximum of twelve turns long, but replaces Phases 4 and
5. The new Phase 4 (the same as the old one, but fd never needs to be
flipped) is a maximum of four turns long. Phase 5 can still take nine
turns, so the maximum of Phases 4 and 5 together is thirteen turns.
Since Phase 5A is shorter than the total of Phases 4 and 5, the total
maximum length of the solution is now 4+5+5+4+9, or 27 turns.
In Phase 5A, there are seven possible positions. Turn the entire
Pyraminx so that the completed portion (except for the flipped fd) is
the base. Make the turn of the Up corner described in Phase 5, making
its colors match the base. Use the method described for Phase 5 to
determine whether a tricycle is needed and which edges have to be
flipped (now there will either two or four, since we know fd must be
flipped, and the total edges to be flipped must be an even
number for parity reasons). We need seven sequences.
The first sequence (not shown) we need is the
standard double edge flip we've already seen in the standard Phase 5,
which we will use here whenever two adjacent edges need to be flipped.
Simply hold the Pyraminx so that the edges which need to be flipped are
at FL and FR. If two edges need to be flipped which are not adjacent,
we need an alternate sequence, luLuRUrU
(above left), which flips edges
at FD and LR.
A third sequence, the Tetraflip (above second left), flips all four
remaining
edges (LD, RD, FD, and LR) without a tricycle: the moves are
ULuRuLuRLuR (note that this is
held in sort of the inverse position of
the standard double edge flip: the two edges not to be flipped are
where the two edges flipped by the standard double-edge flip
would be). This is a little trickier to memorize, but notice the first
Up
turn is clockwise and the rest are anticlockwise; the clockwise left
and right turns alternate, with an Up turn in between each except for
the little hiccup near the end, where the Up turn skips a
beat.
The Tetraflip was derived by combining a modified double-edge flip with
the Hexaflip (above third left), a pretty pattern with a nice sequence,
which flips all six edges (we don't need Hexaflip directly in our
solution method). Since the double-edge flip is symmetric,
we can use its mirror image; since its effect is its own
inverse, we can uses its inverse sequence: if we take the mirror
image of rUluLuRU, we get LuRUrUlu. Reversing it gives
ULuRurUl; appending the Hexaflip gives ULuRurUlLuRLuRLuR;
the six underlined moves undo themselves and can be eliminated, giving
the 11-move sequence shown. [There are shorter 10-move
tetraflips, but they are harder to remember and perform quickly.
A tetraflip position in which the two unflipped edges are not adjacent
is also possible, but we don't need it in our method.]
Another pretty pattern (above right) twists all four large corners and
rotates three of them around the Front face. This, along with the
Hexaflip, might
be useful in starting to mix up the Pyraminx before solving, just as
Pons Asinorum is with Rubik's Cube.
The remaining four sequences perform tricycles and flip two or four
edges simultaneously. When you have determined in which direction the
tricycle must be made, and how many edges need to be flipped, select
the correct sequence.
The four sequences, diagrammed above, are :
(4) clockwise tricycle, flip fd fl fr lr - LrlruBUbr
(5) anticlockwise tricycle, flip fd fl fr lr - RBubURLRl
(6) clockwise tricycle, flip fd and fl - RurluLu
(7) anticlockwise tricycle, flip fd and fr - lULRUrU
Note that when using the last two sequences, you may have to turn the
up corner before using the sequence, in order to get the edge which
needs to be flipped to either fl or fr, as required. If so, the last Up
turn may be unnecessary, or in the opposite direction from that
indicated (it will be obvious in which direction to make the last turn)
in order to finish the solution.
This solution, with practice, will allow you to solve Pyraminx in well
under 1 minute. The 30 move version is probably better for speed, until
you become experienced with the shortcuts.
Petal Pyraminx
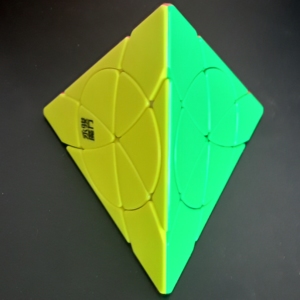
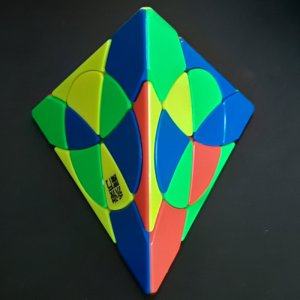
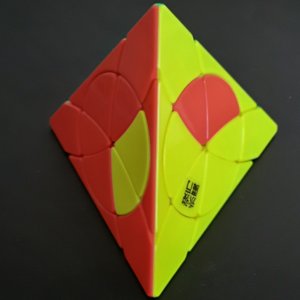
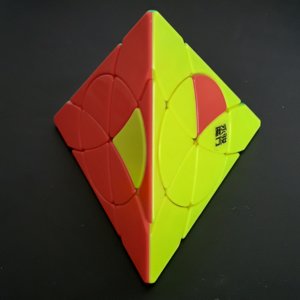
A slightly harder version of the standard Pyraminx has a circular panel
on each face that can be rotated 120 degrees, allowing the 12 large and
12 small wedges to be scrambled along with the corners and edges (it
lacks the trivial small corners of the regular Pyraminx). We mark
circle turns in angle brackets: <F> is a 120 degree clockwise
turn of the Front circle. The
corners and edges can be solved exactly as usual, but it is more
efficient to match up the wedges of one color (the small wedges with
corresponding corners and the large with corresponding edges) before
solving the first face. The edges of the last corner can also be
solved normally (though a bit harder to visualize), leaving only wedges
to be interchanged. Small-large pairs can be interchanged (third
diagram above) with a simple three-move drop insertion (R<r>r,
turning the Right corner clockwise, the Right face anticlockwise, and
the Right corner anticlockwise.) Eventually you will be
left with only large wedges to be swapped: the red and yellow large
wedges in
the upper right of the Front and Right faces (rightmost diagram above)
can be swapped with a somewhat longer sequence:
R<R>r<R>U<f>u<r>U<F>u,
alternating corner
and face turns (this is actually a tricycle, with an invisible swap of
same-colored wedges).
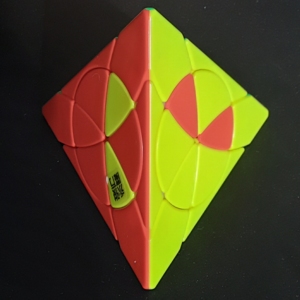
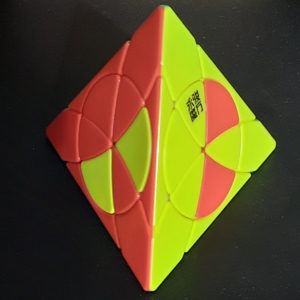
Some shortcuts allow unconnected pairs of small or large petals to be
swapped between faces. The two small petals (above left)
are swapped via R<R>r<F>R<R>r.
The two large petals (above right) are swapped via R<r>r<rF>U<F>u
(note the two center turns in the middle of the sequence).
The Skewb
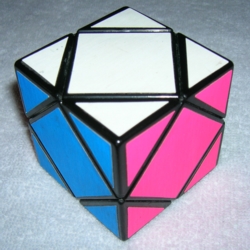
[The original version of this solution was published in WGR2 in 1984. I
later
received a copy of Dr. Kurt Endl's book Pyraminx Cube
(the German name for the Skewb). The solution there follows the
sequence, Up
corners, face centers, Down corners, and has a maximum length
of about 50 moves. After reading his book, I began to study the Skewb
again, looking for shorter moves for my own method. In particular,
since I do Down corners before face centers, I looked for very short
meson and double meson sequences which would take advantage of the fact
that the centers have not been done yet and may be disrupted. I also
discovered shorter sequences to do some of the face exchanges without
disrupting corners. My revised method was published in WGR5 in 1985.
It has been further refined for this booklet.]
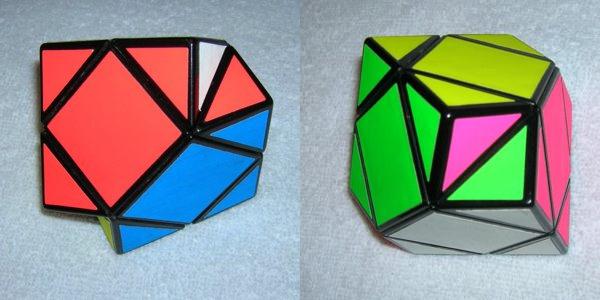
The Skewb is a twisting puzzle, invented in 1982 by
British journalist
Tony Durham, and manufactured by Uwe Mèffert. It was originally called
the Pyraminx Cube, but Douglas Hofstadter suggested the name Skewb in
his Metamagical Themas
column in Scientific American, and Mèffert
adopted this name. It is a cubical shape, with a diamond-shaped pattern
on each face. There are eight corners (each with facets of three
different colors) and six diamond-shaped centers of different colors.
As
usual, the object is to return the scrambled Skewb to
Start (the position in which each face is a solid color). Turns can be
made at each of the eight corners of the Skewb. A turn moves half of
the Skewb (the corner being turned along with the three adjacent
corners and three adjacent centers) in relation to the other half.
The photo above left shows two views of a clockwise turn halfway
completed, forming an
odd symmetric twelve-sided shape. Turns around the upper four corners
are basically the same
as turns of the opposite lower corners (except for the resulting
reorientation of the entire Skewb), and we can solve the Skewb using
only lower corner turns. 120 degree turns can be made in either a
clockwise or anticlockwise direction, as on the
Pyraminx. The diagram above right shows the Skewb, along with
the names of the four lower corners and the six faces (the faces are
named exactly the same as on
Rubik's Cube).
This method for solving the Skewb will take a maximum of 40 moves.
Phase 1 takes up to 13 moves, phase 2 up to 7, and phase 3 up to 20
(when five diamonds need to be swapped). The average length is about 27
moves. The Skewb can be twisted into 4!4!6!3^8/2*2*2*9*12, or 3,149,280
possible positions. Although it has more non-trivial positions and a
longer solution method than the Pyraminx, the Skewb is actually
slightly easier to solve, because there is less to memorize. The bulk
of the moves are repetitions and combinations of four-move commutator
sequences.
When I'm in practice I can get times usually under 30 seconds.
Turns will be designated by the lower corner
being turned, using a capital letter for a clockwise turn or a lower
case letter for an anticlockwise turn. Like most twisting
puzzles, the
colors of the Skewb are not standardized. I have three Skewbs with
different color arrangements. The pattern we will be showing here has
yellow opposite white, blue opposite green, and orange opposite pink.
Because it is much easier to do Front and Right
turns, we will use them
almost exclusively. We add one more notation, using % to designate a
180 degree rotation of the entire cube around the Up/Down axis (picture
a globe spinning on its axis), so that
the Right face exchanges with the Left and the Front face with the
Back (this is equivalent to [U2] on Rubik's Cube). The
solution proceeds in three phases. Phase 1 places the four
upper corners (i.e. correctly oriented, with the proper facets on the
up face): see the diagram above left; gray areas are the portions we
don't care about yet. Phase 2 orients the four lower corners, which
were automatically put in the correct positions by Phase 1. Phase 3
makes any necessary exchanges of the diamond-shaped centers. Many of
the move sequences will be built from the powerful four-move commutator
fRFr.
Phase 1 -- placing the Up corners
Placing the first corner
Look at the color of the diamond on the up face
(you may turn the Skewb so that any color is face up, so let's say that
it is white). We want to put all four corners which have white facets
(we will call these white corners) in the Up layer so that their other
facets match in color. If any of the Up corners already have a white
facet on the Up face, we can consider that corner to be already
correct, and turn the whole Skewb so that corner is at the ULB (Up Left
Back) position and proceed to the second corner (next section).
Otherwise, we need to find a corner which contains white, preferably
one in the Down layer but whose white facet is not on the Down face.
If we have a white corner in the Down layer with its white facet on one
of the side faces, hold it at FRD. If its white facet is on
the Front
face, turn R (clockwise) to put it at URB; if its white facet is on the
Right face, turn l (anticlockwise) to put it at ULF. Proceed
to the
second corner.
Otherwise,
if
all of the corners are either in the Up layer but with their white
facets not Up, or in the Down layer with their white facets Down, we
can twist any of the four lower corners which contains a white corner
to bring it into a usable position. Specifically, if a white corner is
at URF, turn F if the white facet is on the front, or f (anticlockwise)
if the white facet is on the right. If a white corner is at FRD with
its white facet down, turn F. Now we have a good corner,
which we can hold at URF (again turning the whole Skewb as required,
keeping white Up),
and turn as already described (R to URB or l to ULF). At
worst the first corner of Phase 1 should be placed in two turns.
Above is a diagram showing every possible position and orientation of a
corner to be placed in the second, third, and fourth steps of Phase 1.
Each location shows the correct move to be made and an arrow
pointing to the resulting position. The goal position is in the
middle of the second column. The two easy positions which can be
brought to the goal position are directly above and below it.
The key positions to remember, however, are to the left and right
of the goal. Any position which is not already correct (or an
easy single turn) can be brought to one of these two positions in one
move. Then at most three turns will put the corner in the goal
position and restore any momentarily displaced corners.
Placing the second corner
Reorient the entire Skewb, keeping the white diamond up, so that the
correctly placed corner is at ULB.
The second corner needs to be placed at URF, diagonally across from the
first corner. It has a white facet and two facets of different colors
than the first
correctly placed corner. This corner can only be at one of three
positions: URF already, FLD, or RBD. Unless the white facet of
the corner we want is on the Up, Left or Back face, we want to get
it to one of two positions: on the front of FLD or the right of RBD
(second row of the diagram above).
(A) If the white facet is in one of
the two positions (left of FLD or back of RBD) where a single turn will
put it in place, turn F or f to do so, and advance to the third corner.
If the white facet is on the Down side of either FLD or RBD, turn the
Left corner clockwise or the Right corner anticlockwise,
respectively, so it goes into one of the single-turn positions just
mentioned; this is a shortcut only usable for the second corner, and is
shown with red arrows on the diagram above.
(B) In the event that it is at URF
with its white facet Up, it is already correctly positioned and you can
advance to placing the third corner. If it is at URF with
its white facet on the Front face, turn F to put it on the right of
RBD.
If it is at URF with its white facet on the Right face, turn
f to put it on the front of FLD. Continue to Case (C) in either
case.
(C) The white facet either was already in one of the two key positions,
or
you have made one turn to get it there. Now if it is on the front
of FLD, turn lF to put it in place (the extra L turn shown in the
diagram is not needed when placing the
second corner, since the anticlockwise l turn did not displace a
corner). If it is on the right of RBD, turn Rf to place it
(again the extra r is not needed for the second corner). The shorter
sequences for the second corner only are shown in red.
Placing the second corner will take at most three turns. (It's not
absolutely necessary to do place the diagonally opposite corner second:
if you can see that one of the adjacent corners can be placed in one
move, you can go ahead and place it. This may also shorten
the third corner procedure by one move, if it goes to the key position
where
a two-move turn can be used.)
Placing the third corner
Orient the Skewb again so that the two corners
already placed are at UFL and UBR. (This can be done in two ways;
with experience you will be able to spot which of the two remaining
corners is better placed and do it as the third corner, orienting so
its target location is UFR). Find the corner which
belongs at UFR (its colors will be those of the up diamond
(white), the front facet of the upper left corner, and the right facet
of the upper right corner). Occasionally it will already
have been placed correctly at UFR, and you can proceed to the fourth
corner. Otherwise, with two exceptions, follow the same
procedure as for the second corner, making a single turn either to
place it directly in the correct
position or to reach one of the two key positions. Once it is in
a key position, use the full three-move turn of lFL or Rfr to place it
correctly, and proceed to the fourth corner.
If the white facet is on the Down side of either FLD or RBD, turn the
Front corner so it goes to the opposite position, so that the white
facet is in one of the two key positions, on the front of FLD or the
right of RBD. Finish with the
corresponding three-move sequence, and proceed to the fourth corner.
If the corner is at ULB, and its white facet is on the Left or Back
face,
it takes only two turns to get it in the correct position.
Turn the Back corner clockwise if the white facet is on the back, or
anticlockwise if it is on the left. This puts it in one of
the single-turn positions we have already seen. The worst case
is if the white facet in on the Up face. In this case, turn the
Back face in either direction to place it in one of the two key
positions,
and place it as usual.
Placing the third corner will take at most four turns.
Placing the fourth corner
Orient the Skewb once more so that the Up corner yet to be placed
belongs
at UFR, and find that corner at either the upper front or
the lower left or right. Follow the same procedure used to place
the third corner, and you will have completed phase 1.
Placing the fourth corner will take at most four
turns, for a total of 2 + 3 + 4 + 4 = 13 turns for Phase 1.
Phase 2 -- twisting the Down corners
Phase 2 is the shortest and easiest, requiring a single maneuver of
either
four or seven turns. First determine the color which belongs on the
Down face. This is the color common to all four of the lower corners
(which
have been placed, but not necessarily oriented, by phase 1). It
is also the color opposite the Up face color -- memorizing
the colors which are opposite each other on your unscrambled Skewb is
helpful (on mine, they are blue-green, yellow-white, pink-orange).
In our example, the Down color is yellow. Note that the diamond on the
down face is usually not the correct
color. Nevertheless, determine the direction in which each
lower corner must be twisted to put its yellow facet on the down face.
There are three cases, one of which is trivial (in case (a), none of
the corners need to be twisted, so phase 2 is finished). You can
flip the Skewb over to see the Down face more easily, but it is
important to remember, once you are ready to perform either of the
sequences shown, to
hold the Skewb so that the corners are all still in the Down layer
(this allows us to continue turning the lower corners only, in this
case F and R). The diagrams below show a view from underneath the
Skewb.
In case (b), all four corners need to be twisted, two clockwise and two
anticlockwise. Orient the Skewb so that the corners
needing to be twisted clockwise are at the Down Left Front and Back,
and
those needing to be twisted anticlockwise are at the Down Right Front
and Back. Learn to recognize the pattern of the four
yellow facets: note that two of the yellow facets start on the Front
face (diagram below left). Now do fRFr (called a double
meson) to complete phase 2.
In case (c), two of the corners do not need to be twisted. The other
two (diagonally opposite each other) need to be twisted in opposite
directions. In this case, orient the Skewb so that the
corner which needs to be twisted clockwise is at BDR, and
the one which needs to be twisted anticlockwise is at the FDL.
Note again the pattern of the yellow facets: two are on the Down
layer, one on the left, and one on the Back (diagram below center).
Complete phase 2 by doing the maneuver fRFRBRb,
called a meson. The meson is
actually two overlapped double mesons (fRFr/rBRb,
with the
two r's in the middle becoming an R). It looks like the Meson uses Back
turns as well as Front and Right, but the way we actually perform this
sequence is to sneak in a quarter turn of the whole Skewb after the
first
three moves, so it looks like fRF[U]FRFr (as in
Rubik's Cube, [U] turns
the whole Skewb so that the Right face becomes the Front face).
Bottom views of the Skewb before a double meson (phase 2, case
(b)) and meson (phase 2, case (c))
Phase 3 -- Swapping the remaining face centers (diamonds)
Now all eight corners are in place, and their colors determine where
each diamond belongs. At least one diamond (the white one) is in the
correct place, but three, four, or five may need to be swapped to
complete phase 3. Again we will consider the possibilities one case at
a time. In case (a), none of the diamonds need to be swapped (a 1/60
chance!), and the Skewb is solved. In cases (b), (c), and (d), three,
four, or all five diamonds need to be swapped. In case (b) or (c)
a single sequence will complete the solution. In case (d), we use
the first sequence for case (b) to fix one or two of the diamonds
(depending on the exact configuration) and put us in case (b) or (c),
where a second sequence completes the solution. Phase 3 may take
as many as 20 moves in case (d). The diagrams below are shown
from the same point of view as the mesons, with the Down face in the
middle and the Front face on the top.
Swapping three diamonds
In case (b), three diamonds need to be swapped.
There are three subcases. In (b1), the three diamonds are side by side,
and the Skewb can be oriented so that the left diamond needs to go to
the down face, the down diamond needs to go to the right, and
the right
diamond needs to go to the left. Now
do (fRFr%)2, an important set of moves we call the Center Tricycle,
shown in the diagram below left).
In (b2) and (b3), the three
diamonds are positioned on mutually adjacent faces, and need to be
cycled either clockwise or anticlockwise. We are
going to
fix either case with a conjugation of the Center Tricycle.
Orient
the Skewb so that the Down diamond is wrong, and the face it needs to
go to is Left. The third wrong face will either be Front or
Back. If it is Front, do the Center Tricycle except that the
first turn is clockwise instead of anticlockwise, then finish with
another F turn (this is equivalent to the conjugation f(fRFr%)2F, but
the two initial f turns become an F turn). This is shown
below
middle.
If the third face is Back, do the conjugation
R(fRFr%)2r
(below right). Note that in either of the last two cases, it
will
be obvious how to make the final turn to complete the solution.
Swapping four diamonds
In
case (c), four diamonds need to be swapped, in pairs. There
are
five subcases. If the two good diamonds are on adjacent
faces,
orient the whole Skewb so that the white face is the Up face
and
the other correct face is Left. Depending on where
the
Front diamond needs to go (Back, Right, or Down), perform the correct
sequence to fix the remaining diamonds. The Front-Back swap
is a
threefold repetition of the commutator we have already used in
mesons and tricycles. The Front-Right swap uses a different
commutator where the first two moves of each quartet are clockwise.
In the Front-Down swap the turns are backwards (Right
first),
and the first two moves are anticlockwise. Note that in four-diamond
swaps, we are repeating the commutator without reorienting the Skewb in
between repetitions.

If
the two good diamonds are on opposite faces (white and yellow), then
orient the whole Skewb so that the Front diamond needs to swap with
either Back or Right. Now we need to conjugate the second Double
Bicycle sequence (FRfr)3, by making one preliminary turn to put the
four diamonds into the shape we want (shown in the diagrams below). If
the pairs which need to be swapped are opposite,
do a
clockwise Left turn first and an anticlockwise Left turn at the end.
If the pairs are adjacent, do an anticlockwise
Back turn
first and a clockwise Back turn at the end. Once again, the
final turn will be obvious.
Swapping five
diamonds
In case (d), five diamonds need to be swapped.
There are
actually six different possibilities here, but we will simplify the
problem by doing it in two steps. Orient the Skewb so that
the white diamond (which is in the correct place) is on the up face,
and the diamond on the Down face needs to be moved to the Right face.
Now do the Center Tricycle you already know, which
corrects one or two
diamonds, and puts you into case (b) (three diamonds to swap) or (c)
(four diamonds to swap). After doing (b)
or (c), the Skewb will be solved.
Some other interesting sequences
Here are a few more sequences. The first two were used in our original
1984 solution, which twisted corners in Phase 2 without disrupting
centers.
The meson twists two opposite corners on the Up face (I would now
do this as (FR)3[U](rf)3). The double meson twists all four
corners on the Down face; it's actually two-thirds of a Double
Bicycle. The third sequence is a center pentacycle from one of
David Joyner's web pages. It moves the Front diamond to the Down
face, the Down diamond to the Left face, and the other three diamonds
around the sides in order. I looked at whether this could be
used with conjugations to handle case (d) of Phase 3 directly, but it
is slow and unwieldy to perform (requiring the solver to switch hands
constantly), and only a tiny bit shorter than the two-stage solution,
even if unconjugated.
The Orb
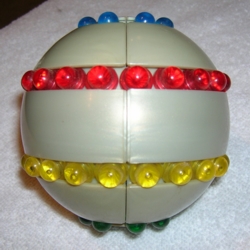
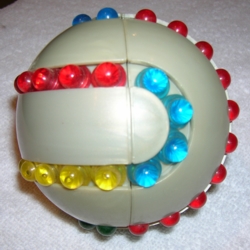
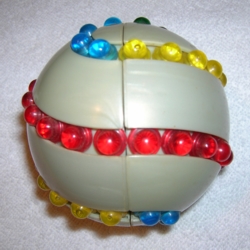
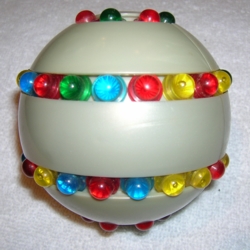
The Orb is a puzzle invented by British designer Chris
Wiggs and manufactured in the U.S. by Parker Brothers. The original is out of
production, but it is being sold again by Hasbro under the name Atomix. The Orb looks
somewhat like a world globe, with four circular channels cut in it at
roughly the locations of the Arctic and Antarctic Circles and the
Tropics of
Cancer and Capricorn (photo above left). The upper and lower circles
contain eight beads each, and the two middle circles twenty each. The
Orb is divided into two hemispheres, divided by a great circle which
runs through both poles. The West and East hemispheres can
rotate
relative to each
other in such a way that the ends of the four circles can match up in
eight different ways: Two ways (including the start position) produce
four tracks of 8, 8, 20, and 20 beads (above far left); two ways
produce
two tracks of 28 beads (above center left); and four ways produce one
track
of 56 beads (above center right). In the Start position, each of the
four
tracks contain beads of one color (e.g. blue and green on the top and
bottom tracks, red and yellow on the middle tracks). The Orb is mixed
up by turning the halves in various positions and pushing the rows of
beads along the tracks (the photo above far right shows a well-mixed
Orb).
The object of the puzzle, as usual, is to
unscramble the puzzle, getting all of the beads separated into four
tracks, one of each color. The total number of positions is
56!/8!8!20!20!, or 73,888,773,475,012,113,089,523,051,000. This is a
much larger number than Rubik's Cube, but the Orb is nevertheless quite
a bit easier to solve.
There are four phases to the solution. In Phase 1, one of the colors of
which there are eight beads (we will use blue) are brought one by one
to the left half of the upper middle track. In Phase 2, the
Orb
is flipped over so that the blue beads are now in the lower
middle track, and the other set of
eight (green) beads are brought to the left half of the upper middle
track. In Phase 3, the green and blue beads are put into the
upper and
lower tracks respectively. In Phase 4, the remaining red and
yellow
beads (sets of 20) are exchanged until one middle circle is entirely
red and the other is all yellow. Hereafter, twisting
the Orb
means
holding the left half in position, while turning the right half of the
Orb in relation to the left half. The great circle is the division
between the left and right halves of the Orb. Sliding
a
track means
pushing the beads along that track. The four starting tracks will be
abbreviated U (upper), UM (upper middle), LM (lower middle), and L
(lower). The beads tend to stick when they are all in one track
(pushing in two different places with two hands, moving in opposite
direction, will help them flow more smoothly). This solving
method is designed to use slides of 8, 20, or 28 beads exclusively,
avoiding sliding all 56 beads at the same time.
Phase 1: We will move (usually) one blue bead at a time to the
centermost position on the left half of the UM, each time sliding the
blue beads
already there one position towards the back. We want to collect all
eight blue beads together, so start by finding the largest group of
consecutive blue beads (there may not be more than one if the Orb is
well-mixed) in either middle track (if they are in LM, flip the Orb
over so they are
in UM), and slide the UM track so they are immediately to the left of
the great circle at the front. Now find another blue bead
somewhere on the Orb. The easiest case is when a blue bead is
on LM, so you should do those first, until there are none left. Slide
LM
until the blue bead is just to the right of the great circle, on the back.
Twist 180 degrees so that the right half of LM aligns with the left
half of UM, and slide the combined track one position left, so
that the bead crosses the great circle. Continue finding blue beads,
if any, in LM and repeat the same maneuver. If there are none left,
check to see if there are any in the right half of UM. If so, twist
180 degrees again to bring them to LM and place each of them in turn.
Sometimes you can move a group of two or more blue beads from LM
together; just
put them at the back right of LM, twist 180, and slide the combined
track
as far as needed. The photos below show a shift of two beads
from LM to UM (the second photo is a vertical view showing the back of
the Orb).
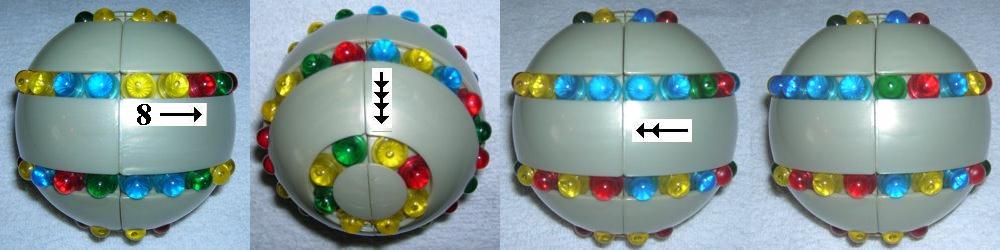
Phase 1 example -- moving two blue beads from LM to UM
If any beads are stuck in the left half of UM towards the
back, then slide UM until any disconnected blue beads go into the right
half of
UM, twist 180 degrees (1/2 turn) so that those beads are now on
the right side of LM, and rotate UM to put the previously placed blue
beads back into position at the front left of UM. Now follow
the same procedure to move them from LM to UM.
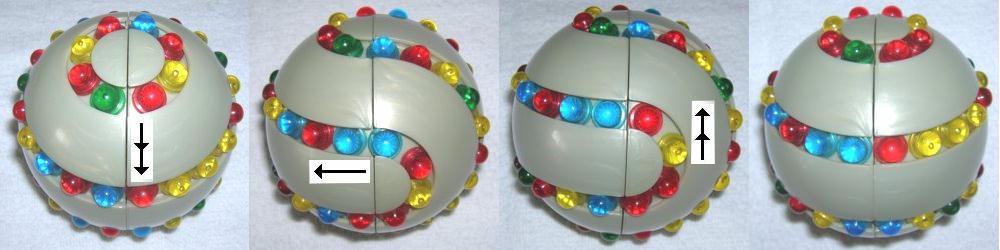
Another Phase 1 example -- moving one blue bead from U to UM
You should eventually have no blue beads in the two
middle tracks except for the continuous group you have collected so
far. There may still be beads in the U and L tracks. To
move a bead from U, slide that track
until the blue bead is just to the right of the great circle, on the back.
Twist the Orb
two clicks anticlockwise (90 degrees) until the right half of that
track lines up with
the left half of UM, and rotate the combined track one position left,
and then twist the Orb back into its
previous position (90 degrees clockwise). The
photos above show the steps in moving one bead from U
to its proper position in UM.
To move a bead from L, slide L so that it
is immediately right of the great circle on the front,
align
L and UM (twist 90 degrees clockwise), slide left, and twist
back
as above. When all eight blue beads are lined up as
shown (below left), Phase 1 is complete.
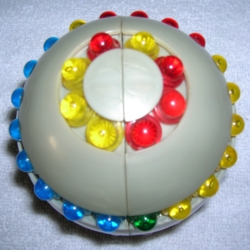
Phase 2 is a little more complicated, since we can no longer freely
slide LM without disrupting the blue beads. Flip
the entire Orb over so what used to be the UM is now LM,
and vice versa. All of the blue beads should now be on the left half of
LM, running from the back of the great circle, to within two beads of
the front of the great circle. We are going to repeat Phase
1,
substituting green for
blue, but we are going to transfer all of the green beads from U or L
to the left half of UM. Once again we should find the
largest
group of adjacent green beads in UM, and slide them just to the left of
the great circle. Now any green beads already in U or
L can
be moved just as we did in Phase 1, but after every transfer of a green
bead, slide LM so
that the blue beads are in their correct position.
If
all of the unconnected green beads are now in the two middle tracks, we
need to get them one or two at a time into U. If a green
bead is
in the right half of UM or LM, twist 90 degrees (two clicks) clockwise,
and slide the combined track until the bead goes into the left half of
U, then twist 90 degrees anticlockwise to return to normal four-track
position. Now move from U to UM as normal.
An
extra maneuver is needed to get
a green bead out of the left half of LM or UM. If a green bead
is
one of the first two on the left half of LM, slide LM to the right so
that the green bead crosses into the right half of LM. Twist
90
degrees clockwise and slide the green bead into the left half of U,
twist 90 degrees anticlockwise, and return the blue beads to their
correct LM position. If a green bead
is in the left
half of
UM but separated from the main group of green beads collected so far,
slide UM so that the green bead crosses the great circle
onto the right half. Now twist 90 degrees
anticlockwise,
slide the green bead into the left half of U, twist
90
degrees clockwise, and slide the green beads back into the
correct
position in
UM. When all eight green beads have been placed in UM,
running
from the
front of the great circle to within two beads of the back of the great
circle, Phase 2 is finished.
Phase 3: Twist the Orb two clicks anticlockwise (90 degrees)
so
that the right half
of U is aligned with the left halves of UM and LM. Slide
four green beads into the right half of U, which automatically also
slides four blue beads into half of L. Twist 90 degrees
clockwise to return to normal position, and slide both U and L four
positions, putting four green beads into the left half of U and four
blue beads into the left half of L. Repeat the procedure to
put
the remaining four greens and blue into U and L (it's not necessary to
slide U and L a second time). You will
find
that the green beads now occupy the entire U track, and the blues
occupy the L track. The photos below show the sequence of moves.
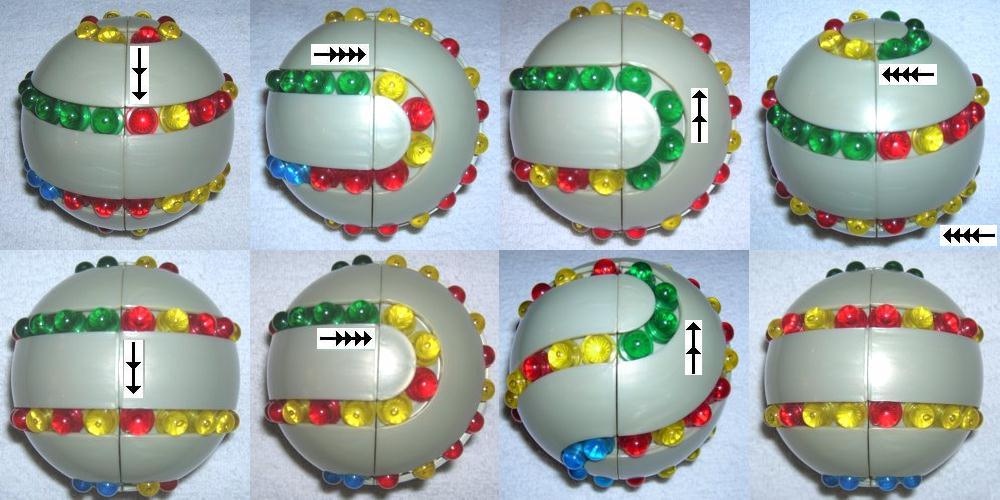
[There
is an alternate way to move all eight greens into U and all eight blues
into L at once, but it requires putting all 56 beads into a single
track. Twist one click anticlockwise, slide the track 8
positions
so that the green
beads all go into the left and right halves of U (see photograph
below), and twist the Orb back into standard position. You
may find this method faster if your Orb slides
more smoothly than mine.]
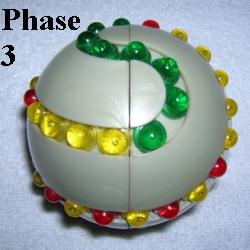
Phase 4: Beads will now be exchanged between UM and LM, without messing
up U or L. We will move the red beads to UM, and the yellow beads to
LM. (If the majority of UM is yellow, it is better to do the opposite.)
We will do a series of exchanges, trading a red bead in LM for a yellow
in UM. Rotate UM so that one yellow bead lies directly to the right of
the great circle on the front. Rotate LM so that one red bead lies
directly to the left of the great circle on the front. Twist the Orb
180 degrees, rotate LM one position to the right, and twist the Orb 180
degrees again. This exchanges the two beads. Yellow and red beads can
also be exchanged more than one at a time, by placing equal numbers of
yellow beads in UM and red beads in LM at the correct positions, and
shifting LM that number of positions to the right between the two 180
degree twists (see photos below). After a number of repetitions of this
maneuver, the Orb will be completed. With a little practice, you should
be able to solve the Orb in under 2 minutes.
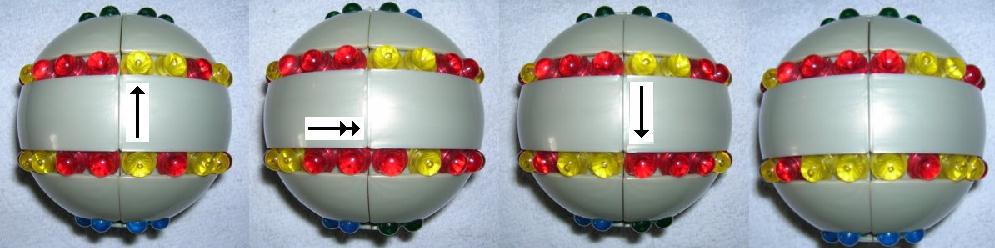
Double exchange of beads in phase 4
ImpossiBall and Kilominx
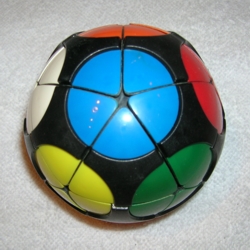
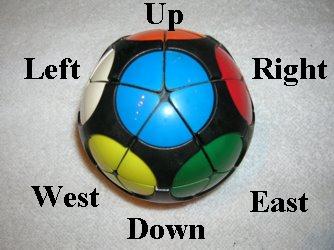
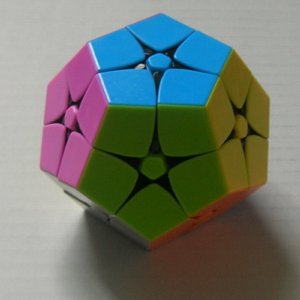
Diagram 1 -- names of faces -- pairs of opposite faces are FB,
UD, LI, RS, WP, and EA.
The ImpossiBall (sometimes rendered Impossi*Ball) is a twisting puzzle invented by
William O. Gustafson
in 1981, and also known as IncrediBall. The ImpossiBall is a rounded
icosahedron, consisting of 20 triangular pieces fitted together into a
spherical shape. Each triangle has three different colors on its three
corners. There are six colors in all (e.g., red, orange, green, blue,
yellow, and white). The pieces turn five at a time, with a flexing
motion. There are twelve groups of pieces (called faces) which can be
turned, like the twelve faces of a dodecahedron. In the Start position,
the circle in the middle of each face is a single solid color. Pairs of
opposite faces have circles of the same color. As usual, as the faces
are turned at random, the colors become mixed up, and the object of the
puzzle is to return a scrambled ball to its original position. For each
of the 10
combinations of three colors, there are two pieces with those colors --
one with the colors in clockwise order on its corners, the other with
the colors in anticlockwise order (so antipodal pairs are not
interchangeable). The total number of combinations
possible on the ImpossiBall is 20!*(3^20)/(6*60), or
23,563,902,142,421,896,679,424,000. The ImpossiBall was one of
the first twisting puzzles without stickered pieces.
The solution will use 72 degree turns, clockwise and anticlockwise, of
seven faces, called Up, Down, Front, Left, Right, West, and East. For
completeness, the five remaining faces can be labelled Back,
Europe (P), Africa
(I), Asia (A), and Australia (S), but we do not use turns of any of
these faces in the sequences used in the solution. These twelve faces
are located as
indicated in Diagram 1. Clockwise turns are indicated by the
capitalized initial letter of the face being turned; anticlockwise
turns are similarly indicated by lower case letters. A 2 following a
letter indicates that the face should be turned 144 degrees in the
direction indicated. A number following a group of turns in parentheses
indicates that the group of turns should be performed that many times
in succession. For conciseness, certain turn sequences are designated
by the single letters C, H, M, X, and Y (C, M and Y have inverse
sequences, designated c, m and y). A piece will be designated by the
initials of the three faces it lies in (e.g. FLW).
The solution proceeds in five stages. Stage 1 places the five pieces of
the front face, and turns that face to become the down face. Stage 2
places the five pieces adjacent to the down face. Stage 3 places the
remaining five pieces of the equator, and turns the ball so that the
face yet to be done is the front face. Stage 4 positions the five
pieces of the front face. Stage 5 orients the five pieces of the front
face to complete the solution. This solution relies heavily on the
various diagrams below, so study them carefully.
Begin stage 1 with the scrambled ball in any orientation. Consider the
piece at FLW to be correct, and use it as a guide to place the other
four pieces of the front face. Look for the piece which can be placed
at FWE (location shown in purple above). One of its edges must match
the right edge of FLW, and its third color must not appear on FLW.
Maneuver this piece to DWE without disturbing the front face. Check the
Stage 1 diagram (above left) to see which of the three orientations it
is in, and use the indicated sequence to put it in place. Now turn the
entire ball, keeping the same face front, so that the piece just placed
becomes the new FLW. The next piece to be placed must match the free
edge of FLW, and its third color cannot appear on any piece already
placed. Maneuver this piece to DWE without disturbing pieces already
placed, use the sequence in the Stage 2 diagram (above right) matching
its orientation, and
turn the whole ball as before so that the newly placed piece is at FLW.
Use the same process to place the last two pieces of the front face
(the last piece to be placed must match the edges of FLW and FRE, and
will require a slightly longer sequence, shown in red, for the first
two cases).
Before beginning stage 2, turn the ball so that the solved face is now
the down face. Now find the piece which belongs at FWE. It matches the
top edge of DWE, and its third color is the same as the part of the
back which lies on the down face. Maneuver this piece to FUL without
disturbing the down face or any pieces already placed in stage 2. Check
the orientation of the piece on Diagram 3, and use the indicated
sequence to place it correctly. Now turn the entire ball, keeping the
same face down, until the face at FWE is incorrect. Use the same
procedure to place the remaining four pieces adjacent to the down face.
Stage 3 is somewhat similar to stage 1, but uses different sequences.
Turn the entire ball upside down, so that the up face is now the
correct one. Find a piece on the down face which does not have a corner
the same color as the on the up face. (If no such piece exists, turn
the ball so that the piece at FWE is wrong, and use the sequence eDE to
bring this incorrect piece to the down face). Turn the down face so
this piece is under its correct location, and turn the whole ball,
keeping the same face up, so that the piece is at DWE and belongs at
FWE. Check the orientation of the piece in the Stage 3 diagram (above),
and use the
indicated sequence to place the piece. Again use the same procedure
four more times (if necessary) to complete the equator.
Before performing stage 4, turn the entire ball so that the face still
to be solved is the front face. Turn the front face so that at least
one of its pieces is in the correct location (regardless of
orientation). Now check to see how many pieces are incorrectly
positioned. There will be none, three, or four. (If there are
three incorrectly placed, there is a way to turn the front face so that
either H or X is reached (see the last four diagrams above)).
Determine how the
incorrectly positioned pieces must be swapped to make them all correct,
and find a picture in the Stage 4 diagram which matches the situation
(turning
the entire ball as necessary). Use the indicated move sequence to place
all of the pieces correctly. Note that the double bicycle sequences H
and X form the basis for all of the sequences. Now only
one more stage is required to finish the solution.

In stage 5, check to see which of the five front pieces need to be
twisted, and in which direction, in order to orient them correctly.
Find a picture in the diagram which matches the situation (again
turning
the entire ball as necessary). A plus sign (+) indicates a piece which
needs to be
turned clockwise; a minus sign (-) indicates a piece which needs to be
turned
anticlockwise. Note that there are three basic sequences: the meson M
(and its inverse m), the baryon Y (and its inverse y), and the double
meson C (and its inverse c). The baryon is actually Benson's
Twisterflipper transported to the ImpossiBall. Other sequences
are built from these six
sequences. When the correct picture has been located, and the indicated
sequence performed, the ImpossiBall will be solved. This solution takes
a maximum of 21, 28, 40, 9, and 20 turns for the successive stages, and
can thus solve any scrambled ball in 118 turns or less.
There is also a somewhat easier version of
ImpossiBall with 12 different colors. This is solved in exactly the
same way, but the pieces are easier to pick out since there are no
mirror-image equivalents.
Even easier is the Kilominx, a new dodecahedral version, which has 12
colors and miniature centers in the middle of each face; it is
essentially an edgeless Megaminx. The Kilominx also turns much
more smoothly than the original ImpossiBall.
Megaminx
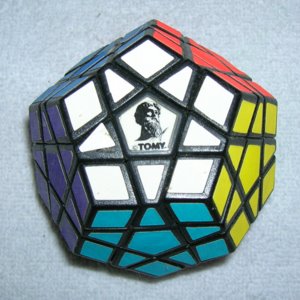
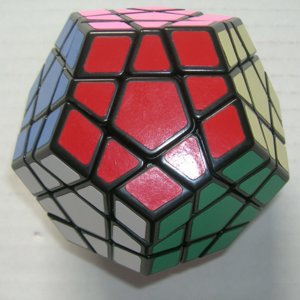
Megaminx is another dodecahedral puzzle, first referred to as the
Magic Dodecahedron. It was independently conceived by several people
with different mechanisms; Christoph Bandelow had an early patent and
is often credited as the inventor. Mèffert first produced a commercial
version in 1982. It is similar to a Kilominx with outer layers cut
thinner, so it has both centers and edges. Some versions have only
six colors (with opposite sides the same color), but we will look here
at the 12-color version.
The solution we are presenting here uses only six outer turns in
sequences: Up, Front (which intersects Up), Left and Right (which both
intersect Up and Front), and West and East (which intersect Front; West
also intersects Left, and East intersects Right). Most of
these sequences are well-known (some can be found in the bilingual
leaflet which comes with many manufactured Megaminxes).
Stage 1 -- Up Edges

First we place all five edges adjacent to one of the centers.
Bring the edge which matches the front and up centers onto the front
face using turns of the six lower faces as needed (if it is in the top
half of the puzzle, turn an upper side layer to drop it into the bottom
half).
Stage 2 -- Four Up Corners
Next we place four of the Up corners, using drop insertions similar
to the 3x3x3 cube. Leave the fifth slot open so that the high edges can
be placed easily.
Stage 3 -- High Edges
Now place all five high edges (the ones just below the Up layer),
using drop or push insertions as needed. After each
insertion, hold the Up layer in place and turn the entire rest of the
puzzle so that the next edge slot you want to fill is directly below
the empty corner slot in the Up layer.
Stage 4 -- Last Up Corner

This needs to be inserted via a corner tricycle, as in the 3x3x3
solution. Turn the entire puzzle so that the
almost-complete layer is the Right layer (to avoid disrupting any
completed pieces), and bring the corner which is being inserted to FLU
(with the target color [light blue here] on the Front face if
possible). If the target color is on one of the other two
faces, make the indicated setup moves before carrying out the standard
corner tricycle lURuLUru. Now turn the whole puzzle so that the completed layer is on the bottom.
The next two stages are actually going to be interleaved: place a lower
middle corner and its two adjacent edges (Stage 5), do the same for an
adjacent corner (Stage 5 again), then place the upper middle corner
between them and the high middle edge above that (Stage 6). Then
return to Stage 5 to do another corner and two edges, and then the
corner/edge between them. After the fifth corner and two
edges have been completed (fifth time through Stage 5), there will be
two more corner/edge pairs to complete (last two times through Stage
6). The reason for using this sequence is that corners which have not been completed yet can freely be turned to
release corners and edges which are needed.
Stage 5 -- Lower Middle Corners/Low Edges
Each corner is placed at FWE by getting it onto the Up
layer. If the correct color is on the Up face, do a drop
insertion as shown below. Otherwise, turning the Up layer to
either UFL or UFR will put the correct color on the Front face; then
turn the Front face to put it in the correct location.
After each lower middle corner is put in position, place the two
adjacent lower middle edges.
Stage 6 -- Upper Middle Corners/High Middle Edges
Bring the corner which needs to be placed at FRE to
UFR. Place it with a drop insertion or upside-down
insertion as shown above (diagrams show Front and Right
faces). Then bring the edge which goes above it to either
UL or UF (with a color matching as shown below), and place the edge
using one of the two sequences below.
Last Layer
Stage 7 -- Edge Tricycles
The easiest edge tricycle is a slight variant of the Sune.
This disrupts four corners, which will be fixed in Stages 10 and
11. Alternatively, a six-move commutator, which is perhaps
easier to remember (though the Sune is faster), cycles three edges
while flipping two of them.
Stage 8 -- Corner Tricycles
This is similar to the 3x3x3 cube, but cycles three corners on the Front face instead of the Up face. Hold the last
layer as the front face, as in the diagram above, which shows a
clockwise tricycle.
The shortcut above swaps two pairs of corners.
Stage 9 -- Edge Flips and Corner Twists
The easiest method of flipping edges on the last layer of Megaminx is
by using monoflips in inverse pairs. To flip the edge at UF, turn
the Left and Right layers away from the Front face, turn the Front face
two turns in one direction, turn the West and East faces (below
the Front face) in the same direction, make two more Front turns to
return the edge to FU (flipped), and reverse the Left and Right
turns. Turn the Up layer anticlockwise one or two turns to bring
the second edge to be flipped to UF, and make the same set of turns as
before, but in reverse, swinging the edge around the front face in the
opposite direction.

Corners can be twisted in pairs in a similar manner: twist a corner at URF
clockwise via (RfrF)2 or anticlockwise via (fRFr)2 (this temporarily disrupts some of the rest of the puzzle), turn
U as needed to bring another corner to URF, and twist as required. The above
diagram shows a simple meson; any combination of twists can be performed in any order,
and the rest of the puzzle will be restored automatically when all twists have been performed.
Often a mixture of twists and flips is easier to handle using
the
same Benson method we used for the 3x3x3 cube. rur3brb3ubu3 twists three corners clockwise and flips the two intervening edges, exactly as its 3x3x3 counterpart. U3BUB3RBR3UR
does the same thing anticlockwise. Note that we have written all
of the turns here in the same direction: the first is equivalent to ruR2brB2ubU2, and the second to u2BUb2RBr2UR; you can do them in whichever way seems easier.
Gigaminx
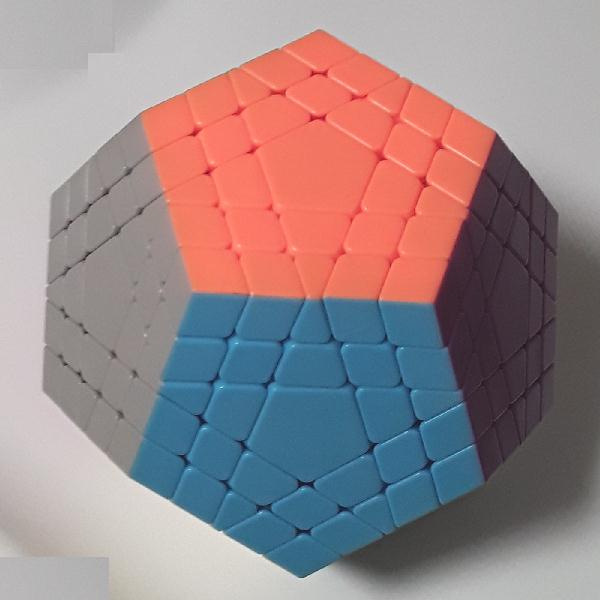
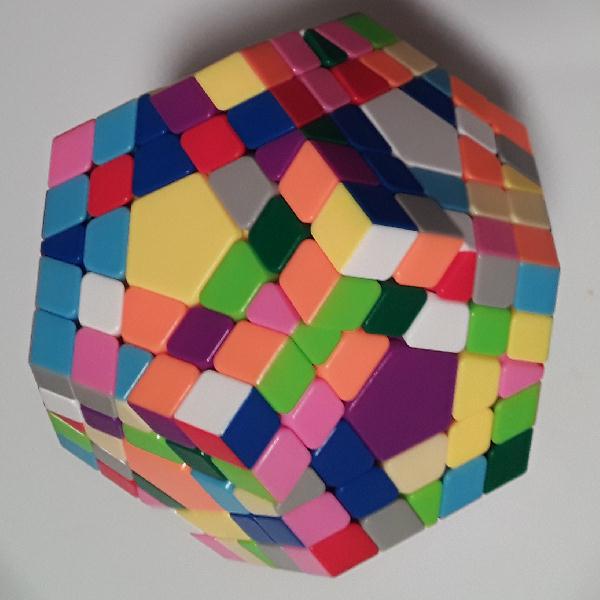
The Gigaminx is a larger member of the Megaminx family, bearing
the same relationship to Megaminx as the 5x5x5 cube does to the
3x3x3. Each edge has three sections, and each center has
five
edges and five corners. I bought a stickerless version from
Shengshou; it's about the size of a softball. It's not
especially difficult to
solve by a reduction method: I was able to work out a
solution within a few hours the first day I had the puzzle.
Stage 1 -- move five center-edges and five center-corners to each of
the six centers on one half of the puzzle (do one center, then the five
centers adjacent to it).
Stage 2 -- turn the six complete centers to the bottom, and move
five center-edges to each of the remaining centers.
This can be done by repeatedly using a push insertion to move a
center-edge from the Up face to the Front face.
Stage 3 -- Move the five center-corners to the six remaining
centers. The routine below moves the fifth center-corner from the
Up face (orange in the photo) to the Front face (gray slot).
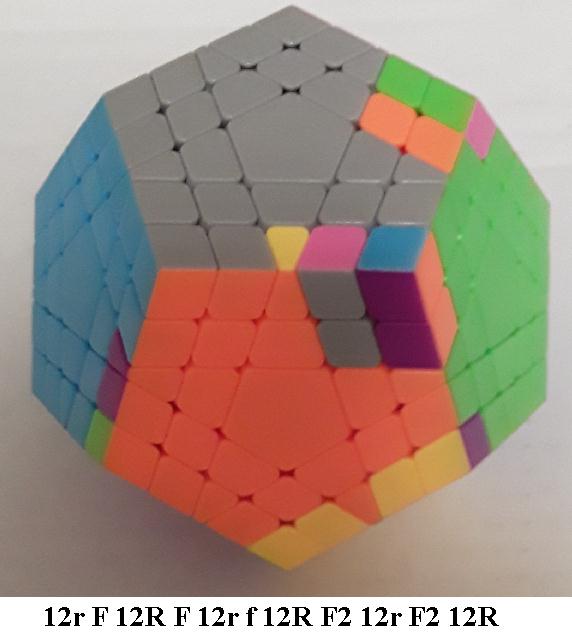
Stage 4 -- Connect outer edges two at a time to their middle edges,
using the
same tricycle as the 5x5x5 cube. This is easy, but
takes a long time, as there are 30 edges. In the photo
below, we want to move the outer edges from UF to FR and from FE to
UF. As in the larger cubes, we don't care about FR going to EF.

Stage 5 -- Complete the solution as a Megaminx, moving only outer layers.
There are even larger versions: the order-7 Teraminx and the order-9
Petaminx, the order-11 Examinx, and the order-13 Zettaminx are all
commercially produced and sold; larger ones have been custom-made with
3D printers.
Easiest Twisting Puzzles for
Beginners
Disc Pyraminx

The Disc Pyraminx is a reduced Petal Pyraminx (corner turns do not
intersect other corners). This is almost trivial to solve:
turn the four corners so their colors match the concave triangular
centers, and swap pairs of football-shaped wedges via drop
insertions. E.g., turn the top corner and then the front face disc 120
degrees clockwise, then the top corner anticlockwise; this swaps the
upper wedge on the right face with the lower left wedge on the front
face). Possibly the easiest twisting puzzle available.
Ivy Cube
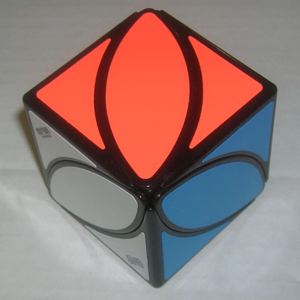
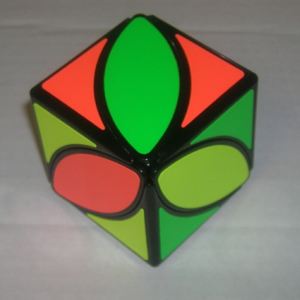
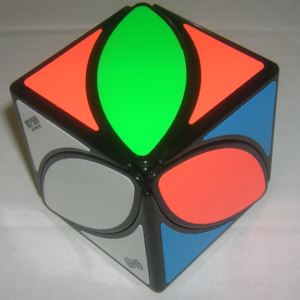
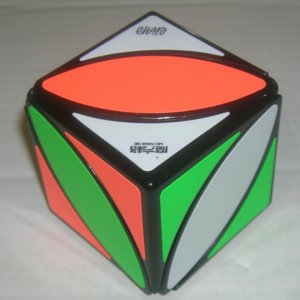
The Ivy Cube, designed by Eitan Cher, is essentially a Skewb with
restricted movement: each face
has a football-shaped center, and corner pieces are missing where three
footballs meet. The diagrams above show the Front, Up, and
Right faces. Only four corners can turn: Left and Right cut
through the Up face, Front and Back cut through the Down face.
The puzzle can be solved quickly: turn the Left and Right corners so
their colors match on the Up face, and Front and Back so their colors
match on the Down face. Only three center tricycles are needed to
swap all the centers correctly: the Flower (second diagram above)
rotates three centers anticlockwise via RlrL (clockwise lRLr); the
Wraparound (third diagram, Left face is green with blue center) swaps
R==>U==>L==>R via RLrl
(turn the puzzle 180 degrees if you need the reverse); the Hexagon (fourth diagram,
rotated 90 degrees to show the Right corner frontmost) rotates
anticlockwise via FBRbrf
(clockwise FRBrbf).
Dino Cube
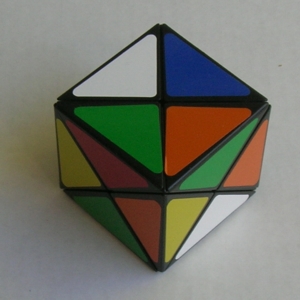
The Dino Cube is a small and easy cubical puzzle with no corner or
center pieces (photo above, scrambled). It consists of twelve
edges, which can be turned three at a time around each of the cube's
corners. The version I have turns
rather slowly and the faces must be aligned well before turning again;
it is not made well for speed solving. Mine is a six-color version, which is easy to solve since
the edges cannot be flipped: an edge in the correct place is
automatically
oriented correctly. There are two mirror-image solutions (e.g.,
if blue is Up and red is Front, Right can be either yellow or
white). You can switch from one solution to its mirror image
(swapping the Front and Back colors) by
the elegant ten-turn sequence (FrFrF[F2])2,
where F is a clockwise turn around the URF corner, r is an
anticlockwise turn around the UBR corner, and [F2] is a half turn of
the whole cube keeping the Front face fixed. Several
listings on Amazon have the notation: (difficulty
8 of 10), which is absurd: this is one of the easiest
twisting
puzzles there is, ideal for beginners (probably only the Disc Pyraminx
and Ivy Cube are
easier). There is also a dodecahedral form, the Dino Dodecahedron.
Redi Cube
Another invention by Oskar van Deventer is the Redi cube, in which the
corners rotate, rather than the face layers. There are
eight corners and 12 edges, but no centers. The corners are
restricted to their original positions, and can only rotate. The
edges can be freely interchanged (subject to the usual parity law which
prevents a single pair of edges from being swapped), but their
orientation is fixed by their position: an edge in the correct position
is automatically flipped correctly. The Redi Cube is only a little more
difficult than the Ivy Cube or Dino Cube, since orienting corners is
trivial, and edges can be drop-inserted (to finish two or three
perpendicular
layers) and swapped by simple three- and four-move
tricycles (to place the last five edges).

Shortcuts
There is also a dodecahedral form, the Rediminx.
More
Solutions Coming
Pyramorphix
What appears to be a trivial two-layer Pyraminx is actually a
shapeshifting, disguised 2x2x2 cube, which turns in halves along four
axes. We saw the larger three-layer version of this earlier among
the Picture Cube variants. Pyramorphix, however, is easier to
solve as a tetrahedral puzzle rather than by using a 2x2x2
method. The solution is in four easy stages:
(1) Return to its original shape
(2) Put the corners in their correct relative positions
(3) Twist corners as needed
(4) Exchange the centers
Master Pyraminx
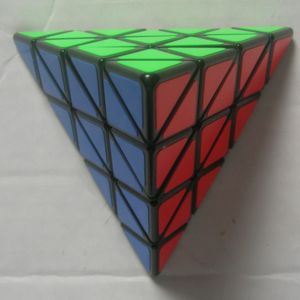
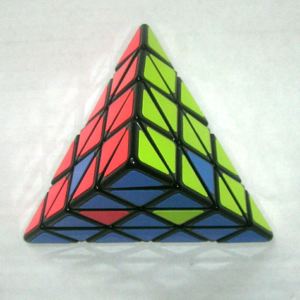
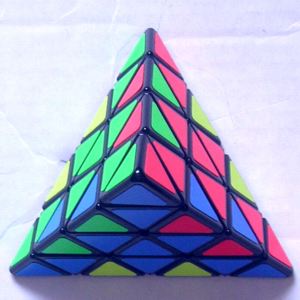
The Master Pyraminx (above left, unscrambled) is the next largest
member of the Pyraminx family. It has four centers, four
(trivial) small corners, six wings, and twelve edges. Wings
can be flipped in pairs: the photo above center shows the puzzle
unscrambled except for two wings. Unlike its smaller cousin, the
Master
Pyraminx has two edges of each color combination, and edges cannot be
flipped in place: the orientation of every edge is determined by its
position, as shown in the diagram
below, which shows how the colors of a single edge appear in each of
the edge positions (each edge has a twin which would appear reversed in
each position). The photo above right appears to show all twelve
edges flipped, but actually each pair of same-colored edges has been
swapped.
Except where indicated, diagrams are
shown from above, and give a panoramic view of the Front, Left, and
Right faces.
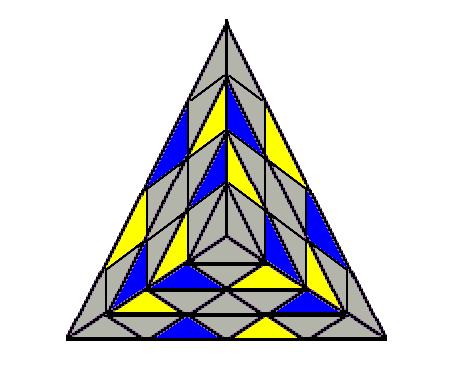
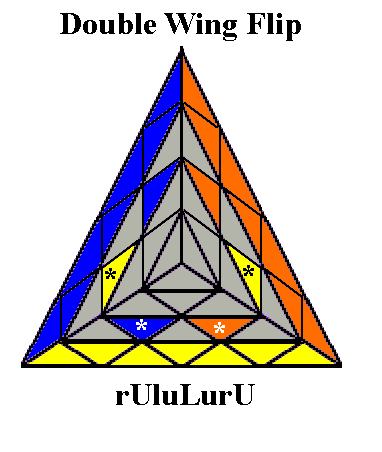
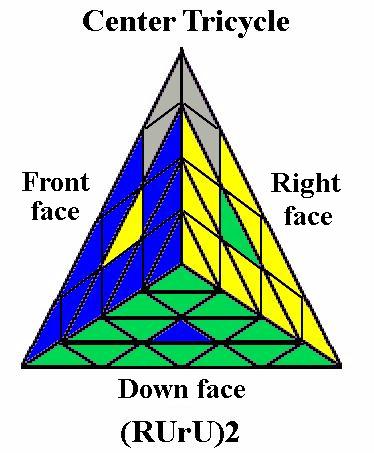
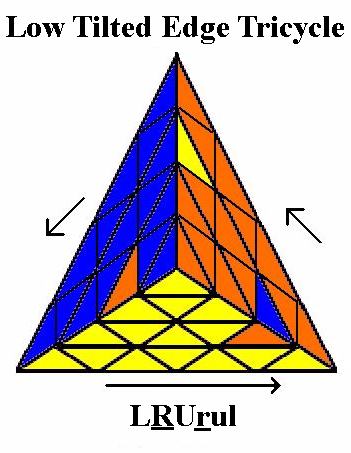
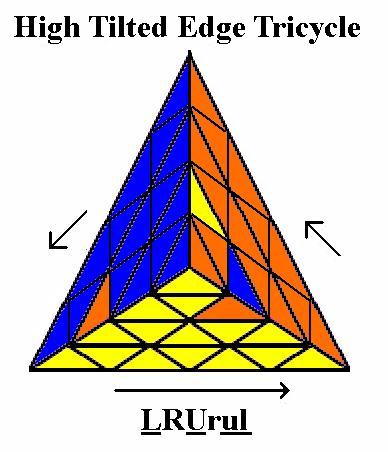
Professor Pyraminx
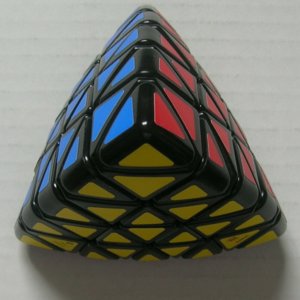
This is the five-layer version of the Pyraminx, invented by Timur
Evbatyrov and produced by Mèffert. It is not easy to find:
I bought mine at a reasonable price (about $40 US including shipping)
from Puzzle Master in
Saskatchewan, Canada. It is pillow-shaped like the 7x7x7
V-Cube. There are 54 visible pieces: 4 corners, 4 trivial tips,
12 wings (6 pairs in each combination of colors), 6 inner edges, 12
outer edges (in pairs like the wings), 4 inner centers, and 12 outer
centers. The design is not flawless: edges have a tendency
to pop out, but can easily be pushed back in.
It can be solved along the same lines as the Master Pyraminx, with
variations of the same routines (e.g. Tilted Edge Tricycles are varied
slightly to produce Tilted Wing Tricycles).
There are also 6x6x6 (Royal Pyraminx)
and 7x7x7 (Emperor Pyraminx)
versions of this puzzle.
Master Skewb
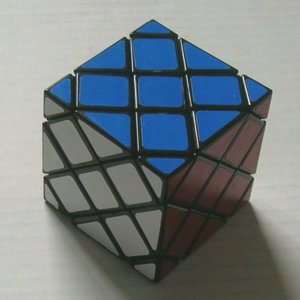
Face-Turning Octahedron
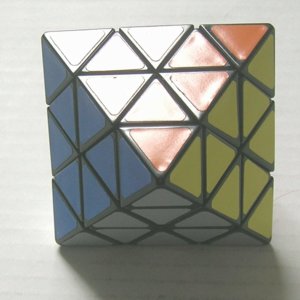
Siamese Cubes
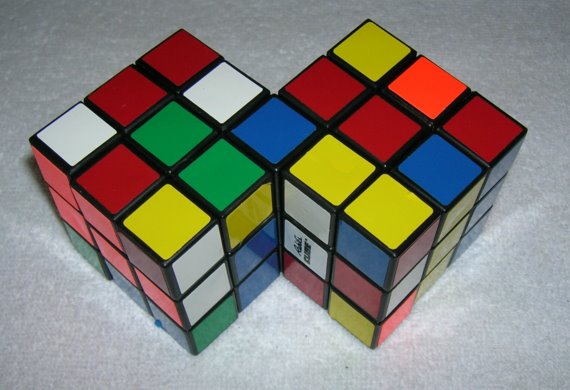
This is a mixed-up Rubik's Zwillinge (twins) made
in 1983 by Arxon, the German division of Ideal (mine is
actually colored wrong). This was also sold in
English-speaking
countries as Rubik's Mate. This is actually two conjoined
copies
of the
same puzzle, the Bandaged Rubik's Cube suggested by Tony Fisher: a
Rubik's cube in which turns along one axis (say F/f, F*/B*, and B/b)
are disabled because one column of cubes is taped or fused
together. Sadly, mine is now broken.
Square-1
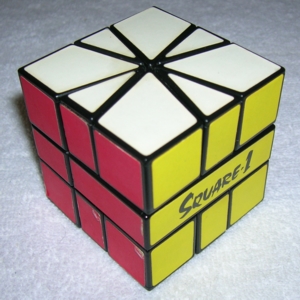
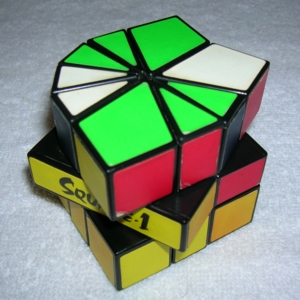
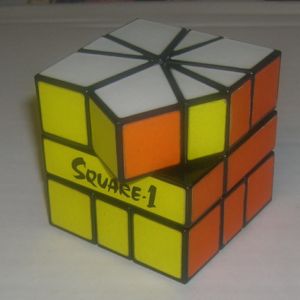
Of dozens of twisting puzzles to appear since Rubik's Cube, perhaps the
most intriguing is Irwin Toys' 1991 puzzle Square-1
(also known as Back to
Square One and Cube-21),
invented by
Vojtěch Kopský and Karel
Hršel. It consists of a cube sliced vertically into thirds, with the
top and bottom
layers cut into eight pieces each (four thick and four thin) by four
cuts at 30 degree
angles. The center third has only one cut, which must be lined up with
any turn cutting
through all three layers. When scrambled, Square-1 produces a variety
of strange shapes
(above center) on top and bottom, and it is by no means easy even to
return it to a cubical shape, let
alone restore the top and bottom colors. Unlike Rubik's Cube, it has no
parity restrictions on
swaps; the cover of Cubism For Fun 28 shows a shape, discovered by
Anton Hanegraaf, in
which one corner has been swapped with an adjacent edge (photo of the
same position above right). Despite its appearance, the puzzle is
essentially two dimensional: the pieces have fixed orientation (the
pieces always have their green or white sides showing on the Up or Down
faces); the only thing that matters is the sequence of pieces in each
of the two layers. It is actually similar to a double track
version of TopSpin where the turntable cuts through half of each track
of 12 'pieces', with the constraint that some of the pieces are locked
together in unbreakable pairs. Kiltinen's book on oval track
puzzles (see the Bibliography) doesn't cover Square One, but the theory
he
describes should apply.
Several
solutions have appeared (see Bibliography); the most concise and
efficient is Edward Hordern's. Richard Snyder has produced a
comprehensive booklet which includes a complete solution with plenty of
useful sequences, as well as dozens of pretty patterns. Clarence
Hewlett has shown that every shape can be returned to a cubical shape
with no more than seven Right turns (cutting through all three slices).
Square-1 originally sold for about $10; it is still widely
available from puzzle dealers on eBay and elsewhere.
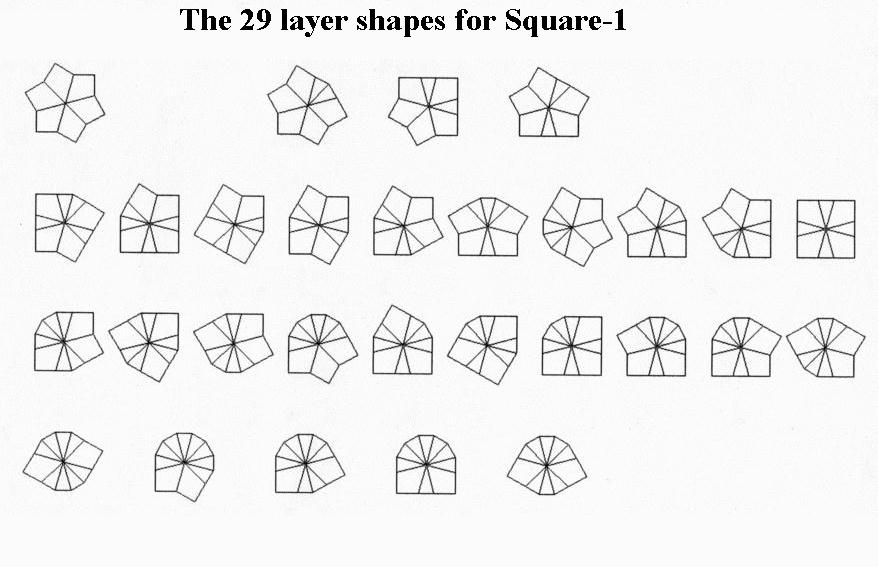
Square-2
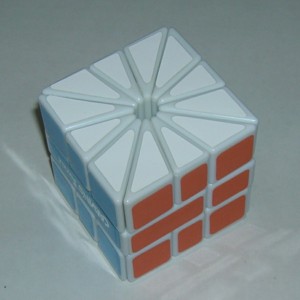
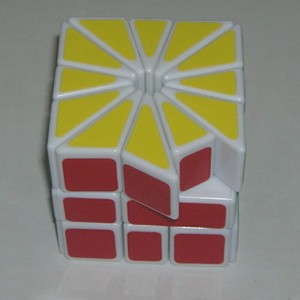
Square-2 is a modified version of Square-1, in which all of the pieces
are cut in 30 degree segments. This actually makes the
puzzle much easier, despite a
far larger number of possible
shapes. In solving Square-2, it is not necessary to bring the
puzzle back to a cubic shape until the end of the solution.
Half of the bottom layer can be solved by bringing pieces one at a time
from the top layer (just to the right of the division) to the bottom
layer (just to the left of the division) with the simple 180 degree
Right turn. A simple routine, RuRuRUR,
then allows the other six pieces to be added to the bottom layer one by
one. Once the bottom layer is completed, a second basic
routine, RuRUDRdR,
is used to swap adjacent pairs of top layer pieces. A
parity error
can occur at the end, with two adjacent pieces swapped (above
right). This can be fixed by swapping one of the pieces all the
way around the top layer in the opposite direction (e.g. in the second
diagram, the piece in the middle of UF is swapped with the piece to its
left, then successively clockwise around the top layer).
Alexander's Star
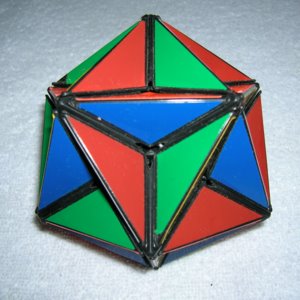
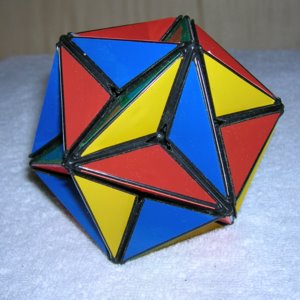
In 1982 Ideal Toys put out another twisting puzzle,
called Alexander's Star, invented by an American mathematician, Adam
Alexander. This failed to make a big splash, perhaps due to a fragile
mechanism: it is hard to turn quickly and breaks easily. It also has
an unusual coloring pattern: each flat pentagon is a solid color when
unscrambled, while the raised five-pointed stars are of mixed colors.
The puzzle is shaped roughly like a dodecahedron,
consisting of 12 overlapping five-pointed stars, each able to rotate.
(Note: to avoid confusion between the name of the puzzle and the term
for a five-pointed star, the puzzle will always be capitalized, while
the uncapitalized word star will refer to a five-pointed star.) There
are two stars each of six different colors (red, orange, green, blue,
yellow, and white). Each arm of each star is divided into two colors,
and can move as part of two different stars. There are a total of
30 arms (hereafter called edges). There are two edges with each of
the 15 different pairs of colors; each pair of identical edges start at
antipodal positions. When the puzzle is in the Start position, each
star
has points containing five different colors, and a solid background of
the sixth color. This background color will be called the color of that
face. Faces
on opposite sides of the star have the same color. The object of the
puzzle is to return a scrambled Star to its original position. One
difficult feature is that any pair of edges which have the same two
colors are indistinguishable from each other, and it is necessary
(about half the time) in the last stages to exchange two of these
indistinguishable edges, because only half of the 30! permutations of
edges are possible. The total number of combinations possible is
30!*(2^30)/(4*60*(2^15)), which is equal to
36,215,857,126,357,819,205,810,651,136,000,000. We use basically the
same notation as for ImpossiBall and Megaminx. The Star has
twelve faces: Front, Up, Left, Right, West, East, Down,
Back, Asia, auStralia, euroPe, and afrIca. The last five names are
given for completeness: only the faces F,L,R,W,E,U, and D will be used
in the sequences. Edges are designated by the two faces they lie on.
There are five basic sequences: one double-edge flip (called G); one
quadruple-edge flip (called Q); two double bicycles, which exchange two
pairs of edges
(called X and H); and one tricycle, which cyclically exchanges the
locations of three edges (called T).
The solution proceeds in seven stages:
Stage 1 - place the five edges of the front star
Stage 2 - place the background of the front face
Stage 3 - place the equator edges which slant to the left
Stage 4 - place the equator edges which slant to the right
Stage 5 - place the background of the (new) front face
Stage 6 - position the five edges of the (new) front star
Stage 7 - flip any disoriented edges on the front star
[Details and diagrams
to follow...]
The Missing Link
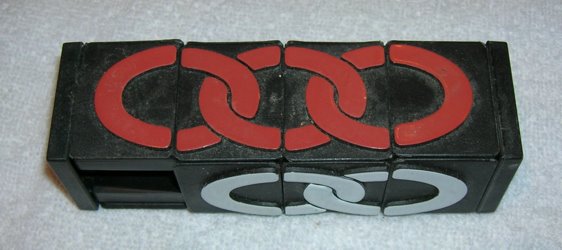
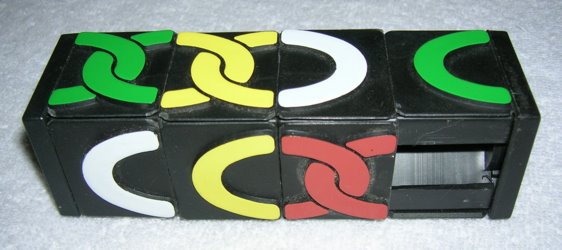
Vertex Turning Octahedron
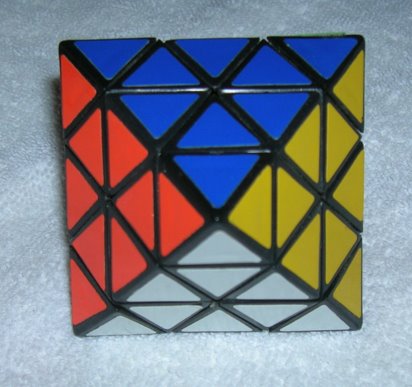
Georges Helm was kind enough to send me an octahedron, a puzzle in the
shape of two square pyramids connected base to base. This can be solved
in a variety of different ways, due to its similarity to both Pyraminx
and the standard cube. It is actually equivalent to a cube with no
corners, but with centers whose rotations are distinguishable (like a
picture cube). Therefore any 3x3x3 cube solution can be adapted to
solving it (with the addition of face center sequences). However, I
prefer to solve it in a manner similar to the Pyraminx (some of the
sequences used on the Pyraminx are similar or identical on the
octahedron).
Rotational Puzzles
Engel's Puzzles
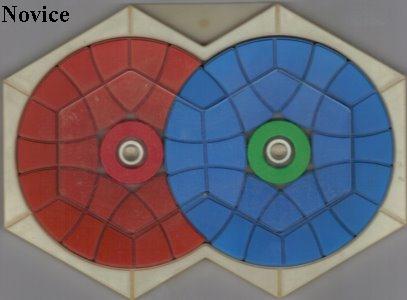

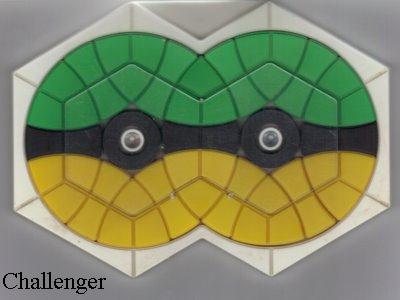
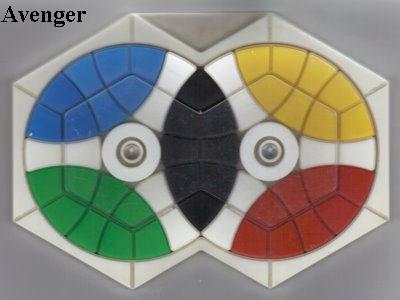
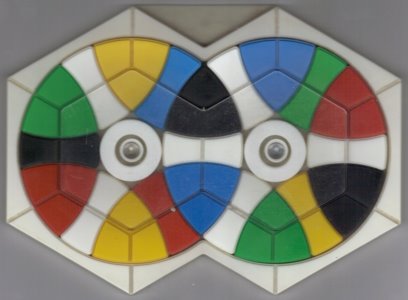
Engel's Enigma -- invented by Douglas Engel,
published by General Symmetrics, 1986,
$14 postpaid in U.S. (add 20% for foreign orders). Write for catalog.

Engel's Enigma is a twisting puzzle consisting of two overlapping
circles, each composed of 12 separate pieces. The photograph above
shows a hand-painted example from my collection. Three pieces are
shared by the circles, making 21 pieces in all. The pieces are of two
kinds: roughly triangular pieces Engel calls stones, and roughly
rectangular pieces called bones. The puzzle is colored, using six
different colors, so that each bone has two colors and each stone has
three. The two circles can be rotated independently at 60 degree
intervals, and when a series of random rotations is made, the pieces
become scrambled like those of other twisting puzzles. The Enigma was
introduced to the world by A. K. Dewdney in Scientific
American
and in
1986, Engel began producing it through his company, General Symmetrics,
Inc. Engel has also written a book on puzzles in general, including
solutions to the Enigma developed by Father Ralph L. Aschenbrenner and
L. E. Hordern. GSI makes a number of other puzzles, including several
less difficult versions of the Enigma. Scott Marley describes, in Games
Magazine, how to use group theory to solve the Avenger, an
easier
six-color variant.
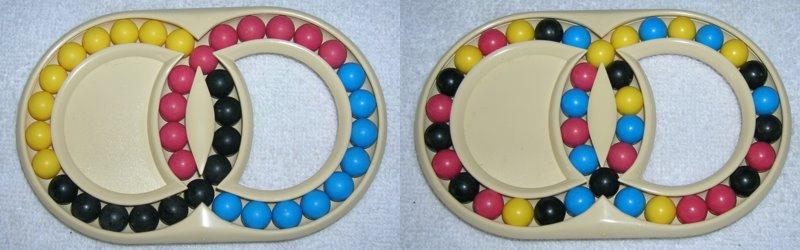
Unlike earlier puzzles of the same family, such as the
Hungarian Rings
(photos above, described in David Singmaster's Cubic Circular),
the
Enigma pieces have orientation as well as position, and Dewdney's
assertion that the puzzle is essentially one-dimensional is inaccurate.
The Enigma is a very difficult puzzle -- since there are only two
groups of pieces to rotate (compared to six on Rubik's Cube), maneuvers
tend to be quite long. There are also some troublesome traps which the
solver will often fall into, and the puzzle takes much longer to solve
than Rubik's Cube. My own solution takes around 400 moves and a good
deal of planning -- my more powerful maneuvers take from 40 to 80 moves
-- though there is probably much room for improvement. Any puzzlers who
enjoy twisting puzzles should find Engel's Enigma both fascinating and
aggravating.
Top-Spin and Back-Spin
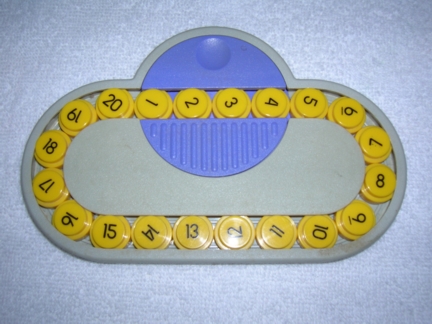

Top-Spin (Ferdinand Lammertink, $11, 1989) and Back-Spin ($12, 1991),
both published by Binary Arts (now ThinkFun)
In 1987, Binary Arts (now ThinkFun) published Spin Out, an
exceptionally well-made
variant of the classic Chinese rings puzzle. Two later puzzles which
maintain the 'spin' motif are Top-Spin and Back-Spin.
Both were invented by the Dutch puzzle designer Ferdinand Lammertink.
Top-Spin (photo above left) is an elegant puzzle,
consisting of a single loop
of 20 numbered discs (the discs are grooved so they stay permanently in
the plastic track -- by
pushing a single disc any distance the others obediently follow), and a
'turntable' which can reverse the order of any four consecutive discs
(e.g. 1234 ==> 4321). The puzzle, when purchased, has the
numbers 1 and 2 reversed in order. The initial challenge is to put them
in the correct order. A second challenge is to reverse the numbers so
they read 1 to 20 anticlockwise. A third challenge is to keep the
numbers in the same order, but turn the turntable upside down (i.e.
rotated 180 degrees). Solutions to all three problems are available
from Binary Arts for $1 and a SASE; Edward Hordern has published his
own general solution (see Bibliography). The puzzle is now out of
production.
A simple notation is:
L -- shift the loop one space anticlockwise and rotate the spinner 180
degrees
[1 2 3 4] 5 6 7 8 9 10 11 12 13 14 15 16 17 18 19 20 ==> [5 4 3
2] 6 7 8 9 10 11 12 13 14 15 16 17 18 19 20 1
L*10 -- do L (one anticlockwise and rotate) 10 times
[1 2 3 4] 5 6 7 8 9 10 11 12 13 14 15 16 17 18 19 20 ==> [14 2 3
4] 15 16 17 18 19 20 1 5 6 7 8 9 10 11 12 13
L10 -- shift the loop 10 spaces anticlockwise and rotate
[1 2 3 4] 5 6 7 8 9 10 11 12 13 14 15 16 17 18 19 20 ==> [14 13
12 11] 15 16 17 18 19 20 1 2 3 4 5 6 7 8 9 10
R -- shift the loop one space clockwise and rotate the spinner 180
degrees
[1 2 3 4] 5 6 7 8 9 10 11 12 13 14 15 16 17 18 19 20 ==> [3 2 1
20] 4 5 6 7 8 9 10 11 12 13 14 15 16 17 18 19
A simple way to reverse 1 and 2 (or any two numbers starting in the
first two spots in the spinner) is R3 L*16 L2 R L
Back-Spin (photos above middle and right) is a
two-sided puzzle consisting of
two plastic plates (which rotate freely relative to each other), with
35 colored balls held
between them in 12 oblong compartments -- holes a little smaller than
the balls allow the balls to show, but keep them from falling out.
There are nine colors of compartment (three colors have compartments on
both top and bottom, the other six are different shades of three other
colors). Each compartment holds three balls of the matching color,
except for one which only has two balls -- the free space allows balls
to be moved as in a sliding block puzzle. Rotating the plates and
shuffling balls between the top and bottom halves scrambles the balls,
with the usual object of restoring the balls so that each compartment
has balls of the matching color. This process is complicated by the
fact that half of the compartments are aligned around the edge of the
plate, while the other half run from center to edge. An entertaining
puzzle, not quite as hard as it looks at first. Back-Spin was
later sold under the name Loophole by ThinkFun's Xex division.
Both versions are now out of print.
Smart Alex and other sandwich puzzles
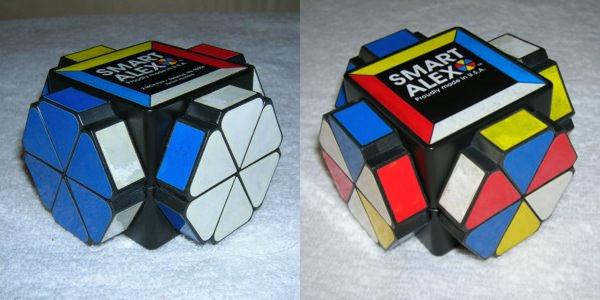
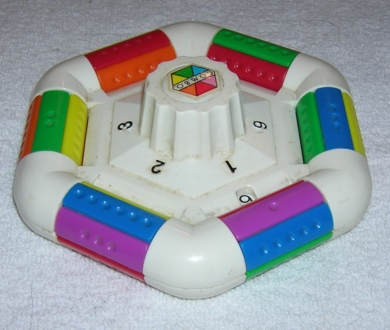
Smart Alex is a member of a subfamily of twisting puzzles
referred to as
sandwich puzzles (see the Bibliography). A Romanian
machinist,
Alex Pop, designed this puzzle in his head during sixteen months he
spent as a political prisoner. It was published by 2 MCH Fun in
1992, and sold for about $10. The puzzle consists of four
rosettes (one in each of four colors) with six petals each. The petals
can rotate in 60 degree intervals, and are attached to four sides of a
base whose two halves can rotate in 90 degree intervals. Random turning
of the rosettes and base mixes the petals, and the object as usual is
to restore the original colors. This is not as hard as most twisting
puzzles; almost half of it can be solved without any special move
sequences.
It seems to be quite rare nowadays.
The following two sequences are sufficient for solving the
remainder:
(1) UfuFUFu swaps the SW piece of the front face
and the NW
space on the right face (it also swaps NE and SE on the front face)
(2) URfUfuFUFuru swaps the SE and S pieces on the
front face, and also swaps NW and SW on the right face (this
swap is invisible if the right face has already
been solved).
Another puzzle of this
type, with six positions instead
of four, is Galaxy Lock
(originally available from Bits and Pieces for
$10.95, now out of print) -- the same solution
method used for Smart Alex
can be used to solve Galaxy Lock as well. Galaxy Lock
(scrambled, photo above right) is, I think, a
much less attractive-looking puzzle than Smart Alex.
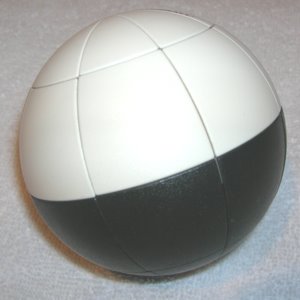
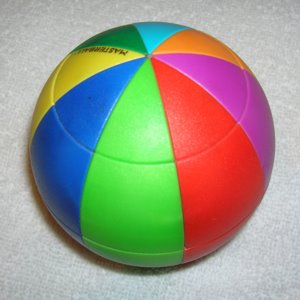
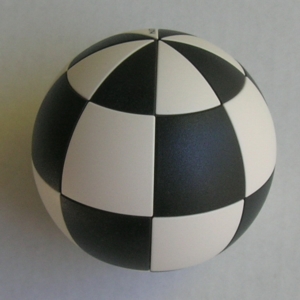
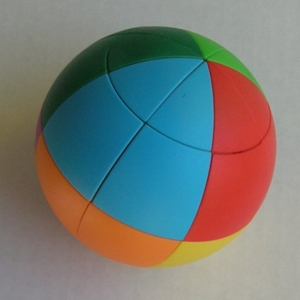
Masterball (Dr. Geza Gyovai,
$20 black and white, $25 color, 1992) --
originally published by Servicom A.G. and sold by World Wide
Games, now out of print
Masterball
is a twisting puzzle in the shape of a sphere cut into 32
pieces by eight vertical 'meridians' and three horizontal circles (like
an equator and two polar circles). There is a black and
white version which is very
easy to do, and an eight-color 'Rainbow' version which is moderately
hard. Picture versions are also available. On
any version, there
are four horizontal loops
of
eight pieces, each of which can turn independently in 45 degree
increments;
half of the sphere can be turned 180 degrees along any pair of opposite
meridians. It is quicker to make turns along the Prime Meridian
running from front to back, turning the right half of the puzzle 180
degrees (we designate this R, although it is always a half
turn),
though we also use F to designate a turn of the front half of
the
puzzle 180 degrees. In the picture second above, the Prime Meridian
runs
between Lime Green
and Red on the front, and its opposite (International Date Line?)
between Green and Cyan on the back. I refer to the other four
colors as Blue and Yellow (left) and Orange and Violet (right).
The object as always is to mix the pieces, and then restore the puzzle
to its original position. The eight-colored version is
likely to prove frustrating to most solvers.
The following routines
should prove useful:
RNRn -- swaps the piece just left of the Prime Meridian in the
upper polar circle with the piece just right of the Prime Meridian in
the lower polar circle
RnRn3s3RnRN4S4 -- swaps the two frontmost pieces of both polar
circles
N4FN4S2RnRn3s3RnRS2FN4 -- swaps the two frontmost pieces of the
North
polar circle only
RU4N4[U]RFR[U]RDN -- converts a position with the bottom half
solid black into a checkerboard
{N/n
= turn north pole 1/8 turn (1 click, 45 degrees)
clockwise/anticlockwise; N4 = turn north pole 180 degrees (4
clicks);
S/s = south pole
likewise (viewed from South Pole), R = turn right half of the
puzzle
180
degrees, F = turn front half of the puzzle 180 degrees along
the
East-West meridians, D = turn the third loop of pieces
(Southern
Hemisphere minus the South Pole) 45 degrees clockwise (viewed from the
South Pole); [U] turn the entire puzzle 45 degrees clockwise
(viewed
from the North Pole)}.
Rubik's Clock
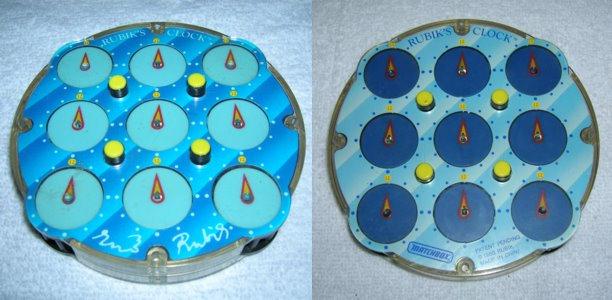
Rubik's Clock -- trademark of
Seven Towns Ltd., published 1988 by
Matchbox International Ltd.,
originally sold for $9
Somewhat lost in the shuffle after Rubik's Magic (reviewed in WGR7) was
Rubik's
Clock,
an entertaining but comparatively easy two-sided puzzle with nine clock
faces on each side -- four gears on the sides change the hour showing
on
one or more of the faces. Four buttons control which clock faces change
when each gear is turned. The object is to scramble the puzzle (by
pushing buttons and turning the knob at random), then restore the
puzzle so all 18 clocks show twelve o'clock. The solutions by Edward
Hordern and Angus Lavery (see Bibliography) are simple and
straightforward. The puzzle is
distantly related to Lights Out.
Matchbox, which is now part of Mattel,
is no longer in the
puzzle business, and Rubik's Clock is currently out of production. My
original copy no longer works --
the gears are jammed and the clocks do not rotate. You can usually find
copies for sale on eBay. At one time there was a simulator
program on the official Rubik site; there may be others around on the
Internet. New versions are being manufactured again, some with varying numbers of clocks on each face.
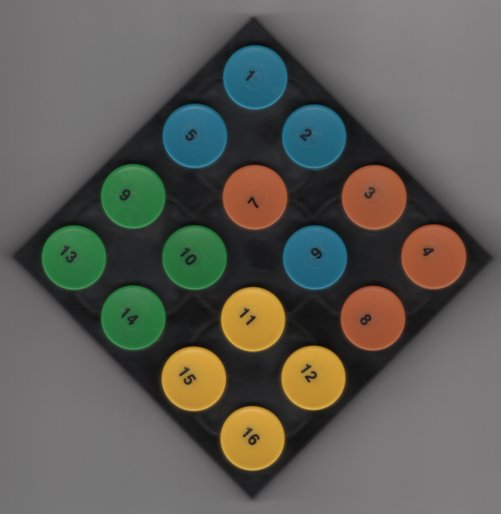
Gripple
is a two-dimensional twisting puzzle, invented by Murray J. Gould,
and published in 1988 by m-squared inc. It is based on a pattern
similar to the Parker Brothers game/puzzle Orion
(see below): four rotors, each containing four colored
disks, are
connected by a central fifth rotor which overlaps the other four. Each
of the five rotors can be turned independently, and the object is to
mix up and then restore the sixteen disks (4 each of 4 colors, arranged
in a 4x4 grid) to a fixed color pattern -- not too hard a task if disks
of the same color are interchangeable. A slightly harder challenge can
be made by putting stickers numbered 1 to 16 (supplied with the puzzle)
on the disks, and restoring not only the color pattern, but the number
pattern s well. The publisher also put out a fine 12-page leaflet in
full
color detailing a solution. Gripple is now out of print (it
originally sold for $10). Unlike the Fifteen puzzle, there
is no parity restriction preventing two disks from being swapped: the
photo shows a numbered Gripple with 6 and 7 swapped; this can be fixed
with the sequence NC2ncNcnc,
where N and n are clockwise and anticlockwise of
the North rotor, and C2 and c are half turns and anticlockwise
turns of the Center rotor.
Orion
(excerpted from Lost and Little Known Games, WGR3, pp. 21-23, September
1984)
Orion is a collection of games
played on a very unusual board consisting of a 5x5 array of plastic
rotors. Football-shaped pieces fit in the spaces between adjacent
rotors, and each quarter turn of a rotor moves all of the pieces
surrounding it 90 degrees. When moving a piece, one may move up to
three other pieces with each turn of a rotor (this is referred to as
indirect movement). The four spaces surrounding a rotor are referred to
as the orbit of that rotor. Orion was published by Parker Brothers in
1971. The game equipment consists of the board, 20 pieces in each of
four colors (green, yellow, orange, and blue), and a 32-page booklet
containing rules for ten games and ten puzzles.
There are several basic rules which apply to all Orion games. A player
may move directly only a piece which belongs to him. Only one piece may
be directly moved per turn, by turning one or more rotors in sequence.
Each rotor must contain the piece being moved in its orbit at the time
it is turned. No move may be made which exactly reverses the move of
the previous player. Some of the games start with a standard sequence
in which one-click moves are made in the first round, two-click moves
in the second round, and so on, up to the maximum number of clicks
permitted. Some games make use of the gambling die, a large cube
labeled with the numbers 1,2,2,3,4,5. A player has the choice on each
turn of taking a 3-click move or rolling the die to determine how many
clicks he may move (the average is 2.833).
Bootes (The Herdsman) is a two player game of sheep herding. One player
has four blue sheep and two red sheepdogs, the other player has four
green sheep and two yellow dogs. The object is to herd your four sheep
to the position initially occupied by your opponent, and also move your
dogs to the corresponding positions. Each player has six clicks per
turn, which may be distributed between his two dogs in any desired
manner (an exception to the usual one-piece rule). Sheep may only be
moved indirectly, by turning a rotor also containing a dog. Moves
intended merely to interfere with the opponent are not allowed. This
game is perhaps the best of the Orion games at using indirect movement,
one of the main features of the system. One of the puzzles, the
Herdsman puzzle, is based on Bootes.
Some of the games are derived from well-known games (Lepus is a Chinese
checkers variation, Draco is a version of Fox and Geese), but the Orion
board gives all of the games a special flavor. Auriga is a simple
chariot race for up to four players. Algol and Libra are games of
penetration, in which players try to break pieces through to the far
edge of the board. In Cassiopeia and Taurus, the object is to arrange
one's pieces in a certain formation. Hydra is a game somewhat similar
to Hex. Orion is a game of surrounding enemy pieces.
The most difficult puzzles are the four Binary Star Puzzles. The first
one is illustrated in Diagram 3. The red piece and the three yellow
pieces start in the positions indicated. The red piece must be moved to
location X, and the yellow pieces must finish in the same position in
which they started. Only the two lowest rows of rotors may be used, and
only the red piece may be moved directly. The best solution takes 20
clicks.
An article in issue 2 of David Singmaster's Cubic Circular
describes a puzzle called Disc Chess, a sliding block puzzle based on a
3x2 array of Orion rotors. Fill all of the orbits of a group of rotors
with pieces in a selected pattern of colors. Next make a series of
random turns of the rotors, mixing up the pieces. Now try to return to
the original pattern by turning rotors. This is an entertaining puzzle
similar to the puzzle in the Orion booklet called Orbit Solitaire.
New Shapes for Rubik's Snake
Ernő Rubik followed up his Magic Cube with another of his own
inventions, the Magic Snake, a toy consisting of twenty-four triangular
prisms,
hooked up in a line with joints which allow the prisms to be turned in
relation to their
neighbors (either 45 or 90 degrees), and which give the snake a good
bit of flexibility. The snake can be formed into an astronomical number
of figures. Figures which use only 90 degree turns will lie flat, while
figures using 45 degree turns will be three-dimensional. There are, to
my knowledge, four good collections of Rubik's Snake figures (see the
Bibliography). Of the figures in these books, my favorite is the cobra
pictured on the cover of Fiore's book (and listed inside as figure 90).
Rubik's Snake is still being marketed as Rubik's Twist, and you can buy
larger ones with 36 segments.
Here are a few original figures. Of them, my favorite is the heart. It
shows how it is possible to make curves using 45 degree turns. The
safety pin is a very simple figure, but actually duplicates the locking
action of a real safety pin (how did I photograph this?). The
rattlesnake and giraffe are two more shapes from the enormous family of
animals.
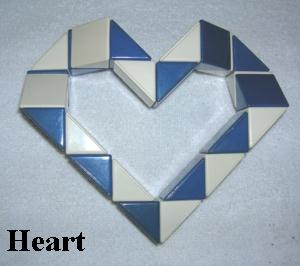
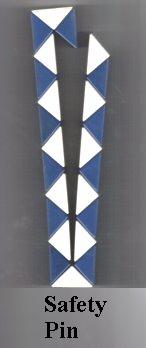

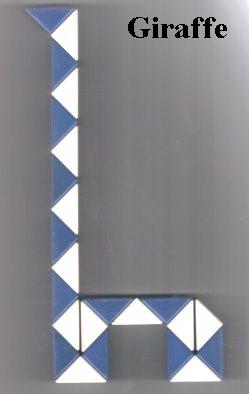
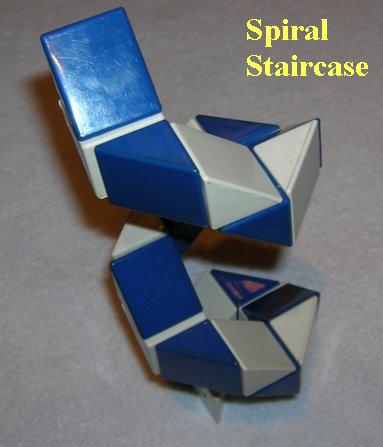
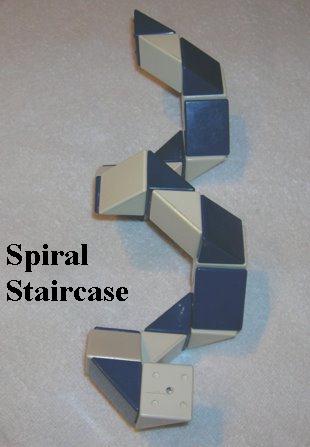
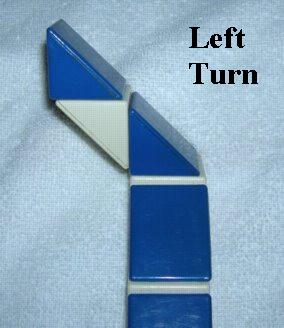

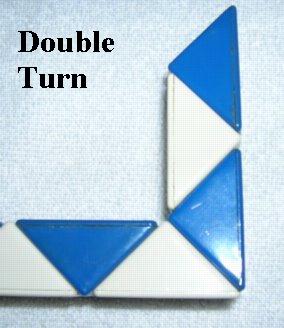
Rubik's Snake figures can be notated by lettering the 23 connections
between pieces from A to W, starting at either end (the end you start
at determines the coloring of each figure). Lower case letters then
denote 45 degree left turns (above left), upper case letters denote 45
degree left turns (above center), and capital letters followed by a 2
denote 90 degree double turns (above right). The figures shown above
may be notated as follows (note the shortcut for planar (flat)
figures):
The Heart bdEGL2qsTV
The Safety Pin A2B2M2N2 = (ABMN)2
The Rattlesnake aegjM2NS2uoP
The Giraffe (AMNPSUV)2
The Spiral Staircase bcefhiklnoqrtuw
Also note that the notation is used to indicate the order in which
turns should be made in complex figures, as in the Rattlesnake (to
avoid pieces getting in each other's way). For example, the
Rhombicuboctahedron, the shape in which the Snake is usually packaged
(and pictured on the cover of Balfour's book), can be notated
ABcDfeGhJIkLnmOpRTsQvWu. Fiore's Cobra is notated A2F2KmNO2qpR2Stv.
Where to Buy Puzzles
Many of the puzzles here are out of production, but those still being
made can be bought from
the manufacturers or through retail dealers. Most of the books are also
out of print. Out of
print books and puzzles from individual dealers range from dirt-cheap
(less than a dollar before
shipping) to ridiculously expensive.
eBay is a good
place to find a
variety of puzzles, including older ones
which are out of production. Books can sometimes be found too,
particularly the more common ones.
Amazon has fast
mail order for standard cubes (2x2x2 through 9x9x9), and dozens of
variant puzzles. It also sells books,
of course, both in and
out of print (via a network of used book dealers).
Rubik's brand cubes, sold by Winning
Moves, are widely available in
retail outlets.
Mèffert sells
a wide variety of
puzzles, many of its own manufacture.
Airmail delivery from Hong Kong is often free and quite fast.
V-Cubes
sells various
designs for 5x5x5, 6x6x6, and 7x7x7 cubes by
direct mail order.
Bookfinder
is a good search
engine for finding used copies of
out-of-print books
from a wide variety of dealers. As with Amazon, prices vary wildly.
Bibliography
Pictured books are those we
particularly recommend
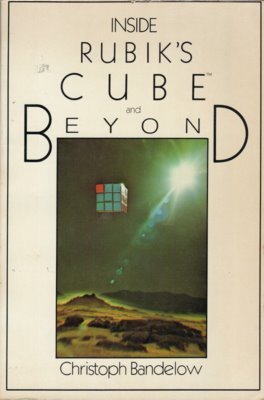
A Survey of Rubik's Cube Maneuver
Catalogs
Although hundreds of books on Rubik's
Cube are
simply descriptions of a solving method, books have also appeared on
the mathematics of Rubik's Cube, on variants and relatives of the cube
(Rubik's Revenge, Alexander's Star, etc.), and on pretty patterns and
specialized move sequences which rectify a particular situation.
Several general books on the cube also contain fairly extensive
catalogs of cube sequences and pretty patterns. To distinguish between
pretty patterns and sequences intended to help solve the cube, we will
call the latter constructive sequences, though the distinction
is not always clear. For example, variations of the
pretty pattern known as Dots
(R*F*L*B*)
turn out to be very useful in
solving Rubik's Revenge (the 4x4x4 cube) and larger cubes, and Rubik's Cubes
with pictures. The bibliography describes catalogs found in many of the
books listed.
There are several major categories of
constructive
moves. Numbers in parentheses indicate the total number of sequences,
excluding inverses and mirror images.
(1) Corner sequences (50) -- place and orient up corners simultaneously
(may affect edges also). These sequences are especially useful for
solving Rubik's Pocket Cube (the 2x2x2 cube, which has no edges or
centers).
(2) Edge sequences (24) -- place and orient up edges simultaneously
(may affect corners also).
(3) Permutations (14) -- place up corners and up edges simultaneously,
without regard to orientation.
(4) Twisterflippers (35) -- orient up corners and up edges
simultaneously without changing their positions. The name comes from
the book Unscrambling The Cube by M. Razid Black
and Herbert Taylor.
Most books on the cube contain twist-only sequences (baryons, mesons,
and double mesons) and flip-only sequences, but very few contain
sequences that do both.
(5) Miscellaneous up layer sequences
(6) Middle edge sequences (20) -- place and orient (flip) middle layer
edges.
(7) Face center sequences -- turn face centers without affecting any
edges or corners. These are designed for solving picture cubes.
(8) Insertion sequences (up corner, up edge, and middle edge insertions)
(9) Whole-cube sequences -- perform tricycles and other sequences on
subcubes which do not lie in the same layer.
Mastering the Cube Literature: A Short Guide to Books on the
Magic Cube
of Ernő Rubik (based on an article originally published in Inscape #1, pp.
11-16, December 1982, and expanded and edited for this booklet)
Starting in 1980, a number of books and articles appeared in
the United States and elsewhere on one of the most popular puzzles of
all time, Ernő Rubik's Magic Cube. The beginner is likely to be at a
loss to know
where to start, and more experienced cubists may wish to know what
information is available beyond step-by-step solutions. This is
intended as a survey of the most easily available sources of
information on the cube. I will try to give an idea of how each
solution works, and indicate how easy and efficient each one is,
without going into too much detail on move sequences.
Most of the books on the cube are primarily solutions to the problem of
returning the cube to Start (the position in which every side is a
single color). This is generally done by working on one group of cubes
at a time, e.g. top layer edges, and proceeding to another group when
the previous group has been correctly placed (put in their proper
locations) and oriented (turned so the colors of the faces match the
sides they are on). A group of cubes is worked on by means of a
sequence of moves which place and orient those cubes, while leaving
undisturbed any cubes placed during earlier sequences. Generally there
are from four to eight main stages to a solution, depending on how the
cubes are divided into groups. It is much easier to follow the progress
of a solution when the cubes you are trying to place are in the top and
middle layers. Several of the solutions described here work on the
final layer (the most difficult) with the cube positioned so that the
final layer is on the bottom. The solver must therefore turn the cube
over repeatedly to look at the bottom, or else rewrite the move
sequences from the point of view of the bottom face, a difficult task
for a beginner. Almost half of the solutions described here follow a
common pattern: one layer is done first (edges before corners), the
four edges of the middle layer are done next, and finally the last
layer is done (often in four stages in which edges and corners are
placed and then oriented). Solutions of this type will be referred to
here as orthodox solutions.
Many books feature a section showing
how to produce colorful arrangements of the cube from the Start
position (these arrangements are usually called pretty patterns). A few
books also discuss how to solve cubes with pictures on them and cubes
with different shapes or coloring patterns. Other features may include
a brief history of the cube, details on the cube's physical mechanism,
instructions for cube maintenance, mathematics, and catalogs of move
sequences.
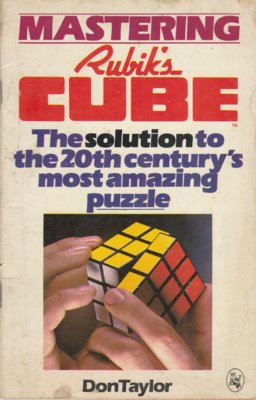
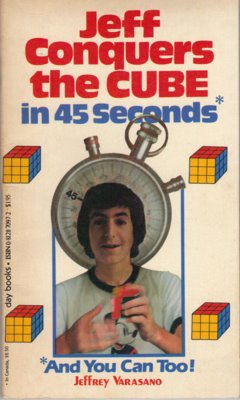
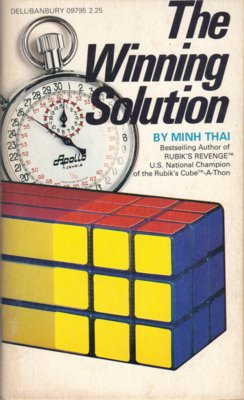
Adams, Jeffrey -- The Cube Solution, 1981, Amity
Products, 23x35" wall
chart, $4.00
The most unusual presentation of a solution is Jeffrey Adams' The
Cube
Solution. His solution is printed on a full color wall
poster, about two feet
by three feet. Unfortunately, this is an extremely long solution,
taking far more moves than most others. It places all 12 edges
before doing any corners. It is not too difficult
to learn, but is inefficient and very tedious (most of the cubes are
positioned and oriented one at a time). The poster also includes a
small move catalog, a few pretty patterns, and some mathematical
background. Adams later wrote a book on Rubik's Revenge.
Angevine, James -- Solution for the Magic Cube Puzzle,
n.d., Logical
Games, 5 pp., $2.00
Logical Games,
the other U.S. company (besides Ideal) which made
the cube in the 1980's, distributed a solution written by James
Angevine. The
solution is similar to Bossert's, but gives no instructions for the top
layer, instead assuming that the solver can finish the first layer
unaided (this is a bad assumption to make if the solver is a beginner).
Bandelow, Christoph -- Inside Rubik's Cube and Beyond,
1982,
Birkhauser Boston, 136 pp., paperback, $3.95
Comprehensive guide to the theory behind Rubik's Cube. Although
some of the mathematics is somewhat heavy, it covers a basic strategy,
pretty patterns (including 11 pages of photos in full color), and brief notes on
solving a few related puzzles (Picture Cube, Magic Domino, 2x2x2 Cube,
15 Puzzle, and Pyraminx). There is a chapter on how to
construct your own sequences, and a chapter on using computers to
analyze and solve the cube. The book's most notable feature is a
very extensive catalog of maneuvers (over 200 sequences, pages
106-119), compiled by Bandelow and his colleague Peter
Klering. The maneuvers include the seven most
useful face center sequences
and nineteen out of the twenty middle edge sequences. Many of
these sequences feature true slice moves:
turns of the three layers running through the center. Slice moves are
very powerful, and notation using them is often much more concise than
normal fixed-center notation. For example, using our notation D* to
designate a turn of the middle layer lying between U and D 90 degrees
in the direction of a D turn, we can notate the powerful quadruple edge
flip (D*F)4, rather than the fixed-center version UdL UdB UdR
UdF. The powerful slice moves enabled Bandelow and
Klering to find many sequences shorter than any others
known. Now out of print and expensive where you
can find it, but worth getting if you can. My own copy is
rather battered by now.
Benjamin, Arthur T. -- The
Mathematics of Games and Puzzles: From Cards
to Sudoku, The Great Courses, 2013, 3 DVD's and accompanying 130
page booklet, ISBN 159803961-X
Lecture
9 (45:53), Mastering Rubik's Cube, gives some general information on
the cube and an inefficient layer-by-layer elementary solution.
Berlekamp, Elwyn R.; Conway, John H.; Guy, Richard K. -- Winning
Ways for your Mathematical Plays,
Vol. 2: Games in Particular, 1982, Academic Press, 850 xix pp., ISBN
01-12-091102-7
The best book ever written on mathematical games and puzzles in general
(reviewed
in WGR1),
originally in two volumes by Academic Press (1982). Pages 760-768
in Volume 2 contain a detailed mathematical look at Rubik's
Cube, including a sketch of a solution.
This is the book that brought David Benson's Twisterflipper
to my attention. There is also an appendix (pp. 808-809) giving a
complete table of 23 Up face processes (including mirror images) to
position edges and corners
simultaneously in 13 moves or less, and 57 twisterflippers (including
inverses) to orient edges and corners simultaneously in 16 moves or
less. Diagrams help the cubist pick out the two sequences
needed to solve any scrambled up layer. This is somewhat similar to the
CFOP system used today, although CFOP does orientations first (most of
which disrupt positions). Republished in four volumes
by A. K. Peters (2001-2004); pages 868-876 and 916-917 in
the revised
volume 4 cover Rubik's Cube.
Black, M. Razid and Taylor, Herbert -- Unscrambling
the Cube,
1980, Zephyr Engineering Design Ltd., 37 pp., $2.50
A good, well illustrated guide to move sequences (cleverly shown using
skeleton
diagrams), with 32 pretty patterns (24 of them shown in full color).
Many of
the move sequences given were not found in other contemporary sources
(even Jackson
and Singmaster), mainly twisterflippers, corner sequences,
and edge sequences. Some of the sequences operate on corners or edges
which do not lie in the same layer. The solution,
devised by Black, solves only three Up corners before placing all four
middle edges: this completely changed my thinking on solution methods.
This trick, even today, is never found in elementary solutions,
although it will greatly speed up your solving with little additional
knowledge. This book was also a
best seller.
Bossert, Patrick -- You Can Do The Cube, 1981,
Puffin, 112 pp., $1.95
For collectors only. A slow and poorly conceived solution to Rubik's
Cube, written by a 13-year-old British schoolboy. This solution is
quite long, and does not use the easy layer-by-layer approach. Instead
it solves the top layer first (doing corners before edges), followed by
the bottom corners. Then it solves
the remaining eight edges (on the bottom and middle layers) with a
series of cycles of three edges. This sequence makes for a very tedious
solution. It is better to do the top edges before the top corners,
since the edges are much easier to place when the corners are not
already in place, while the top corners are placed in the same way
whether they are placed before or after the top edges. The solver is
also forced to learn several basic move sequences in a number of
different positions, and the relationships between these sequences are
not explained. A good deal of experience is necessary to be able to
choose efficient sequences. Rather than Singmaster's notation, Bossert
uses a pictorial notation, and is not always consistent in the way he
describes moves.
Cairns, C. and Griffiths, D. -- Teach Yourself Cube-Bashing, September
1979, self-published, 7 pp.
One of the very first published solutions. It uses an unorthodox
notation, and only three routines (with inverses and reflections): a
corner tricycle which disrupts edges, a Sune (baryon for twisting
corners), and an edge-tricycle with one edge in the middle layer.
Incomplete, inefficient, and strange.
Eidswick, Jack -- Rubik's Cube Made Easy, 1981,
Peace, 55 pp., $1.95
Jack Eidswick, a professor of mathematics at
the University of Nebraska, wrote Rubik's Cube Made Easy.
The solution presented here is a weak one, having some of the same
problems
as Bossert and Nourse. But the value of the book lies in a fine sixteen
page section on the mathematics of the cube. Eidswick explains a good
deal about the structure of the cube in a clear manner. The reader
whose mathematical background is too light to fully appreciate
Singmaster will have much less trouble with Eidswick's book.
Frey, Alexander Jr., and Singmaster, David -- Handbook
of
Cubik Math, 1982, Enslow, 193 pp., paperback, $9.95, ISBN
0-89490-058-7
Detailed guide to the mathematics behind the cube. Describes a
solution method that is easy to understand and remember (though not
especially efficient). Singmaster's constructive
sequence catalog is updated and expanded (again with
discoverers credited) in a six-page appendix.
Hall, Roland -- Rubik's Cube, 50 Years of the World's Most Famous Cube,
2024, White Lion, London, 160 pp., hardback, $19.99, ISBN
978-0-7112-9827-9
Glossy book with full color photos and illustrations, covering
the history and culture of the Cube in 50 short sections (the
beginner's method is a one-page picture givng the outline of the
solution only). Attractive but superficial.
Hammond, Nicolas -- How to Solve the Cube in 37 Seconds,
1981, DRG Blackhall, 20 pp.
The four pages of Chapter Three contain a complete set of
sequences for solving the Up layer -- first by positioning and flipping
the edges simultaneously (edges should be done first, since shorter
versions of many of the
routines disrupt corners), then by positioning and twisting the
corners simultaneously. This approach gives the cubist a
little less to memorize (24
edge sequences and 50 corner sequences) than
the Winning Ways
or CFOP method, but takes a little
longer (up to 25 moves for edges
and up to 18 for corners). The
expert cubist can try both systems to
see which he prefers. [Guus Razoux Schultz devised a similar
method, but doing corners first, which he used in his second-place
finish at the first World Championship in 1982. This uses
42 sequences for corners and 29 for edges].
Harris, Dan -- Speedsolving the Cube,
2008, Sterling, 166 pp., paperback, $9.95, ISBN 978-1-4027-5313-8
This is a detailed description of the CFOP system of speedcubing to
solve Rubik's Cube. It starts
out with a mediocre basic method for solving the 3x3x3 cube, then goes
into the powerful CFOP method. It includes lots of details on
tricks and shortcuts, and plenty of illustrations in full color.
The chapter on solving the 2x2x2, however, is a waste
of space. There are at least three established
speedcubing
methods for the Pocket
Cube, and surprisingly Harris does not describe or even mention any of
them, giving instead a very slow beginner's solution, in
his words "a
simple method that allows even the most inexperienced puzzle
solver...". Wait, isn't this supposed to be a book for experts? It
also contains chapters on reduction methods for solving the 4x4x4
and 5x5x5, but these are slow and hard to learn. Some
of
the material included in the book is pointless (Felix Zemdegs
alone rendered the list of world records on pages 5-8 obsolete:
none of the times listed there are even in the top 100 anymore; some of
the websites listed under Further Resources have already
disappeared). There are quite a few errors in the
book. Harris compiled a list of these and posted them on
his website, but his site is no longer up and you will need a web
archive service like the Internet
Wayback Machine to find the list
of errors, which is incomplete: the first
formula on page 131 (Table 8.9) starts with (U u') instead of the
correct (U' u'). I can't
recommend this book, since it isn't very useful except for 3x3x3
methods, and there is already a lot of material on the Internet
on speedcubing methods. It's probably only worth
picking up for collectors.
Hofstadter, Douglas -- Metamagical Themas, March
1981, Scientific
American, pp. 20-39, $2.00
A very good article on the cube.
Hofstadter gives an interesting history of the cube, and discusses some
of the contributions made by cubists from various countries, including
the United States (giving information which Singmaster lacks).
Hofstadter does not give an actual solution, but explains some of the
mathematics behind the cube, and discusses how to work out your own
solution.
Ideal Toy Co. -- Rubik's Cube Puzzle - An Introduction and
Solution,
1980, Ideal Toy Corporation, 14 pp., $2.00
The Ideal Toy Corporation,
one of the two U.S.
companies which had rights to produce the cube in the
1980's, produced its own
solution. This is a well illustrated booklet with full color diagrams,
and gives an interesting, but difficult method. The solution follows an
plan somewhat similar to Thai or Varasano, solving the top and bottom
layers
first, then the middle layer, but it is fairly difficult to visualize.
The notation used is not Singmaster's, but a pictorial notation with
captions (only the captions clearly show the difference between half
and quarter turns).
Jackson, 3-D -- The Cube Dictionary, n.d.,
manuscript, 38 pp.
A very valuable source of information, which unfortunately
exists only in handwritten manuscript form. It
consists of several pages of background information, a step-by-step
solution to the cube (requiring the solver to remember only a few
fairly short sequences), and a 16-page catalog of more than 200 move
sequences
which can be used to build an extremely powerful solution. Included are
corner and edge sequences, middle edge and up corner
insertions, and
face center sequences (useful for solving picture
cubes). The sequences are not as well organized as
those
in some other catalogs, but there is a lot of good material here
for anyone willing to put some effort into it.
Kenzed, Inc. -- A Simplified Solution to the Cube Puzzles,
1981,
Kenzed, 7 pp., $1.50
A short pamphlet with long and tedious move sequences, some
described verbally, some in a bizarre and inconsistent
notation. The information provided is not even
sufficient for a beginner to solve the cube.
Kolve, Donald I. -- Cracking the Cube, 1981,
Kirkland, Wash., 20 pp.,
$3.95
A short booklet giving a solution which has
only a few sequences to remember, but is not very efficient. Kolve uses
his own notation, a peculiar one, rather than Singmaster's.
Kosniowski, Czes -- Conquer That Cube, 1981,
Kornworthy Press, 32 pp.,
$2.95
Another orthodox solution is presented by Czes
Kosniowski in an attractive full color booklet, Conquer That
Cube.
This solution has little to distinguish it from other orthodox
solutions,
but Kosniowski does include move sequences for a number of pretty
patterns, and for solving picture cubes (cubes with designs on the
faces) and variant shapes.
Last, Bridget -- A Simple Approach to the Magic Cube,
1980,
paperback, 20 pp., Tarquin Publications, £0.50, ISBN 0-906212-12-X
Strange approach using tricycles of
corners and edges to place everything. I haven't tried to
work through this solution, frankly. It doesn't seem
to have any routines for flipping edges.
Morales, Phillip -- Gott'cha: Rubik's Cube, 1981, paperback, 60 pp.,
T/D Publications, $2.95 [reprinted in larger format 2010, 42 pp, $9.95,
ISBN 978-1453687116]
An attempt to build a solution to the cube based on four basic
routines. I confess I couldn't make heads or tails out of this. The
author uses an unorthodox notation, spelling out the face turns in
all caps (and using TOP and BOTTOM instead of U and D), and reckoning
clockwise from the point of view of the FRU faces, so his BACK, for
example, is
actually our anticlockwise b.
Nourse, James G. -- The Simple Solution to Rubik's Cube,
1981, Bantam,
64 pp., $1.95
This is an orthodox solution, but many of the individual move sequences
used are
quite long, being built on repetitive sequences of moves. Nourse does
mention a method of
combining the top corner and middle edge sequences, but gives no
details. He uses his own
notation, which differs slightly from Singmaster's. This book sold
more copies in the U.S. than any other book on the cube (over a million
copies in print), and for several weeks around the end of 1981 was the
number one
selling mass market paperback. Surprisingly, this book is harder to
find
cheap on the used book market than many others (including Nourse's much
better follow-up on other puzzles).
Östrop, Cyril -- Solving the Cube, 1981, Price,
Stern, Sloan, 20 pp., $1.00
A small booklet written by
a Swedish cubist, Cyril Östrop, translated into
English and published in the U.S. at the budget price of one
dollar. It
contains an orthodox solution which is awkward in certain places, and
rather inefficient. But the appendix explains an interesting method of
partially combining the top corner and middle edge steps, which alone
was worth the price of the book to me: I expanded his ideas into part
of the method described in this guide.
Parks, Tom, ed. -- The Rubik's Cube Newsletter,
quarterly, Ideal Toy
Corporation, 8 pp., $5.00/year
One of several newsletters published in the cube's heyday. Only four
issues of this eight-page foldout were published between May 1982 and
August 1983, available
only to members of the Rubik's Cube Club. It covered news of
competitions, new releases from Ideal, and club activity, but contained
little technical material.
Peelle, Howard A. -- Learn How to Solve Rubik's Cube,
1981, manuscript,
70 pp.
Howard A. Peelle, a professor at
the University of Massachusetts, has written a very good book for
beginners. The solution is similar in its basic outline to Varasano's,
but is easier to learn. Dr. Peelle, a well known educator, explains his
solution simply and clearly, and then gives shortcuts to enable the
reader to solve the cube more efficiently. He places a great deal of
emphasis on visualization, an important part of solving which is
ignored or glossed over in many other books on the cube.
Quittendon, R. -- A Solution of Rubik's Cube, 1981,
self-published, 7 pp.
A slow layer-by-layer solution; the author does
Up corners first, then inserts Up edges with slice moves.
Notable for the 5-move Up corner insertion FLD2lf, where most solutions
use a 6-move sequence. The author oddly refers to edges as "centers".
Rubik, Ernő; Tamas Varga,
Gerszon Keri,
Gyorgy Marx, and Tamas Vekerdy -- Rubik's Cubic
Compendium -- translation edited by David Singmaster,
225 pp., 1987, Oxford University Press, ISBN 0-19-853202-4,
$24.95. [originally reviewed in WGR8, p. 26]
This is the fourth volume to appear in the series Recreations in
Mathematics. Though it has a few weak points, the strong points far
outweigh them. The book consists of six chapters by the five Hungarian
authors (originally published in Hungarian in 1981), plus an
introduction and afterword by Singmaster. Rubik's opening chapter puts
the Cube in the context of other puzzles and describes the road Rubik
took in inventing and marketing it. The longest chapter, Tamas Varga's
"The Art of
Cubing", is an excellent
guided tour of the cube and some of the methods of solving it --
including a euphonious 'language' for verbalizing turn sequences.
Though assuming no initial knowledge of the cube, this chapter slowly
builds understanding, and by the end is presenting techniques for
experts.
In Chapter 3, Gerzson Keri presents "Restoration Methods and Tables of
Processes" -- for me the best chapter of the book. There's a lot of
valuable material here on both the Cube and the Magic Domino. The only
weak point of the chapter is the presentation of a method called the
'throw and catch'. This method solves upper corners and middle edges
simultaneously, but uses a set of more than forty routines! The reader
is left to work out the details of 24 sequences, and there are errors
both in diagrams (two are swapped) and notation (in one sequence an
undefined subscript is used). What is more, reasonable results
can be achieved using a small set of short sequences, described
elsewhere in this booklet. The following two chapters cover the
mathematical aspects of the cube,
and the final chapter from the Hungarians is a short essay on the
psychology of the cube. Singmaster's Afterword is an expert summary of
the recent history of the cube (since the original Hungarian book
appeared), concentrating on the cube's numerous offspring.
Alas, the bibliography is inadequate. It comes from
the original Hungarian edition, and should probably have been scrapped.
Many of the sources are in Hungarian, and there are relatively few in
English. In several places in the book, methods too complex to be fully
described are mentioned but no information is given as to where to find
out more. Many of the articles in the bibliography appear to be simple
newspaper accounts, and it would have been better to eliminate these
and include serious articles. The illustrations are excellent,
with many diagrams in full color.
There is also a good index. Despite the few flaws I have listed, the
book is well done, and a valuable addition to the literature on the
cube.
Rubiks.com -- How To Solve the Rubik's Cube, 2018, Farshore, 64 pp., paperback, ISBN 978-1-40-529135-4
Full color booklet with a typical beginner's solution. The
last section of the book gives a very condensed speedcubing solution
using the CFOP method. This uses 41 sequences to put in the Up
corners and middle edges, 57 to orient the last layer, and 21 to
permute the last layer.
Seven Towns Ltd. -- You CAN do the Rubik's Cube,
2008, Seven
Towns, Ltd., 10 pp.
Full-color booklet with a rather poor solution to the cube, relatively
easy to
memorize but very inefficient. Stage 3 (Up corners) is
particularly bad, sometimes taking 20 moves to put in a corner which
can be done
in three ((rdRD)5 instead of FDf). I bought an
inexpensive
printed copy on eBay.
Shah, Neil -- Unlocking The Rubik's Cube, 2008,
Trafford, 46
pp.,
paperback, ISBN 978-1-4251-5110-2, $21.92 from Amazon
Another book by a teenager, this is a well-illustrated beginner's
solution (mostly pictures with little notation), though neither very
efficient or very clear (e.g. the author fails to give an explicit
method for bringing an upside-down corner to the Up layer in the first
phase of solving, doesn't even suggest that Up edges should be done
before Up corners, and uses slice moves where they aren't
necessary). In Chapter 3 he tells beginning solvers to do the
top
face without regard to position (i.e. get all of the yellow facets on
the same face), and then swap as necessary. This is a
wrongheaded
approach: although he later suggests placing them correctly to begin
with, I think it is better to teach solvers the correct way from the
start. He uses conventional middle-edge insertions, then
solves
the third layer by orienting edges, swapping them a pair at a time
(inefficient if all of them are out of place), placing the corners,
then using monotwists to finish. The book is
written for
children, teenagers, and absolute beginners, but even on that basis I
cannot recommend it, especially at its substantial price.
Singmaster, David -- Notes on Rubik's Magic Cube,
1981, Enslow, 73 pp.,
$5.95
The first reasonably comprehensive book in English on the cube was Notes
on Rubik's Magic Cube, written between 1979 and 1980 by
British cubist
David Singmaster, and published in the US in 1981. At
the time it was the single best source of information for the
experienced cubist,
and the best source of detailed information on the mathematical aspects
of the cube. The main problem with the book is that it was compiled by
Singmaster over many months, and he wrote an addendum each time he
collected a fair amount of material. Instead of removing outdated
information, he cross referenced it to later pages in the book which
give new information. Although this makes very interesting reading from
a historical point of view, it makes a poor format for a reference work
on the cube. The book suffers from a lack of organization which would
be almost intolerable if Singmaster had not provided an excellent
index. At the time Singmaster seemed to have had little contact with
American
cubists, who developed many useful terms such as baryon and meson, and
names for pretty patterns such as Pons Asinorum, Plummer Cross, and
Christman
Cross. This is also not a book for the beginner
or the casual cubist, and readers without a good mathematical
background will find much of the book extremely difficult. But
the wealth of invaluable information in Singmaster's book overshadows
these problems. Here you can find much historical material, group
theoretical basis of
the cube, world records for solutions (both solving time and number of
moves), and a bibliography containing 86 books and articles on the
cube. Singmaster also gives his own solution, an orthodox one. It
also includes a catalog
of useful move sequences: 3 pages of constructive sequences
and 2 pages of pretty
patterns, and specifies the person Singmaster believed to be the
discoverer of each
routine. Most of the constructive sequences are corner and edge
sequences, but there are some permutations and twisterflippers, a few
miscellaneous up layer and whole-cube sequences, four middle edge
insertions, and four face center routines. One of
Singmaster's most important contributions to the study of the cube is a
notation for move sequences which has become standard.
Singmaster, David -- Cubic
Circular, 1981-1985
Five issues of this small magazine were published by Singmaster after
the publication of Notes
on Rubik's Magic Cube,
adding new material on the Cube and many other puzzles which
appeared in the early 1980's. The last three issues were numbered
as double issues, so there are issues 3/4, 5/6, and 7/8. The
entire set of issues is available
online at Jaap Scherphuis's Puzzle Page, with annotations.
Slocum, Jerry, David Singmaster, Wei-Hwa Huang, Dieter Gebhardt, and
Geert Hellings -- The Cube; The Ultimate Guide to the World's
Bestselling Puzzle, 2009, Black Dog and Leventhal
Publishers, Inc., ISBN-13 978-1-57912-805-0, paperback, $12.95
This
new book, profusely illustrated in full
color, is divided
into four sections, each with a different author. The first
section is a short history, by Jerry Slocum, of
19th-century
puzzle crazes, including tangrams and the Fifteen Puzzle, both
popularized by Sam Loyd. The second section is a good
history of
Rubik's Cube, by David Singmaster. The next section is a
survey
of other twisting puzzles inspired by the Cube. The last
and weakest section, by Wei-Hwa Huang and Dieter Gebhardt, is
a solution to the cubes from 2x2x2 through 7x7x7. The
solution to 3x3x3, designed to be similar to the solutions for the
other sizes, is rather
poor and inefficient, with a clumsy notation. Only sketches
of
solutions are given for the 5x5x5 and larger cubes, and none of them
use the efficient reduction methods which are now commonplace.
Taylor, Don -- Mastering
Rubik's Cube, 1980, Holt,Rinehart,Winston,
31 pp., $1.95
The best book for the beginner is Don Taylor's Mastering
Rubik's Cube.
The solution given here for the cube is very easy and efficient. It
works
on the cube using an orthodox approach, and wisely turns the cube over
after finishing the top layer, so that the solver can more easily see
what is going on. Taylor also gives, on page 30, a list of fifteen move
sequences, without explaining what they do. The reader can experiment
with them, and add those he finds most useful, to build an even more
powerful solution.
This is the book I originally learned from.
Taylor, Don and Rylands, Leanne -- Cube Games -- 92 Puzzles
and Solutions,
1981, Holt, Rinehart, and Winston, 49 pp., $3.95
A second book by
Taylor, Cube Games
(cowritten with Leanne Rylands), is a highly entertaining and useful
guide to the cube, giving a number of problems for the reader to solve.
A solution to the cube is not given, but the book presents information
on useful move sequences and pretty patterns, and is beautifully
illustrated with actual photographs of the cube in full color. It is a
fine follow-up to Taylor's first book, and a beginner can become quite
knowledgeable in a short time by studying these two books. Both books
were deservedly best sellers.
Thai, Minh -- The Winning Solution, 1982,
Dell/Banbury,
61 pp., $2.25
Thai was the champion of the first U.S. Rubik's Cube Championship, with
a winning time of
26.04 seconds, on the second of two trials. He wrote a book describing
his method. Thai solves all
eight corners first, then the edges of the up and down layers, then the
middle edges (using a set of 9 routines for orienting or swapping
middle edges, in some cases simultaneously). This is a
strong solution, especially on edge technique, but is quite difficult
to learn (it has over 40 different
move sequences to learn).
Tyler, J. -- The Easy Rubik's Cube Solution, 2010,
self-published,
Lexington, KY, ISBN 9-7814-5054-3576, paperback, 24 pp., $19.99
One of a slew of new print-on-demand books on cube solving. Another
oversimplified and inefficient beginner's solution, with no
notation. The book is nicely printed
with a glossy
cover, but the colors chosen for diagrams are
poor -- black
arrows don't show up properly on a dark blue background. For
less
than what I paid Amazon for the Shah and Tyler books, you could instead
buy a 9x9x9 cube.
Varasano, Jeffrey -- Jeff Conquers The Cube in 45 Seconds*
(*And You Can Too), 1981,
Stein and Day,
48 pp., $1.95, ISBN 0-8128-7097-2
Jeff Varasano, a 15-year old student from New York, finished in second
place in the 1982 U.S. Rubik's Cube Championship, solving the cube in
28.96 seconds on his second trial. At
one time he held the U.S. record for the fastest time in a tournament,
24.67
seconds. Several months before the U.S. Championship, he wrote a book, Jeff
Conquers The Cube
in 45 Seconds. It gives two versions of his
solution. The simple solution uses a great deal of repetition of moves,
while the expert solution is much faster, but harder to memorize.
Varasano's expert solution follows the same general outline as Thai's,
but with very different methods for each stage. It is about as
efficient as a complex orthodox solution, and is more useful for speed
cubing. Varasano's corner method is excellent: he
was the first to describe a speedcubing method for the Rubik's
Pocket Cube (the 2x2x2 cube, equivalent to the
corners of the standard cube).
Wray, C. G. -- The Cube - How To Do It, 1981,
paperback, 7 pp., self-published
Extremely long layer-by-layer solution, using monoswaps, monoflips, and
monotwists. The
stage where corners are exchanged is particularly tedious.
Sequels to the Cube: Books on Big and Little Cubes, Snakes,
Pyramids, and Chains
Some of this section was originally written as a follow-up to the survey of
books on Rubik's Cube,
but never published. A few of these books cover
multiple
puzzles; the rest are sorted out by individual puzzles.
Hofstadter, Douglas R. -- Metamagical
Themas, "The
Magic Cube's cubies are
twiddled by cubists and solved by cubemeisters", March 1981, Scientific
American, pp. 20-39.
The article that introduced many people to Rubik's Cube. I solved the
cube for the first time after reading this article, though it took me
45 minutes and copious notetaking (writing down long conjugation
sequences so I could later undo them).
Hofstadter, Douglas R. -- Metamagical Themas,
"Beyond Rubik's Cube:
spheres, pyramids, dodecahedrons, and God knows what else", July 1982,
Scientific American,
pp. 16-31.
Douglas Hofstadter brought Scientific
American readers up to date on the latest twisting puzzles in his 1982 column. Hofstadter described the many new puzzles which
had appeared or were soon to appear, several of them from the catalog
of Uwe Mèffert, the inventor of Pyraminx (one of the puzzles
described). Hofstadter himself suggested the
name
Skewb, which was adopted to replace the puzzle's original name Pyraminx
Cube. Among the other puzzles described
are magic octahedrons, dodecahedrons, icosahedrons, a sphere called
IncrediBall (later produced as ImpossiBall),
and a 5x5x5 cube with
shaved corners and edges, called Pyraminx Ultimate. No solutions to
any puzzles are given, but theoretical results by several puzzlists
are reported.
Hofstadter, Douglas R. -- Metamagical Themas: questing for
the essence of mind and pattern,
1996, 880 pp.
A hardback collection of Hofstadter's articles for Scientific
American,
including both of the articles cited above, with additional material
added (Chapter 14, Magic Cubology, pp. 301-328, and Chapter 15, On
Crossing the Rubicon, pp. 329-363).
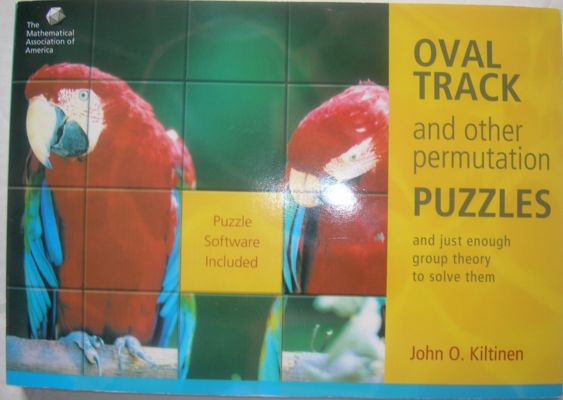
Kiltinen, John O. -- Oval Track and other permutation Puzzles (and just
enough group theory to solve them), 2003, The Mathematical Association
of America, 305 pp., ISBN 0-88385-725-1, $43.00
A thick paperback textbook on the mathematics of group theory, covering
the Fifteen Puzzle, Top-Spin, and Hungarian Rings. Profusely
illustrated in black and white, and includes a CD-ROM with simulation
software for Windows and Macintosh. The math is somewhat heavy
going, but even non-mathematicians can find useful information here.
Kosniowski, Czes and Ewing, John -- Puzzle It Out,
1982, Cambridge U. Press, 65 pp., $4.95
Kosniowski, like Nourse, wrote a follow-up to his book on the
cube, covering other puzzles of a
similar sort. Kosniowski and Ewing emphasize the use of group theory
to solve the cube, Pyraminx, the Fifteen puzzle, and others. For
the mathematically oriented reader, this will be a useful book in
explaining the structure behind the cube and a number of related
puzzles. Included is another 2-page catalog of moves for the cube (most
of which can be found in Jackson or Singmaster). There is a small
section on the pyramid, describing a few basic moves which can be put
together to produce a workable (but inefficient) solution. No
coverage is given to the Missing Link or the Magic Snake, but other
puzzles (including two new ones created by Kosniowski) are discussed.
Lapeyre, Gale Augusto -- The Cubing Bible, c.2025, Lapeyre, 503 pp., paperback, $68.90
Enormous print-on-demand guide to speedcubing for the regular cube
(including 2x2x2 and larger cubes), including detailed tutorials on
blindfold, one-handed, and Fewest Moves. Also covers
Pyraminx, Megaminx, Skewb, Clock, and Square One.
Illustrated in full color, with QR codes giving links to further
information. Not designed for beginners: the Cube solution
for beginners (pp. 34-49) is as bad or worse than those found elsewhere,
solving all four corners (with long repetitive sequences) in the first layer before doing middle edges,
and using repetitive sequences to finish the last layer.
Lenard, Frank -- There is no magic
to Rubik's Cube and all of its offspring
Lenard, Frank -- Solving the Mysteries of the Great Pyramid Puzzle, 26 pp., 1981, 1982
Two books printed together. Usual beginner's solutions to the
regular cube (including minor variant shapes like the Barrel and Flying
Saucer), Pyraminx, and Missing Link. Mentions Picture cubes
without giving a solution ("...you may encounter slight difficulty with
center pieces"). The last page has pictures of seven Snake
figures.
Nourse, James G. -- The Simple Solutions to Cubic Puzzles,
1981, Bantam, 64pp., $1.95
James G. Nourse, who topped the best seller list with The
Simple Solution to Rubik's Cube, wrote
a follow-up, covering a number of puzzles, including the Snake, The
Missing Link, and
Pyraminx. This book is admirably concise, giving good information on
many different puzzles. The Pyraminx section is inadequate, giving a
solution which is too inefficient. Only one
sequence is given to handle each situation (usually there are two
different edge orientations possible), so the solver frequently must
backtrack and correct the results of the previous move sequence. The
Snake section is necessarily brief, but gives a good notation for
describing turns, and shows a surprising number of shapes within a
few pages (almost a third as many as Michael Balfour's whole book!).
No solutions to the shapes are given, but Nourse does show how to
form the rhombocuboctahedron, and demonstrates a few spiral patterns.
The best section of the book covers The Missing Link. Nourse's
solution is clear, easy to follow and learn, and efficient, and his
notation is excellent. Other puzzles covered include the Billion
Barrel, the picture cube, and the octagonal barrel. On the
whole, this is a very good guide, markedly better than Nourse's first
book.
Inexpensive copies are easy to find from used book dealers, and it is
worth picking up.
Missing Link
Ideal Toy Corporation -- you are about to find the solution:
The Missing Link, 1981, Ideal,
14pp., $2.00
Although its solution booklet for the cube was only of average quality,
Ideal Toy
Corporation produced a fine booklet on solving The Missing Link. This
is basically a
catalog of move sequences showing how to exchange two tiles in almost
any position relative to each other, without, disturbing any other
tiles. This gives the solver great flexibility in working out his own
solution, but enough instruction is given so that he will not feel
lost. The illustrations, in color, are clearly drawn so that the
effect of each sequence can be clearly seen.
Pocket Cube
Stat, Bob -- Rubik's Pocket Cube, 1982, Banbury
Books, 80 pp., $2.25
For collectors only. The full title is The Altogether Fun and
Absolutely Understandable Solution to Rubik's Pocket Cube. It
actually
contains an overlong and overcomplicated solution to the 2x2x2 cube.
Reading it even now, after almost 27 years of experience, I find it
hard to follow, even though Stat goes to a great
deal of effort to help the solver understand why each sequence has
the effect it does. It has only five sequences to learn, all
of them easy and fairly short, but is a very inefficient
solution, taking an average of about 40 moves. Instead of placing Up
corners directly, Stat's solution puts them in position and the orients
them if
necessary. Later he explains how to twist pairs of Up corners using
what he calls The
Adjacent Cell Twist (a meson similar to the one we describe in our
solution), which twists URF anticlockwise and UFL clockwise. Right
after doing it once (in the course of untwisting four corners), he
tells the solver to do it twice in a row on a pair of corners when ULF
needs to be twisted anticlockwise and URF clockwise, failing to point
out that it's not necessary to do it twice, or even to have a mirror
image version, since the whole cube can simply be reoriented so that
the cubes are in the correct position (the actual reorientation in our
notation is [RU2]). The most astonishing mistake, however, is in the
section entitled The Final Dilemma (pages 71-74). Stat states quite
clearly that a diagonally opposed pair of twisted cells "can never
be resolved by twisting adjacent pairs of cells" (italics his), and he
gives an alternate routine to twist diagonally opposed cells. There's
nothing wrong with having this alternate routine (a slight variation of
the normal meson; it has the same effect as Rubik's Twist), but in fact
it is very easy to fix opposite corners using The Adjacent Cell Twist
twice. If URF needs to be twisted clockwise and ULB anticlockwise (if
the reverse, just rotate the whole cube 180 degrees via [U2]), applying
TACT
will fix URF and twist UFL anticlockwise, putting the cube in perfect
position for a second TACT after turning the whole cube via [D].
The inside front cover contains a reference card showing the five move
sequences and what they do. There is also a 29-page glossary.
Rubik's Revenge
Adams, Jeffrey -- How to Solve Rubik's Revenge,
1982, Dial, 64 pp., paperback, ISBN 0-385-27807-1, $3.25
A very slow and inefficient solution, doing corners first, then edges,
and centers last. Perhaps the first book to have a
reasonably short Single Edge Flip, though Adams' 15-move routine
disrupts some centers (the non-disrupting one he gives later is 29
moves). Good color illustrations. Adams was at the time a 25-year-old
mathematics professor at MIT. I bought a used copy.
Jean-Charles, Jérôme -- Solving Rubik's Revenge,
1982, Corgi, 176 pp, paperback, ISBN 0-552-11974-1, £1.50
Translated from the original French, this is a corners first solution,
using part of the Varasano 3x3x3 method (the second set of corners are
oriented first, then positioned). Jerome introduces an even
more complicated version of the MES slice notation (ES are the U/D
slices, XY are the L/R slices, and αβ are the F/B slices), then largely
abandons it for a pictorial notation, using a confusing diamond shape
to indicate turns of the F/B slices). Better than the Adams
and Mason solutions, but there is a lot to remember. There
are also some editing errors (e.g. the diagrams on pp. 80-83).
Illustrated in black and white. Introduction by Ernő Rubik. I bought a
copy
from an independent dealer through Amazon UK.
Lenard, Frank -- There is no magic
to Rubik's revenge : the four by four cube, 18 pp., 1982
A rare booklet, which I have never seen. As far as I know,
one of
only seven English-language books devoted entirely to the 4x4x4 cube.
Mason, William L. -- Rubik's Revenge : The Simplest Solution,
1982,
Prentice-Hall, 154 pp., hardback, out of print
This book describes a layer-by-layer solution to the 4x4x4 cube, using
a
consistent set of 8-move tricycles to handle centers, edges, and
corners. Although the author takes pains to help the solver
remember what each routine does, there is a lot to remember here and
the general method is not efficient. Solutions to the 3x3x3
and 2x2x2 cubes are outlined in appendices. There is also a
collection of 50 pretty patterns. Like most books from this
era, it is illustrated in black and white. There are a few copies
floating around
the used book market, but at ludicrous prices (over $1000). I was
extremely lucky to get a paperback copy from Paperback Swap.
Reid, Michael -- Mastering Rubik's
Revenge, 1982, Simon & Schuster, 63 pp.
Smith, Wendy (edited by Robert Kraus) -- Rubik's Revenge, 1983, Simon &
Schuster, 128 pp., paperback, ISBN 978-0671457495, out of print
Included here for completeness' sake, this is one of two
English-language
guides from the 1980's which I have never seen. It also
doesn't seem to be available anywhere, at any price. I've been
looking everywhere for the last several years: Bookfinder, eBay,
Amazon,
Paperback Swap, WorldCat, etc. Even the Library of Congress doesn't seem to have a listing.
Thai, Minh et al. -- The Winning Solution to
Rubik's Revenge,
1982, Dell/Banbury, 73pp., $3.95
U.S. Rubik's Cube Champion Minh Thai
also wrote a book on Rubik's Revenge, with M. Razid Black and
Herbert Taylor. The solution is based on Thai's solution to the cube,
with some additional steps necessary to solve the multiple centers
and the double set of edges. Like his solution to the cube, this is
powerful but rather difficult. The solution is marred by a
consistent diagram error in Stage VI, starting on page 47: the diagrams
for center-swapping routines show the center at Ldf being swapped to
Bdl, but the 9-gram and 8-gram routines both move the Luf center rather
than the Ldf center.
Pyraminx
Alford, Bill and Iobst, Ken -- The
Simple Solution to
the
Pyramid, 1982, Pinnacle, 62pp., $1.95
A reasonably efficient solution to Pyraminx; the
sequences given here handle each possible situation, so
that the solver need not backtrack as is necessary with Nourse's
solution. The mathematics of the pyramid is discussed briefly, and
five pretty patterns are shown (with solutions). The book is somewhat
longer than necessary (partially due to the pictorial notation), but
it is nevertheless a worthwhile book for anyone interested in
Pyraminx. Inexpensive used copies are plentiful.
Nourse, James G. -- The Simple Solutions to Cubic Puzzles,
1981,
Bantam
See above.
Werneck, Tom -- Solving the Magic Pyramid,
1982,
Perigree, 112 pp., $2.95
Although written at the request of Uwe Mèffert, the inventor
of Pyraminx, this book is a disappointment. The book consists of some
history
and background on the pyramid, a solution, and a number of pretty
patterns. The background is the best part of the book, giving some
details about Mèffert and his invention of the pyramid (Mèffert
invented the pyramid in the early 1970's, but did not see its
possibilities as a puzzle until Rubik invented the cube several years
later). The solution given, however, is by far the weakest of all of
those discussed here. The basic method is poorly
conceived
and long-winded. It uses the small corners as
signposts to
which color will
end up on each layer, requiring the solver to
turn one or
more small corners after most
sequences. This adds considerably to the amount of time (and the
number of moves) required. Individual sequences
are also
unnecessarily long (e.g. 13 moves for a
sequence which twists a large corner, essentially equivalent to a
tricycle). The worst section of the book,
however, is the section on pretty patterns. There are 12 patterns
presented here, but many of them are chaotic and unattractive, and
Werneck has saddled them with rather pretentious names. The move
sequences given to solve most of them are, again, generally longer
than necessary. A few of them should be classified as basic sequences
rather then pretty patterns. An example is the pattern called The
Fire Red Cat's Paw (nothing more than a double edge flip), with a
solution given that runs 16 moves (bUBrLR(UL)5). A
double edge flip should only take 8 moves. Three of the
patterns also appear in the section on alternative sequences with
solutions which are shorter than those in the pattern section, but
still much longer than the best known solutions! Werneck tries to
downplay the relationship between the cube and the pyramid (instead
of helping the reader by emphasizing their similarities, he advises
forgetting about the cube while trying to solve the pyramid). The
Pyraminx enthusiast would do well to choose another book instead.
For collectors only.
Magic Domino
Helm, Georges -- Das magische Domino, 6 pp., booklet,
self-published,
February 1984
Neat 6-page booklet in German, giving a full solution to the 2x3x3
Domino, including extra routines for speeding up edge swaps.
Easy to follow even if you can't read any German; the diagrams are
clear and the notation is similar to Singmaster's, except that German
OULRVH (oben, unten, links, rechts, vorne, hinten) = English
UDLRFB.
If you run across any books or magazines in Dutch, BOLRVA (boven,
onder, links, rechts, voor, achter) = English UDLRFB.
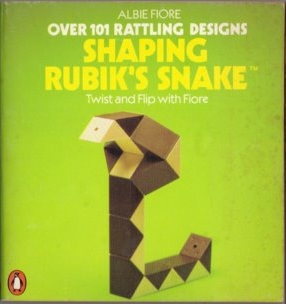
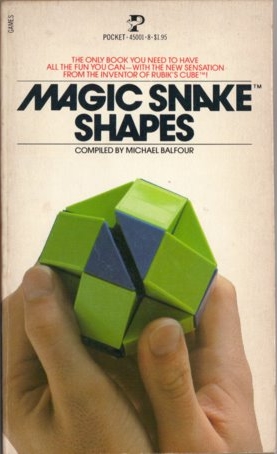
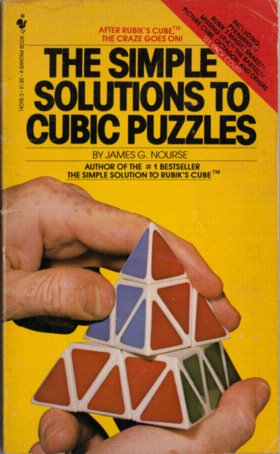
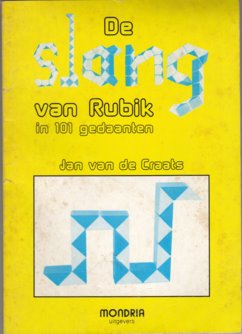
Rubik's Snake
Balfour, Michael -- Magic Snake Shapes, 1981,
Pocket, 96pp., $1.95
This is a collection of about 130 figures, and does not include
solutions for the
shapes. There is little background information, but Balfour poses a few
interesting
problems in the last section (also without solutions). There are a
larger number of figures
here than in Fiore's book, and many of them are grouped together
thematically, including some good collections of birds,
dogs, and snakes. Surprisingly few of the figures in Balfour
are found in
Fiore, and the real Snake enthusiast will want to buy both books.
Inexpensive used copies are plentiful.
Fiore, Albie -- Shaping Rubik's Snake, 1981,
Penguin, 127pp., £1.95
Albie Fiore (a former editor of the superb British magazine Games
& Puzzles) has written Shaping Rubik's Snake,
with drawings of over a hundred figures to be made
with the Snake. Fiore gives solutions to all of them, as well as some
interesting problems, using a simple notation. His notation does not,
however, indicate when twists have to be made in some order other
than from one end of the Snake to the other. The background
information is highly valuable (for example, Fiore discusses the ways
in which two or more sections can be twisted into a particular
angle). This little book is an excellent reference for the Snake
enthusiast.
Nourse, James G. -- The Simple Solutions to Cubic Puzzles,
1981, Bantam
Nourse packs 41 figures, plus information on forming the
rhombicuboctahedron (the spherical shape in which the snake is usually
sold, pictured on the cover of Balfour) and some spirals, into only 7
pages of his book on post-cube
puzzles.
van de Craats, Jan -- De Slang van Rubik in 101 gedaanten,
1981, Mondria
101 figures with black-and-white photographs.
Sly, Susanna -- 666 Silly Schemes to Scramble the Magic Snake,
1982, A & W Visual Library, ISBN-13: 9780891043003, 96 pp.
A book as silly as its title. It has less than 100 cartoons, showing
snakes
scrambled into various figures (not very well drawn, and titled
only in the Index), with no solutions or other
details. Recommended only for the most die-hard collector.
I bought this for $2 in February 2010 from a used book dealer.
ImpossiBall
Endl, Prof. Dr. Kurt -- Impossiball, 1982,
Wurfel-Verlag GmbH
Skewb and Orb
Singmaster, David - Cubic Circular, Issues 2
(Spring 1982) and 3/4
(Spring/Summer 1982)
Issue 2 mentions the Orb (called Orb-It in the U.K.); issue 3/4
mentions the Skewb (called the Pyraminx Cube in the U.K.).
Endl, Prof. Dr. Kurt -- The Pyramid, 1981,
Wurfel-Verlag GmbH
Endl, Prof. Dr. Kurt -- Pyraminx Cube, 1982,
Wurfel-Verlag GmbH
Hofstadter, Douglas -- Metamagical Themas, July 1982, Scientific
American, pp. 16-31
Singmaster, David -- Cubic Circular, Issue 5/6,
page 10
Octahedron
Delbourgo, Daniel and Tino -- How to Organize the Octahedron,
1982, National Library of Australia
Schlagbauer, Keith H. -- The Easy Way to Solve the Star,
1981, Rainnie,
Punt and Fitzgerald
Engel's Enigma
Dewdney, A. K. -- Computer Recreations, "Bills baffling burrs, Coffin's
cornucopia, Engel's enigma", Scientific American,
October 1985, pages
16-27.
Engel, Douglas A. -- Circle Puzzler's Manual, 87
pages, 1986, General
Symmetrics, $10 postpaid in U.S., paperback.
Marley, Scott -- Group Theory, Rubik's Cube, and the Avenger, Games
Vol. 11, Num. 4, June/July 1987, pages 44-45.
Singmaster, David -- Cubic Circular, Number 2, page
14, and Number
5/6, pages 9-10.
Square-1
Hordern, L. Edward -- "Square-1 -- The Solution", Puzzle World
1, pp.
8-13, Summer 1992
Hanegraaf, Anton -- "The Many Faces of Square-1", Cubism For
Fun 28,
pp. 27-31, April 1992
Hewlett, Clarence -- Returning a Non-Cube Shape of Square-1
to the
Cube Shape, 5 pp., private publication, 1993
Hewlett, Clarence -- Solution for Square-1 Puzzle After the
Cube Shape
Has Been Restored, 3 pp., private publication, 1993
Kopský, Vojtech -- "The Story Behind Square-1", Puzzle World
1, pp. 14-19, Summer 1992
Snyder, Richard B. -- Turn to Square-1, 1993,
Richard Snyder, 81 pp., no ISBN, $5.00
Top-Spin
Binary Arts -- "Top-Spin Solutions", 7pp., 1989
Hordern, L. Edward -- "The Top-Spin Puzzle", Cubism For Fun
22,
p.26,
December 1989
Lammertink, Ferdinand -- "About the Design of Top-Spin", Cubism
For Fun
23, pp.16-17, March 1990
Wiezorke, Bernhard and Anton Hanegraaf, "Top-Spin Processes", Cubism
For Fun 24, pp.12-13, July 1990
Smart Alex and Galaxy Lock
Fletterman, Ronald -- "Smart Alex", Cubism For Fun
29,
September 1992,
pp.38-39 and "Sandwich Puzzles", p.40
Rubik's Clock
Lavery, Angus -- Rubik's Clock: A Quick Solution (Authorized Edition), 1988,
Pan, 48 pp, paperback, £1.99, ISBN 0-330-30866-1
A straightforward solution to the Clock (which came to the author
in a dream!), with large black-and-white diagrams. Also
shows all 16 possible positions of the buttons and which clocks turn
when each wheel is turned (there are only two cases for each position).
[The following three articles are from Cubism For Fun
19,
Dec. 1988:]
The Editors of CFF -- "Rubik's Clock", p.10
Hordern, Edward -- "Solution for the Clock", p.11
Schultz, Guus Razoux -- "Mathematics on the Clock", p.12-15
Who's Who in Cubology
Adam Alexander -- inventor of Alexander's Star
Christoph Bandelow -- author of many books on twisting puzzles
Oskar van Deventer -- inventor of the Redi Cube and other puzzles, many of them built using 3D printers
Tony Durham -- inventor of Skewb
Tony Fisher -- inventor of Siamese Cubes, the first transformed twisting
puzzle design,
which also led to analysis of bandaged cubes where certain layers
cannot be turned
Solomon Golomb -- mathematician working in many puzzle fields
(particularly
polyominoes, a term he coined); also coined the terms baryon and meson
by
analogy with particle physics
Gaétan Guimond -- developer of a complex corners-first method for
solving Rubik's Cube, widely used for the Pocket Cube
Georges Helm -- author and preeminent collector of twisting puzzles and
books
Douglas Hofstadter -- wrote the first mainstream article on Rubik's
Cube, for Scientific
American
Edward Hordern -- eminent collector and analyzer of puzzles (he wrote
the definitive book Sliding Piece Puzzles);
published solutions for many twisting
puzzles including Rubik's Cube, Rubik's Clock, and Square-1
Herbert Kociemba -- developer of the powerful Cube Explorer solving program; developed an improved version of Thistlethwaite's algorithm using only two stages instead of four.
Tom Kremer -- game inventor and agent who licensed the Cube from Ernő
Rubik; founder of Seven Towns Ltd. and co-founder of Winning
Moves, which manufactures Rubik's Cube and other games and puzzles today
Uwe Mèffert -- inventor of Pyraminx and manufacturer of many puzzles.
James G. Nourse -- author of a 1981 best-selling book on Rubik's Cube,
and subsequent books on other twisting puzzles as well as Rubik's Magic
Cyril Östrop -- author of an early solution book, perhaps the first to
suggest placing Up corners and middle edges simultaneously. His
ideas helped inspire the 3x3x3 method described in this booklet.
Max Park -- current world record holder for a single 3x3x3 solve, and
both single and average times for cubes 4x4x4 through
7x7x7. He was the first to break one minute on a 6x6x6
solve. He and Feliks Zemdegs were the subject of a 2020
documentary, The Speed Cubers.
Ernő Rubik -- inventor of the Rubik's Cube, perhaps the first puzzle
inventor in history to become a brand name
Jaap
Scherphuis -- author of a very
comprehensive website on twisting
puzzles and other mathematical puzzles, including not only
solutions but many simulator programs written in Javascript
David Singmaster -- author of an early newsletter and eventually
several books on Rubik's Cube and other puzzles; devised a notation
which is widely used
Christopher Taylor -- co-inventor (with Chris Wiggs) of the Orb and
Rubik's Clock
Don Taylor -- author of one of the first commercially published
solutions, a best-seller in 1981
Minh Thai -- winner of the inaugural Rubik's Cube World
Championship in
Budapest, and best-selling author. On June 5, 1982, at only 16 years
old, he solved a cube in 22.95 seconds in the finals (the current world
record is 3.13 seconds by Max Park of the U.S. in 2023; top
solvers now average under 5 seconds!). Single
times can be
a fluke; nowadays the average time of five trials (discarding the
fastest and slowest) is used; that record is held by Yiheng Wang with
4.25 seconds in 2024. Minh Thai went on to write two popular
books
explaining his methods of solving both the Rubik's Cube and Rubik's
Revenge.
Morwen B. Thistlethwaite -- devised the first extremely short
algorithm, initially able to solve the cube in 52 moves (later
improved by Kociemba and others)
Jeffrey Varasano -- one of the competitors in the
first Rubik's cube tournaments, holding a world record of 24.67 at the
end of 1981; author of a book describing a corners-first method for
solving
Rubik's Cube which is widely used for the Pocket Cube
Panagiotis Verdes -- inventor of a new cube mechanism which allows for
cubes larger than 5x5x5; so far cubes through 9x9x9 have been
manufactured by his company.
Chris Wiggs -- co-inventor (with Christopher
Taylor) of the Orb and Rubik's Clock
Feliks Zemdegs -- an Australian who set over 100 world records as a
teenager for single and average solving times for cubes ranging from
2x2x2 to 5x5x5. At one time he held 9 of the 10
fastest times ever for the 3x3x3, and 13 of the 20 fastest for the
5x5x5. In an early version of this booklet, I
predicted he would be first to break the 1 minute barrier on the 5x5x5,
which he did at the 2011 World Championships -- he averaged 59.94 in
the finals. He was also the first to break the 2 minute barrier
on the 6x6x6.
Appendices
Appendix 1 -- Varasano method for
speedsolving
2x2x2
A fast and relatively easy method
for speedsolving the Pocket Cube was first described (as part of a
3x3x3 method) in Jeff Varasano's 1981
book Jeff Conquers The Cube in 45 Seconds. The idea
is to
put the four corners of one color (say blue) into the same
layer with their common color face up without regard to
position (in fact it's preferable not to have them all positioned
correctly, as we saw earlier in A Peculiar Position).
Then the cube is flipped over and the four remaining
corners are twisted, using one of seven fast twisting
routines, so that the opposite face also has four facets of
the same color (in this case, white, the color opposite blue).
Finally both layers are positioned simultaneously. Here is our
slightly simplified version. Similar methods found online are frequently
credited as the Ortega method, but Varasano published this method eight years before the World Wide Web.
In the first stage, we want to put all four blue facets on the Up face,
regardless of what order the four blue corners are in (that is, the
upper halves of the four side faces can be any combination of
colors). Turn the whole cube so that (at least) one of the Up
facets is blue, and that a blue facet is at ULF (diagram above far
left). [If there are two adjacent blue facets, you can skip one
step and hold the cube as in the second diagram above.] Find
another blue facet, preferably in one of the pink shaded locations
(where a single turn puts a blue facet in place) in the first
diagram. Make the turns indicated to put the second blue facet at
either ULB or URF, and then hold the cube so that the two blue facets
are on the left half of the Up face. Now we want to put a
third blue facet at either URF or URB. The ideal positions are again
shown in pink: anywhere on the right half of the cube, except the Right
face. If both remaining blue facets are on the left half of the
cube (or the lower half of the right face), a single Down turn puts one
of them in one of the positions where the correct Right turn puts it in
place.
In the rare circumstance where both blue facets are on the upper half
of the Right face, we can use a special maneuver, shown above far
right, to put both in simultaneously. Turn the Right face
anticlockwise to put the third and fourth blue facets on the front half
of the Right face, then do F2R2F. This quick maneuver is worth
knowing and understanding, as we can use
variations of it to place the third and fourth blue facets at the same
time whenever they are adjacent. If they are both on the Down
face, just turn the Down face so they are below the target positions,
then make a half turn of the Right face. If both are
together on the lower half of a side face, turn the Down layer to bring
them both to the Right face, then turn the Right face clockwise to put
them into the position shown. Sometimes a single turn of the Down
or Right layer can bring the third and fourth blue facets together to
allow them to be placed together.
If you have placed the third blue facet by itself, the fourth facet can
be placed using sequences shown in the third diagram. Many of
these are the same as we are familiar with in the standard 2x2x2
solution, but the shortcut sequences highlighted in yellow are worth
knowing; they take advantage of the fact that we can put the fourth
facet where the third one was and the third back in the remaining
spot. [We will meet the sequence R2DR2
again in almost identical circumstances when we solve the first four
centers of the 4x4x4 cube.]
Now all four blue facets are on the Up face. Turn the whole cube
upside down, and remember what color is opposite blue on your 2x2x2
(white on the original Pocket Cube, and in our diagrams, but green on
most newer cubes. Of course, if you chose a different color than
blue, you need to know, or figure out, what color is opposite
it). Use one of our six standard twisting
sequences
to put the four facets of the correct color on the new Up face. [The
standard method uses seven sequences: the baryons (Sunes)
and second double meson are identical to the ones we already
know. The other four routines are shorter, but harder
to remember (they also reposition some of the Up corners); there are
two mesons with mirror-image orientations. You can learn these
from page 28 of Varasano's book.]
Now all eight corners are correctly separated into two layers and
oriented
correctly with respect to their layer (so that Up and Down faces each
have four facets of one color), but may be out of position.
In each of the two layers, either the corners are correctly
positioned (all of the side facets match in that half of the cube), two
adjacent corners need to be swapped (one of the four sides has two
facets of the same color), or two diagonally opposite corners need to
be swapped (none of the sides match: in this case it doesn't
matter which diagonally opposite pair is swapped). There are
six possible cases. In one case (8 matches) both layers are fully
correct and they
can
simply be turned so they match, and the cube is solved. Each of
the other five cases requires using a different sequence which
simultaneously
fixes both layers. Note that the whole cube needs to be held
in a
particular position for each case. The two layers only need
to be
aligned with each other beforehand in the 2 matches case; turn the
whole cube so
that the correct pair on the Down layer is on the Front face, and turn
the top layer so that its correct pair also
goes to the Front face. After performing the indicated
routine,
turn the layers so they match to finish the solution (the last move of
the 4 Matches routine is shown as U2, but it might be any turn (or
none) of the Up face).
[Note: The 2-match routine can be done a little faster if you reorient
after (or even while) you're doing the middle turn, so it actually
comes out as R2UR2U2[U]R2UR2.]
Appendix 2 -- MES
and xyz notation
Mathematicians analyzing the 3x3x3 and larger cubes
introduced
two additional sets of notations (horrible and
unnecessary in my view) for slice turns and
turns of the whole cube. Since these are used elsewhere
(including the official notation of the World Cube Association), I have
added a quick explanation.
MES denote turns of the three slices of the 3x3x3 cube. They also
denote turns of the central
slice of the 5x5x5 and larger odd-order cubes, or the two center slices
of 4x4 and larger even-order cubes.
M (meridian) turns the middle slice in between L and R, in the
direction of L (L* in our
notation). M' is R* in our notation. [Some sources reverse
this]
E (equator) turns the middle slice in between U and D, in the direction
of D (D* in our
notation). E' is U* in our notation.
S (slice) turns the middle slice in between F and B, in the direction
of F (F* in our
notation). S' is B* in our notation.
Some books use H/V/C (horizontal, vertical, center) to
indicate U*/R*/F*.
Winning Ways uses the
first five (and the last) Greek letters αβγδεω to designate the 3x3x3
slice
turns R*, L*, B*,
F*, D*, U* (using the mnemonics Away, Back, Gauche, Dexter, East, West).
xyz denote turns of the entire cube.
x turns the entire cube in the same direction as an R turn, [R] in our
notation. x' is [L] in our notation.
y turns the entire cube in the same
direction as an U turn, [U] in our notation. y'
is [D] in our notation.
z turns the entire cube in the same
direction as an F turn, [F] in our notation. z'
is [B] in our notation.
Note that not only is M ambiguous depending on the source, E and y are
opposite turns, while S and z are turns in the same direction.
The whole thing makes no sense.
Some authors also use a w suffix for deep turns: Fw means to turn the
Front face and its corresponding middle slice together (FF* in our
notation for 3x3x3, 12F in our 4x4x4 notation). Other authors use
a lower-case letter (f instead of Fw).
Not only does this system require three different notations just for
3x3x3 cubes, it breaks
down badly when you try to apply it to cubes of 6x6x6 and larger.
Copyright ©2026 by Michael Keller. All rights reserved.
This booklet
was edited most recently on March 16, 2026.