Solitaire
Arcade presents:
A
Walkthrough and Player's Guide for
Plants vs.
Zombies
written by Michael Keller
Plants vs. Zombies is ©2009-2010 by PopCap
Games, Inc. Used with permission. All rights reserved.
Plants vs. Zombies is a trademark of PopCap Games, Inc.
which may be registered in some countries.
It's very rare nowadays that I buy casual games at full
price,
but the first hour of Plants
vs. Zombies (I made it through level 2-1) was so good that I
didn't want to wait for it to show up on the portals. I bought
it directly from PopCap
at
10% off within a few days of its May 13th, 2009 release. It was worth
every penny of the $17.95 I paid. It has been nominated for a
number of awards, including Best PC Game and Best Downloadable
Game in the Spike TV 2009 Video Game
Awards (though it didn't win either award, as it was competing with
hardcore video games). The Academy of Interactive Arts and Sciences
nominated it as Casual Game of the Year. In terms of replay
value
and how much it offers
the player, in play variety and strategy, it is one of the best casual
games ever. It is first-rate in its design
(George Fan), programming (Tod Semple), music and sound (Laura
Shigihara), and art (Rich Werner and company). It's full of humor and
loaded with pop culture references to music, movies, and TV. There are
no serious bugs and only a few minor flaws. It loads quickly and plays
easily in an 800x600 window. The game features 101 different levels,
providing an astonishing variety of play which combines strategy with a
bit of arcade skill. PopCap also now has an online
Flash version, though this only goes up to level 2-4 and has
no money. There are versions now for PC (Windows XP/Vista/7),
Macintosh,
iPhone, iPad, XBox Live Arcade, and Nintendo DS. This player's guide
was written for the PC
version, but almost all of it should apply to most of the other
versions (the iPhone version is a limited version, while the iPad,
XBLA, and DS versions have some added features).
The basic idea of the game is that you have moved into a
new neighborhood beset by zombies who might attack your house, day or
night, in any weather, trying to get into your house across your front
yard, back yard, or rooftop, in order to eat your brains. How can you
stop these zombies from getting in? By planting a variety of plants in
your yard, pool, and on top of your house (to keep them from getting in
through the chimney). The plants are powered by sunlight, which falls
from the sky (you have to click the yellow balls of sunlight as they
fall). In the very first scenario you have only one plant, a
Peashooter, which shoots green peas one at a time at the zombies which
amble slowly across the screen from right (the street) to left (your
house). When a zombie is hit enough times (a basic zombie takes ten
hits from a pea), its head falls off and it eventually disappears. When
a zombie reaches a plant, it will attempt to eat it (with wonderfully
horrible chomping noises), and if the zombie survives long enough the
plant will disappear. As you collect sunlight (expressed in points --
generally 25 per ball), you can buy plants with it and place them in
the squares of your lawn, which starts as one strip, but quickly
expands to 5 (and later 6) lanes of 9 squares. The initial part of the
game, the
Adventure mode, consists of 50 levels in which new plants are
introduced, generally one per level; some of the 49 varieties of plants
can only be bought as powerups later in the game. The 26 different
kinds of zombies are also introduced gradually. Each level starts
slowly, with zombies coming one at a time, but eventually they come in
waves, with a huge Final Wave at the end. Each level ends either with a
win, by destroying all of the zombies, or a loss, by a zombie reaching
your
house -- but each lane of your lawn is protected by a lawnmower which
is triggered by a zombie breaking through the last (leftmost) plant. A
lawnmower destroys every zombie in its lane, but each can only be used
once per level -- if another zombie breaks through the same lane, you
lose and must repeat that level.
After the first level, you get Sunflowers, which generate
extra sunlight. You have to buy these too, but the more sunflowers you
plant the faster you collect sunlight to buy zombie-attacking plants.
You actually have to manage four resources: sunlight, time, space, and
money. Time is important because each kind of plant must recharge,
once you have planted one, before you can plant another of the same
kind (a few plants also take time to activate after they are planted --
Potato Mines in particular take just a fraction under 16 seconds).
Space is important because the game takes place in an area
which is 5 by 9 squares (sometimes 6 by 9) and each square usually
holds only one plant (with a maximum of three). The first ten
levels (Day) take place in your front yard during daytime. Each set of
ten levels is punctuated by a variety game at the fifth level and a
conveyor belt game (where plants are handed to you at random) at the
tenth. After level 1-4 you find a Shovel, which allows you to dig up a
plant and plant another one. This is free and you will need it a lot,
either to place a different plant in a particular spot, or to replace a
badly damaged one. You also meet your neighbor, Crazy Dave, who wears a
pot on his head and speaks in gibberish (luckily translated by word
balloons). He introduces you to Level 1-5,
where Wall-nuts (large walnuts, introduced after 1-3) are rolled
towards the attacking zombies. These will ricochet after hitting a
zombie, possibly hitting other zombies. Red Explode-o-nuts detonate
when they hit a zombie, also destroying nearby zombies. This serves as
an easy introduction to two of the later Minigames. The early levels
are relatively easy, though you still might find yourself saved by a
lawnmower on occasion. Once you have found enough plants, you are also
limited to six different kinds of plant in each level, which you select
at the beginning of each level starting at 1-8. Later you will be able
to buy additional seed slots, allowing you up to ten different plants
per level (important for the more difficult games).
A Quick Look at the Plants
The plants can be grouped into six categories:
generators,
shooters, catapults, explosives, protectors, and specials.
Generators are plants which produce Sun. There are
three of these: Sunflowers and Twin Sunflowers, which work at any time,
and Sun-shrooms, which are only useful at night. Marigolds
could also be grouped with generators, but they produce money instead
of Sun.
Shooters shoot either peas (Peashooter, Repeater,
Threepeater, Gatling, Split Pea, and Snow Pea), pointed darts
(Cactus and Cattails), stars (Starfruit), or poisonous purple
fumes (Puff-shroom, Sea-shroom, Fume-shroom, Scaredy-shroom, and
Gloom-shroom). The pea, dart, and
star shooters (and the Scaredy-shroom) have unlimited range
(and are equally effective at any range); the rest of the fume shooters
have limited range. None of the shooters are
effective on the angled part of the Roof, being limited to one square
of range. Most shooters only affect the first zombie they hit,
but Fume-shrooms and Gloom-shrooms shoot thicker fumes which affect
every zombie in their range.
Catapults fling vegetables with unlimited range
(including the whole roof): these are Cabbage-pult, Kernel-pult,
Melon-pult, and Winter Melon. Both shooters and
catapults destroy zombies by accumulated
damage. Snow Peas and Winter Melons have an added
effect of slowing down
zombies they hit, making all shooters (including themselves) and
catapults more effective by
giving them more time to inflict damage. Regular green melons and blue
Winter melons burst apart when they hit a zombie, and the fragments can
also damage zombies in adjacent squares (usually called splash
damage).
Explosives are plants which generally destroy one
or more zombies in a
single attack. Some go off
almost as soon as they are
planted, with a large area of effect (Cherry Bomb, Jalapeño,
Doom-shroom, Cob Cannon). Others go off on
contact with a zombie, destroying either one zombie (Chomper,
Tangle Kelp), or everything in one square (Squash, Potato
Mine). Not all of them actually explode,
but the effect is the same; the Chomper eats a zombie, the
Tangle Kelp drags one underwater, and the Squash smashes one or more
zombies flat. The Ice-Shroom can also be
considered a wide-area explosive, which temporarily freezes
zombies rather than destroying them (a special effect shared by the
pats of butter flung by Kernel-pults). In general, plant
explosives harm only zombies (the converse is true for the few
explosive zombies: e.g. Jack-in-the-Boxes only destroy plants).
Explosives (and Garden Rakes) cause about 90 peas' worth of damage,
enough to immediately destroy any zombie except a Gargantuar or
Giga-Gargantuar.
Protectors block zombies, forcing them to stop and
eat (Wall-nuts,
Tall-nuts, and Pumpkins), cause damage as zombies cross them
(Spikeweed and Spikerock), divert zombies into other lanes (Garlic), or
reject aerial attacks (Umbrella Leaf).
Specials are plants with various individual
effects. Grave
Busters destroy graves in Night
scenarios. Hypno-shrooms hypnotize zombies,
effectively turning them into
plants. Torchwood doubles the effectiveness
of peas passing over it by turning them into fireballs. Lily
Pads and Flower Pots allow most plants to be planted in Pool lanes or
on the Roof, respectively. Planterns and Blovers
counteract fog (Planterns continuously, by illuminating a large area,
Blovers by blowing the fog away temporarily); Blovers also
blow Balloon zombies backwards off the screen. Coffee Beans wake up
mushrooms, allowing them to be used during
daytime. Magnet-shrooms steal metal objects away from
zombies. Marigolds generate money. Gold
Magnets collect money.
Each
plant has a recharge time. Fast-recharging plants are
available
as soon as a scenario begins, and can be planted as soon as you have
enough Sun. Slow and very slow recharging plants
take about
20 and 35 seconds, respectively, from the start of the scenario to be
(potentially)
available for the first time.
Shooters (peas, stars, darts, fumes) all seem to shoot around 44 times
a minute, though this may be two (Repeater, Cattail), three
(Threepeater), four (Gatling), or five (Starfruit) at a time. The
exception is Gloom-shroom, which shoots fumes in all eight directions,
three bursts at a time, about 32 times a minute. Catapults lob
their fruits or vegetables about 22 times a minute (so that
Cabbage-pult, whose cabbages have the same effect as two peas, has
about the same firepower as a Peashooter).
Adventure mode
Day scenarios
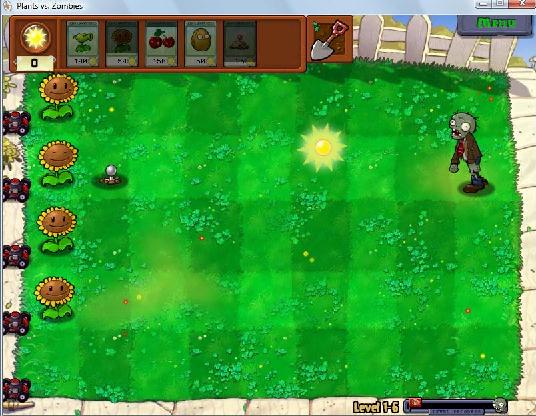
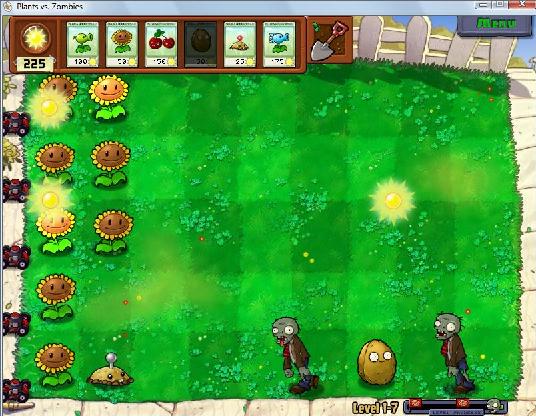
Level 1-1
On the very first level of the
Adventure, your
front lawn is only one lane
wide. Your only weapon is Peashooters, and you only face plain
zombies. It's actually impossible to lose this in tutorial
mode, as the game won't send any zombies until you have collected some
Sun and planted two Peashooters, which is enough to kill the five plain
zombies you see in this level. Even if you plant two Peashooters
at the far right, and both get eaten, the Lawnmower will save you by
running over the remaining zombies. Each zombie takes ten
hits from peas to kill it. Sun falls about every 6 or 7 seconds.
You'll only have time to plant three Peashooters. This is the only
level without a Final Wave.
If you type the word mustache on
your keyboard at any time,
the zombies will grow mustaches, and you will get the first of 20 achievements. At the end of
the level, you
will find seeds for Sunflower.
When you
play
through the Adventure a second time, you still only face plain
zombies in Level 1-1, but your lawn will be the normal five lanes wide.
You will have a wide range of weapons available, potentially all 49
plants.
This is the easiest place to try for the Good
Morning achievement. All of the Day levels except 1-10 are a
flag longer the second time through.
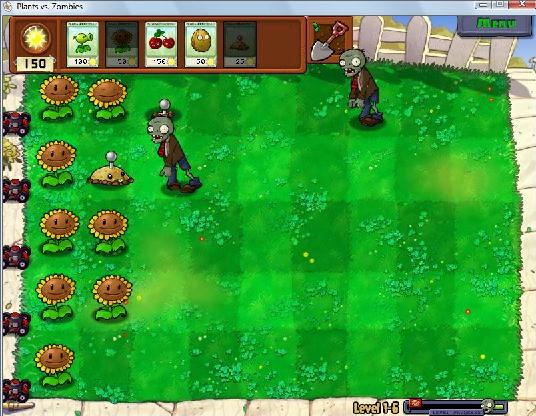
Level 1-2
Your lawn is now three lanes wide. You will need to plant Sunflowers
to earn Sun to plant Peashooters more quickly; plant two or three
columns of Sunflowers, and start planting Peashooters in column 3 or 4,
getting at least two in each row as quickly as possible. The
Flag Zombie appears, but it only marks the start of a new wave of
zombies, and you kill it just like a normal zombie. You will
find seeds for Cherry
Bomb.
Levels 1-1 and 1-2 are so easy,
even the second time through, that you can win with Peashooters alone,
using only the falling Sun.
Sun planting strategies
The most important principle to follow in planting Sunflowers (and
later Sun-shrooms) is to plant
one every time it recharges. That is, always make sure you have enough
Sun accumulated to
plant a Sunflower, until you have planted all the Sunflowers you have
room for: generally three
full columns of Sunflowers (and perhaps four of Sun-shrooms), though in
some scenarios you can
place more in some of the grass lanes (e.g. in Bobsled Bonanza,
or in
scenarios where you are using
Threepeaters). For example, in Fog scenarios, you should always have 50
Sun accumulated before you
place your first Lily Pad, and 50 again before you plant a Plantern.
You can bend this rule slightly when planting something critical: it is
important to get your
first Cattail down the moment you have 225 Sun, and you might have to
plant a Tall-nut or an
explosive to deal with an immediate threat. You can also plant extra
Sunflowers in spots you know you will
eventually want to dig them up and replace them with other plants (e.g,
plant them in the pool
lanes and later replace them with Cattails).
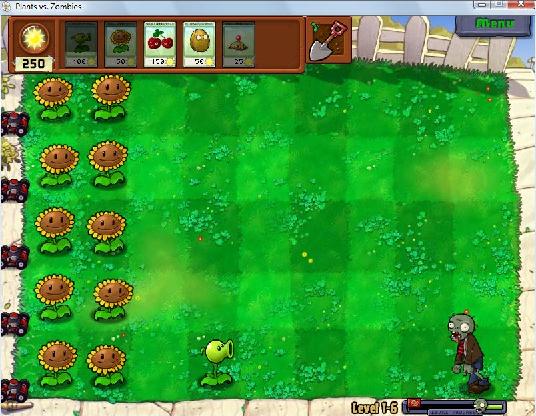
Level 1-3
You now face some Conehead zombies as well as plain ones. Coneheads
take 28 peas to kill. You might need to use Cherry Bombs to kill some
of the Coneheads (place them in the same or an adjacent square), though
it is possible to win without using any. You
should be able to plant three columns of Sunflowers and three or four
of Peashooters. You will find seeds for Wall-Nut.
Visual Damage

Instead of having a complex system where you would have to
mouse over a zombie or plant to see how much damage it had taken, the
designers chose to use an approximate system of gradual physical decay,
which enables the player at a glance to have a rough idea of how close
a zombie or plant is to being destroyed. Above is an example for
Coneheads, showing each level of damage and the number of peas at which
it is reached. The undamaged Conehead is shown at 0. His
cone is bent after getting hit with 7 peas or the equivalent,
cracks at 13, falls off at 19, his arm falls off at 24, and he dies
(again) at 28. Most zombies have fewer levels than this: a
plain zombie loses his arm at 5 and dies at 10. Generally
speaking, when a zombie loses his protection (cone, bucket, screen
door, etc.) he is at least as weak as an undamaged regular zombie
(and should take no more than 10 more peas worth of damage).

Another example. The Buckethead's bucket is dented at 19 peas,
moves
upward at 37, and falls off at 55. His arm falls off at 60 and his head
at 65. Screen Door zombie has analogous damage at exactly
the same levels.
Level 1-4
Your lawn is now five lanes wide. Use Wall-Nuts to protect each
lane, placing them in the seventh or eighth columns in each lane.
You will continue to face regular and Conehead zombies throughout the
remaining Day levels. Three Peashooters and a Wall-nut in each
lane are enough to stop everything, though you have Cherry Bombs if you
need them.
You will meet your neighbor Crazy Dave, who shows you how to dig up
plants
with a Shovel. Just click on the Shovel icon in the
upper right, which turns
your cursor into a shovel, and then
click on the plant you want to dig up (the plant you are about to dig
up will light up as you drag the shovel over it; this is important
later when you may have multiple plants in the same square).
Level 1-5
Dave then gives you a Wall-nut so you can play an introductory version
of Wall-Nut
Bowling, one of the Minigames. This is a Conveyor Belt
scenario: you do
not collect Sun and buy plants with it; the plants you receive (in this
case Wall-nuts) randomly appear at about 4 second intervals,
moving right to left on a conveyor belt. You may pick them up
and use them (in this case, roll them) immediately, or save them up and
let them accumulate on the left end of the belt.
The belt will hold ten plants; if it fills up,
no more Wall-nuts will appear until you start using them again. Roll
the Wall-nuts down one of the five lanes to kill a zombie coming up
that
lane. A rolling Wall-nut will hit the first zombie it reaches,
then randomly deflect at about a 45 degree angle into one of the
adjacent lanes (or bounce off the side of the lawn and deflect the
other way). Plain zombies take one hit from a Wall-nut,
Coneheads take two. Explode-o-nuts (which are red) will explode
when they hit a zombie, blowing up everything in adjacent squares (like
a Cherry Bomb) -- you should save these up until you need them to blow
up large groups of zombies which have advanced too far. You
shouldn't need to use many Explode-o-nuts, perhaps none. You
will face between 45-50 zombies in about 3 minutes, about a third of
them
Coneheads. You will find seeds for Potato Mine.
On your
second
time through the Adventure, 1-5 is the full
version of Wall-nut
Bowling, just like the Minigame -- you will face Newspaper
zombies, Bucketheads, and Pole Vaulting zombies.
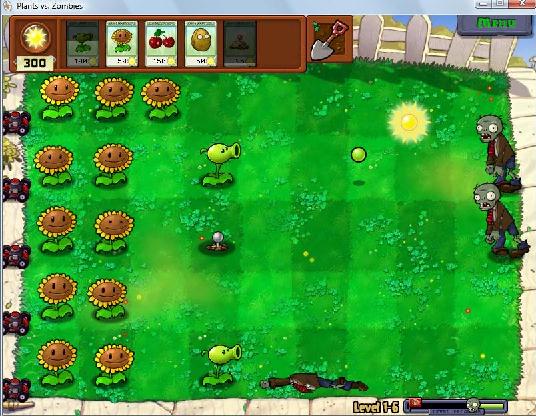
Level 1-6
You will encounter the Pole Vaulting Zombie (in this and all remaining
Day
levels), which jumps over the first plant it encounters. It becomes
slower after it jumps, so put anything cheap in
its path (Potato Mines are good, since they can later blow up something
else if they are not eaten too quickly). A double wall of
Wall-nuts is very effective, since the second wall will stop Pole
Vaulters who clear the first. You may have room to plant four
columns of Sunflowers. When your first Potato Mine blows up a
zombie, you will get Spudow!, the second of
20 achievements.
You will find seeds for Snow Pea.
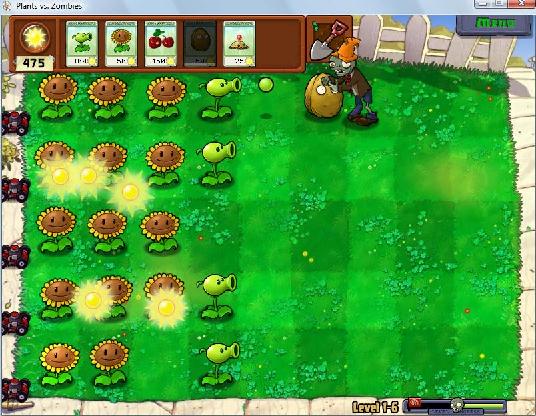
Elementary Strategies for Daytime Levels
Once you have Potato Mines, you can start practicing a general
strategy for building up your defenses which should work on all daytime
(Day, Pool, Roof) scenarios. This strategy is enhanced as you gain more
plants and powerups (especially Squash and Garden Rake). Let's see how
to handle level 1-6. When the level starts, you want to start
planting Sunflowers in any and all lanes, starting from the far left
and eventually aiming to fill up three whole columns with Sunflowers
(the Tree of Wisdom and several other sources suggest only two columns
of Sunflowers, but I like having as much Sun as possible). Your
shooting weapons will
be placed starting in the fourth columns, with blocking plants
(Wall-nuts in the early
Adventure levels, Tall-nuts as soon as you have them in level 3-9)
usually in columns seven and/or eight. Once the first zombie appears
you
should place a Potato Mine as far left as possible (below left) in
whatever lane it is advancing in, and while it is arming, continue to
plant Sunflowers. You should be able to pick off the
first two or three zombies with Mines. Below right, another mine has
been placed in the top lane to get the
second zombie, while several more sunflowers have been planted and the
first zombie has not even reached its mine:
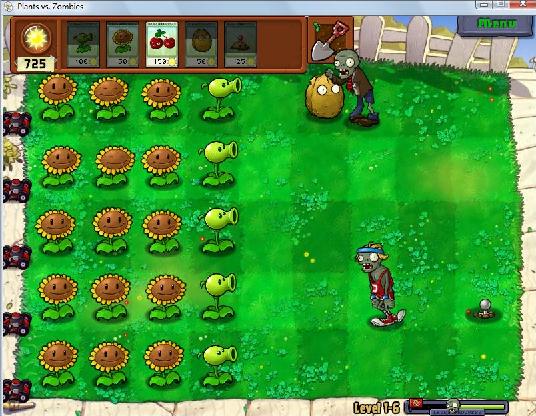
When you have accumulated enough Sun (at least 150), you
should place a Peashooter in the fourth column of a lane where the next
zombie is coming (below left). You might need to
switch back to a Mine to get the next zombie, or place a Wall-nut in a
lane (in column 6 or 7) without a Peashooter, to hold off an
approaching zombie until you can put a Peashooter behind the
Wall-nut. Below right, two zombies approach simultaneously,
and a Mine has been placed in one lane and another Peashooter has been
placed in the other.
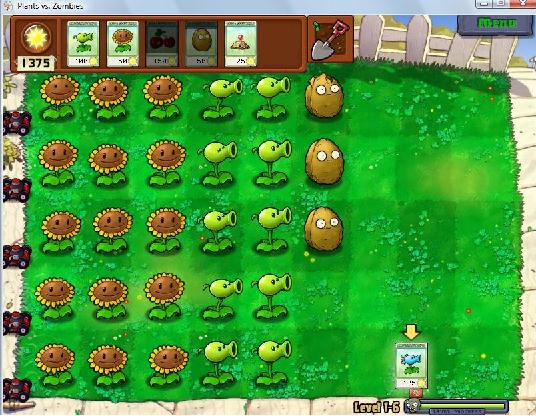
You should be planting Sunflowers steadily, gradually building up Sun,
and putting at least a Wall-nut and a Peashooter in every
lane. When you have planted a Wall-nut in a lane
without a Peashooter, you should get a Peashooter behind it as soon as
possible (below left, a Wall-nut was placed in the top lane, and the
next Peashooter was placed in that lane rather than in the undefended
third lane). When a Pole Vaulting zombie appears,
throw something in front of it immediately make it jump.
Below right, a Potato Mine was placed in front of a Pole
Vaulting zombie, which jumped over it and began walking (blue headband
in lane 4):
When you have plenty of Sun (200 or so), look for
opportunities to eliminate two, three, or more zombies with a single
Cherry Bomb (below left). Below right shows the
successful end of level 1-6, even though only three Wall-nuts were
planted. Planting your first Wall-nut early (to allow for their
slow recharge time) may allow you to get an extra Wall-nut
or two planted; that isn't necessary here, but may help on later
levels, especially when you get Tall-nuts late in the Pool levels.

Once you have a Wall-nut in every lane, even if they are
staggered, you can gradually push your defensive wall forward by
putting a Wall-nut in front of another one, digging up the rear
Wall-nut and putting a Peashooter there instead. Sometimes the game
will throw a curve by sending two early zombies in a row in the same
lane; you might have to improvise and
throw a Wall-nut or Chomper in front of the second zombie (example from
1-7
below):
Later, when you have Squash, you can eliminate the first zombie with
a Mine, switch to Squash for the second, and back to a Mine for the
third. Once you have a Garden Rake, you should
ignore the first zombie and place a mine to blow up the second zombie
when it appears. In some levels where we recommend you skip the Mine,
you can use Squash (and Rake) on the early zombies.
As you get more powerful weapons such as
Repeaters, you should use them instead of plain Peashooters; you should
also switch from Wall-nuts to Tall-Nuts as soon as they are available.
Level 1-7
This is the first level which is two flags long: there is a heavy wave
of zombies in the middle of the scenario and another at the end. Use
Snow Peas to slow down the approaching zombies. Try to get one
in each lane, in column 4 or 5 if possible. There is no need
to plant more than one in a row, as the freezing effect of two
is the same as one. Plant the cheaper Peashooters, which have
the same killing effect, in front of them. This might be the last time
you will want to use the Peashooter, since you need room for new
plants, and will shortly get its replacement which fires two peas at a
time. You can plant
four columns of Sunflowers, eventually replacing one column with
additional
Peashooters once you have built up plenty of Sun. You will
find seeds for Chomper.
Level 1-8
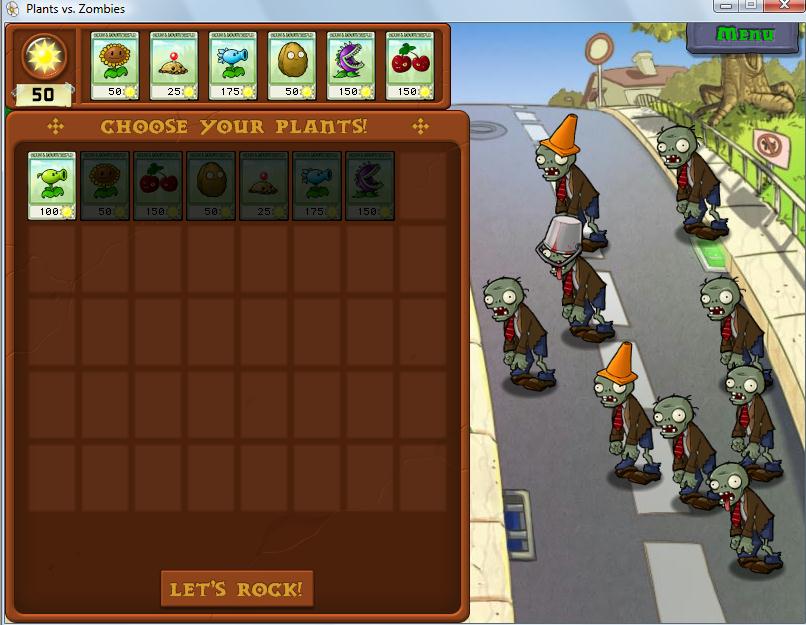
First plant selection screen, at the start of level 1-8. The
zombies are previewed at right. I have
selected six plants in the order I'm most likely to use them.
If you are playing on XBox Live
Arcade, this is the
level to
get the Nom Nom Nom achievement. Use only
Sunflowers, Chompers,
and Wall-nuts to stop the zombies.
This level is only one flag long again: the only heavy wave of zombies
is the Final Wave. For the first time, you have too many kinds of
plants, and must select
6 out of the 7 available. (The order in which
you select them does not matter). You definitely want to start learning
how to use Chompers, but
probably don't need both the Snow Pea and the Peashooter, so I would
suggest skipping the Peashooter. If
so, the Snow Pea is your only shooter, and you will have to plant more
than one per lane. You
encounter the Buckethead zombie for the first time (it also, like the
other zombies you have
encountered so far, appears in the
remaining Day levels); this takes 65 hits
from peas to kill it, and it will be tough to do that even with
multiple Snow Peas protected by Wall-nuts. You will probably
need Cherry Bombs and/or Chompers to kill the Bucketheads. Chompers
are very effective when placed behind Wall-nuts, as they will eat the
first zombie which reaches the Wall-nut. Then, when a second
zombie reaches the Wall-nut, the Chomper might have time to swallow
before the second zombie can eat through the Wall-nut. You
will find seeds for Repeater.
Level 1-9
Two flags again. You face both Pole Vaulters and Bucketheads. You
will need to skip two plants. Peashooter should definitely be
one of them (in fact, you probably won't use it again except in
Conveyor
Belt scenarios and Vasebreaker, since you now have
its replacement).
You should definitely take the new Repeater, which shoots two peas at a
time. You should skip either one of
the explosives, or Snow Peas (I'm usually trying not to use Cherry
Bombs yet, so I skip them). You will find the first of many
notes from the zombies, warning of an impending all-out
attack.
Level 1-10
This is the first true Conveyor Belt scenario: plants randomly appear
about
every 4 seconds, moving right to left on the belt. You may pick them
up and plant them immediately, or save them up and let them
accumulate on the left end of the belt. As in 1-5, the belt will hold
ten plants. You
will face plain zombies, Coneheads, Bucketheads, and Pole Vaulters. The
plants you will receive are: Peashooters, Repeaters, Snow Peas,
Cherry Bombs, Potato Mines, Wall-nuts, and Chompers. Get at
least one Snow Pea and one or two Wall-nuts in each lane; use Potato
Mines and Chompers to pick off the early zombies and to defend
behind Wall-nuts. Save Cherry Bombs for large groups of
zombies; make sure you have a few left for the Final Wave.
You may be able to get the Explodonator
achievement by blowing up a group of 10 or more zombies with a single
Cherry Bomb. You will find seeds for Puff-shroom.
Silver and Gold -- Night Scenarios
Level 2-1 is the first of ten Night levels, and money starts
to appear sometimes when you kill a zombie. Initially you will only see
Silver coins worth $10; click these quickly when they appear, as they
disappear after about six seconds. Eventually (usually
starting in level 2-5 or 2-6, but sometimes as early as 2-2) you will
see Gold coins worth
$50, and later (usually starting somewhere between 2-8 and 2-10) Blue
diamonds worth $1,000. You want to accumulate
$750 as quickly as possible in order, so that Crazy Dave will sell you
"something really neat-o", which turns out to be a seventh seed slot.
You should be able to do this before you start level 2-4, since you
will
get a $50 bonus for every lawnmower unused at the end of each level
starting with 2-1.
In Night levels,
sunlight no longer falls from the sky, and you have to generate all of
your sunlight from plants. You can use Sunflowers, or choose the
cheaper Sun-shrooms (a special kind of mushroom which generates
sunlight), which appear after level 2-1. These only generate 15 units
of Sun at a time when they are first planted, but after they swell to
full size, they generate 25 units just like regular Sunflowers. There
doesn't seem to be a great deal of difference in efficiency between
Sunflowers and Sun-shrooms. Sun-shrooms give a little
bit more Sun at the very beginning of a
scenario, but Sunflowers eventually close that slight gap. Sunflowers
are preferable if you intend to upgrade later in the same
scenario to Twin Sunflowers (which you don't
have yet), but this is rarely useful in Adventure scenarios.
Various kinds of mushrooms are introduced; you will need to use lots of
Puff-shrooms,
which don't take any sunlight to create, and recharge quickly. These
are good for attacking the standard zombies which come out early, until
you have accumulated enough sunlight for the more powerful plants.
(The first level I failed on my first time through the game was level
2-4,
after I forgot to choose Puff-shrooms). A lone Puff-shroom can kill a
single zombie before the zombie crosses the Puff-shroom's three-square
range, but you will need more in each lane when the zombies start
coming in waves. The Night levels are also
complicated by gravestones which appear in your yard -- zombies will
come out of these in the Final Wave if they have not been destroyed by
Grave Buster plants (the only plant which can be placed in a gravestone
square; these appear at the end of level 2-3). You want to
get at least three Puff-shrooms in each lane as soon as
possible, while you build up Sun and gradually crush graves.
The
second time through the adventure, you should choose Sun-shrooms
(unless Crazy Dave gives you Sunflowers), Puff-shrooms,
and Grave Busters
in all levels. Magnet-shrooms
are a good choice for every level except 2-1 and 2-8 (in every other
level you
meet some or all of Bucketheads, Screen Doors, and Footballs).
Fume-shrooms are a good choice for early levels with
Screen Doors
(2-3, 2-4); for later levels where the zombies are stronger, they take
up a valuable slot and are not powerful enough. Melon-pults
are valuable in 2-2 (a long scenario) and from 2-6 onward. Tall-nuts
are a useful choice for every level from 2-2 onward (to
stop Pole Vaulters, protect Magnets, and slow down the heavier
zombies), except perhaps 2-8. Hypno-shrooms and Cherry
Bombs
are useful in the later levels (2-6 through 2-9) where you face
Football and/or Dancer zombies, though in 2-9 you might prefer the more
powerful Doom-shrooms to
Cherry Bombs.
Level 2-1
Four graves appear at the start of the level (anywhere in columns 7-9),
and you cannot destroy these yet. But 2-1 is a short and easy level,
and you face only plain and Newspaper zombies. A Newspaper zombie
carries a newspaper; after it receives eight hits, it drops the paper
and start moving at more than twice normal speed.
Choose Sunflowers, Puff-shrooms, Wall-nuts, Cherry
Bombs, and Chompers. For your last slot I'd
suggest choosing Snow Peas, although
2-1 is so short that you won't get them into
play much. Potato Mines are not
especially useful in Night scenarios, since you can't afford to plant
them early when you normally want to plant Mines, because Sun is at a
premium at
night. Plant Sunflowers and Puff-shrooms as quickly as possible, trying
to get at least three Puff-shrooms in each lane, to
hold off the initial slow wave of zombies.
Collect Silver coins whenever they
appear. Once you have enough Sun accumulated, try to place
Wall-nuts to the immediate left of any graves, if possible before the
Final Wave begins. Save a Cherry Bomb to place
in the center of the largest group of graves, and leave that
spot open so you can plant the Cherry Bomb right after the four zombies
emerge from their graves during the Final Wave.
You will find seeds for Sun-shroom.
If you are playing on Nintendo DS, this is the easiest level to get the
Photosensitive achievement. Plant Puff-shrooms as quickly
as possible, and eventually one Wall-nut in the lane with the most
graves.
The
second time
through the Adventure, choose Sun-shrooms,
Puff-shrooms,
Grave Busters, and Scaredy-shrooms.
Anything else is overkill; I usually take as many of the rest of
the mushrooms as possible. If you did not get it the first time
through the Adventure, this is a good place to try for No
Fungus Among Us.
Typical defensive arrangement in early Night levels. The empty spot in
the
top lane is being saved for a Cherry Bomb which will destroy three of
the
four zombies which emerge from the graves during the Final Wave.
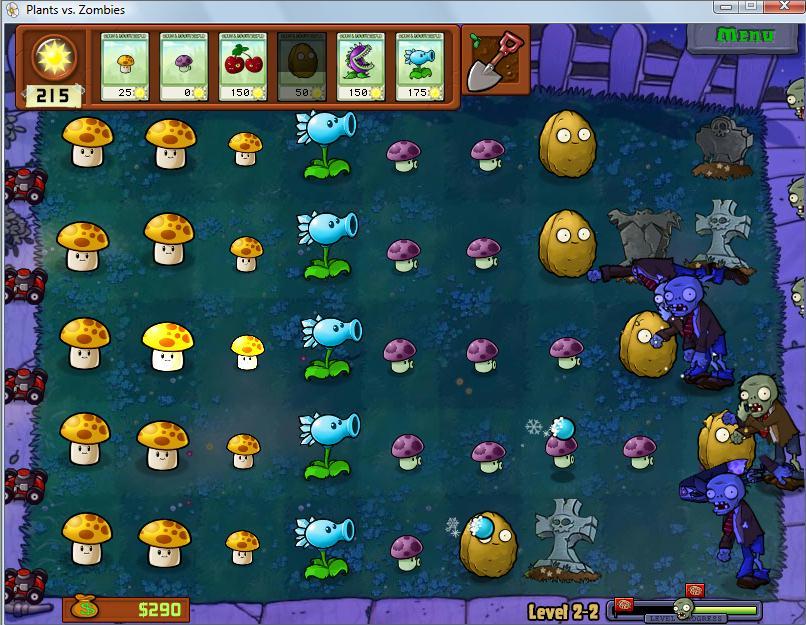
Level 2-2
Use the Sun-shroom instead of the Sunflower, and
otherwise the same plants as 2-1 (Snow Peas are very useful now). The
Coneheads and Bucketheads appear again, and the scenario
is longer; once again there are 4 graves at the start. You will
need to use Chompers, Cherry Bombs, or Wall-nuts and Snow Peas to
stop the Bucketheads. You should have time to plant plenty of
Snow Peas; eventually you should dig up and replace every Puff-shroom,
filling the lawn with Snow Peas, Chompers, and Wall-nuts. You
will find seeds for Fume-shroom. It is possible by the
end of the level to have at least $750, and if you do, Crazy Dave will
offer to sell you a 7th seed slot for $750. Buy it.
The
second time
through the Adventure, choose Sun-shrooms,
Puff-shrooms,
Grave Busters, Magnet-shrooms, Melon-pults, and Tall-nuts. Add
Hypno-shrooms,
Cherry Bombs or Ice-shrooms if you still have a slot left.
Level 2-3
This is another short scenario, but now you face Screen Door zombies
(along with plain and Conehead zombies, and 4 graves),
so you will want to select and use Fume-shrooms, along with Sun-shroom,
Puff, Cherry, Wall-nut, and Chomper (if you have seven slots, take Snow
Pea also). Fume-shrooms shoot
toxic purple fumes over a slightly longer distance than Puff-shrooms,
and the fumes affect every zombie in range, not just the first one they
hit. The fumes also penetrate screen doors, killing Screen
Door zombies much more quickly (they are as tough as Bucketheads
against normal peashooters and Puff-shrooms). Start to plant
Fume-shrooms when the Screen Doors start to appear, or sooner
if you have accumulated enough Sun; dig up Puff-shrooms if
necessary to make room. It's better to plant Fume-shrooms
towards the back (columns 3, 4, and 5) and use Puff-shrooms in front of
them as cannon fodder. Use Wall-nuts to block graves, slow
down the stronger zombies, and protect lanes containing
Fume-shrooms. Use Cherry Bombs as needed for groups of
zombies, but try to arrange to have one recharged (and enough Sun saved
up) before the Final Wave. You will
find seeds for Grave Buster. By the
end of the level, if you didn't already buy the 7th seed slot
after 2-2, you should have around $900 or so, and you should buy it
from Crazy Dave now.
The
second time
through the Adventure, choose Sun-shrooms,
Puff-shrooms,
Grave Busters, Fume-shrooms, Magnet-shrooms, and Tall-nuts. Add
Hypno-shrooms or
Ice-shrooms if you still have a slot left.
Level 2-4
This level starts with seven graves, which can now appear anywhere in
the four rightmost columns. You will face Pole
Vaulting zombies again (along with plain, Conehead, and Screen Door
zombies). You still don't really have any strong
weapons (Squash or Tall-nuts) to handle the Pole Vaulters yet.
Again we can use the trick of throwing
anything right in front of them (Puff-shrooms
are ideal since they're cheap;
even Sun-shrooms can be used in a pinch), as soon as
possible, to make them vault, then
attack them with whatever you have once they're walking. You
can also blow them up immediately with Cherry Bombs if you can afford
the Sun. A double wall of Wall-nuts, or Wall-nuts with Chompers
behind them, is once again effective in stopping
Pole Vaulters.
Select Grave Busters as one of your plants.
You should also be
able to select the same plants as 2-3 (except Snow Pea, if you already
had seven slots). Once you have
planted eight or nine Sun-shrooms, you should have
enough Sun
accumulated to start planting Grave Busters to crush graves (plant them
directly in the grave squares). I would usually suggest
starting with graves at the far
right of lanes, in order to get rid of these before the
flow of zombies gets too heavy (since zombies will eat a Grave Buster
before it can finish its job, if they reach it too quickly).
But if you have a lane with three or more graves in it, you
probably need to start there to give you enough room to plant
Puff-shrooms. You should have plenty of time to destroy all
seven graves, but I would suggest eliminating as many as
possible before starting to plant anything else besides Sun-shrooms and
Puffs.
After level 2-4, you
find the Suburban Almanac, which is one
of the two help files in the game. This is an index of every kind of
plant and zombie, with a short description of each, though it only
shows the ones you have seen so far (or are about to see in the
upcoming level). At this point
the Almanac has 12 plants and 7 zombies. New ones are added
automatically.
The
second time
through the Adventure,
choose Sun-shrooms, Puff-shrooms, Grave Busters, Fume-shrooms,
Magnet-shrooms, and Tall-nuts. Add Squash or Cherry
Bombs if you still have a slot left (they can be useful to
deal with Pole Vaulters which break through early).
Level 2-5
Crazy Dave returns to introduce the fifth
Night level, which is once again a variety level, in this case Whack-a-Zombie.
This is exactly what it sounds like: you use a
wooden mallet to smash zombies
which pop up randomly from gravestones (there are 9 graves at the
start). You get Sun at random
(three balls of 25 appear occasionally when you smash a zombie), but
only three plants: Potato Mines (try to plant these at the far left of
each row), Grave Busters (you can destroy graves with these, though
more will pop
up irregularly, anywhere in the six rightmost columns), and Cherry
Bombs. This is also an introduction to the Whack-a-Zombie
Minigame, though in the full Minigame you will have Ice-shrooms instead
of Cherry Bombs. This one lasts a little over 2-1/2 minutes, though you
will have to smash over 100 zombies, including Coneheads (which start
showing up at about the midway point, and take two whacks to destroy)
and Bucketheads (which appear very late and take three
whacks). If you don't crush any graves, there will be 16 at
the
end, and even a Cherry Bomb may not get you through the Final
Wave without losing a lawnmower or two.
Once you start collecting Sun, start using Grave Busters to
destroy graves. Start with the ones farthest to the left,
but once you have cleared any out of columns 4 and 5, you should look
to clear out entire lanes, trying to get down to four or five graves in
two adjacent lanes. If you get down to this ideal, you can plant
Potato Mines in both of those lanes. Cherry Bombs should be
saved for the Final Wave (if you are inundated with zombies), but if
you plan carefully and get a reasonable amount of Sun, you can win the
level without needing a Cherry Bomb or losing any Mowers.
If you don't get enough Sun, you might not ever have enough for a
Cherry Bomb anyway. You might be lucky and collect a $50 gold
coin or a
$1000 blue diamond (which may allow you to get the eighth seed slot a
level early). You will find seeds for Hypno-shroom.
Even on
the second
time through the Adventure, 2-5 is still the
short version with Cherry Bombs, and a maximum of 16 graves.
Level 2-6
This short level starts with seven
graves anywhere in the four rightmost columns; try to destroy all of
them before the Final Wave. I'd
suggest taking the new Hypno-shroom, along with Sun-shrooms, Puffs,
Grave Busters, Cherry Bombs, Wall-nuts, and Chompers (you don't face
Screen Doors here, so the Fume-shroom is not too useful). This
level is too short for any of the Peashooters to be of much use.
The
Hypno-shroom is a fun plant to use: it hypnotizes the first
zombie which reaches and eats it, which turns around and advances
towards its
former allies, attempting to eat any zombies it encounters (which in
turn will attempt to eat it). A hypnotized zombie is essentially a
moving plant; it is
impervious to any effects from plant attacks, and eventually either
gets eaten or moves off the right side of the board. You will
encounter Football zombies for the first time (along with plains and
Coneheads), which can be handled with Hypno-shrooms,
Chompers, or Cherry Bombs. Usually you will see one about
mid-level, and one during the Final Wave. You will find seeds
for
Scaredy-shroom.
The
second time
through the Adventure, Football zombies are the only
dangerous
adversary. Choose Magnet-shrooms, Tall-nuts, Hypno-shrooms, and Cherry
Bombs, and perhaps
Melon-pults (though you won't have time to plant a lot of them).
Level 2-7
There are 11 graves during this scenario, anywhere in the five
rightmost columns, so you will have to crush
graves aggressively. Do not select the Scaredy-shroom; despite
requiring only 25 Sun, it is too expensive to use for its modest power;
you won't have time to plant enough to make it worth a slot.
You will see both Football and Screen
Door zombies, so you probably want to drop something (probably Wall-nut
or Chomper) and choose Fume-shrooms instead. You will find
seeds for Ice-shroom.
The
second time
through the Adventure, choose Magnet-shrooms,
Tall-nuts,
and Melon-pults. This is a long scenario and you may find
yourself constantly low on Sun; if you can spare two slots you might
try taking Sunflowers and Twin Sunflowers instead of Sun-shrooms.
Level 2-8
This is a short level, and since
you don't face Screen Door zombies here, I would suggest
replacing Fume-shrooms with Ice-shrooms. Ice-shrooms will
freeze every zombie on the screen for about
4 seconds, after which they move slowly until the freezing effect
wears off (around 16 more seconds). You
are back to 7 graves in the four rightmost columns at the start, but
you will encounter Dancing
zombies and Backup Dancers for the first time (along with plains and
Coneheads).
You don't really need any shooters
except Puff-shrooms; also choose Sun-shrooms, Grave
Busters, Cherry Bombs, Ice-shrooms, Hypno-shrooms, and
Chompers. When
a Dancing Zombie is about to
appear, music will play to announce its impending arrival.
It will soon spawn four Backup Dancers, one ahead,
one behind, and one in each adjacent lane alongside it. None of these
zombies are particularly powerful, but are dangerous in quantity.
Wall-nuts
are not too useful here, since a Dancing zombie can come right up to
one and then summon a Backup dancer beyond it. The
Dancing zombie can continue to generate new Backups periodically, so
destroy it as soon as possible with a Cherry Bomb or Chomper,
freeze it with an Ice-shroom, or hypnotize it with a Hypno-shroom.
A Hypno-shroom should be placed directly on the
Dancer, or it might hypnotize the frontmost Backup by mistake.
Hypnotizing a Dancing Zombie gets the Disco is Undead
achievement in Steam, and turns the Dancer around,
where it can summon new hypnotized Backup Dancers, and all
of them will attack oncoming zombies. Any Backup Dancers
which have already been summoned are not hypnotized if their Dancer is
hypnotized. If you use a Cherry Bomb against a Dancer, wait
until its Backup Dancers have fully emerged; if you blow it up too
soon, you will destroy the Dancer, but the Backups will still emerge.
It may not be possible to plant anything directly on the
first Dancer if it stops on a square with a grave in it; you may need
to use Ice-shroom or plant a Cherry Bomb in a lane next to it. You
will find seeds for Doom-shroom.
The
second time
through the Adventure, choose Melon-pults,
Hypno-shrooms, and
Cherry Bombs. You can skip Tall-nuts if you're short of slots,
since they don't stop the Backup Dancers, and you'll barely have
enough time and Sun to plant even one Melon-pult and one Tall-nut in
each lane.
Level 2-9
You will face 11 graves (in the five rightmost columns) and both Screen
Door and Dancing zombies (along
with the usual plains and Coneheads). Hypno-shrooms and Cherry Bombs
are a must; you
probably want to choose Ice-Shrooms or Doom-shrooms instead of
Chompers. You might even drop
Fume-shrooms (which are useful but not essential; you can stop Screen
Doors with any of your explosives), and choose both Ice-shrooms and
Doom-shrooms. Doom-shrooms immediately blow up
every zombie in a 7x7 area, leaving a crater in the square
where the Doom-shroom exploded (they are essentially extra-powerful
Cherry Bombs). If you choose them, make sure you have one ready for
the Final Wave. You will find a note from the zombies warning
of another attack.
The
second time
through the Adventure, choose Melon-pults,
Hypno-shrooms,
Tall-nuts, and Cherry Bombs. If you have any slots left, choose
Doom-shrooms. You may also consider Magnet-shrooms, but you
will lose many of them to Backup Dancers, unless you also have room to
choose Pumpkins to protect your Magnets (you probably won't have time
to build a double wall of Tall-nuts if you're also planting Magnets).
Level 2-10
The last Night level is another Conveyor scenario; you will randomly
receive plants about every 4 seconds: Ice-shrooms, Puff-shrooms,
Doom-shrooms, Scaredy-shrooms, Hypno-shrooms, Fume-shrooms, and Grave
Busters. There are 13 graves
at start, in the six rightmost columns; on rare occasions you might not
get enough Grave Busters to
remove them all. Use Doom-shroom,
Ice-shroom, and Hypno-shroom to stop
Football zombies, Dancing zombies, and Screen Door zombies (and
Fume-shrooms against Screen Doors as well). If you want to remove a grave with zombies nearby, use
a Doom-shroom to clear out the area around it, or freeze the zombies with
Ice-shroom, so you can use the Grave Buster without it being eaten. Place
Scaredy-shrooms in the far left columns of each lane, and Fumes and
Puffs in the middle columns. Don't be shy about leaving craters; use
Doom-shrooms as necessary, especially during the Final Wave. A
fairly easy scenario. You will find seeds for Lily Pad.
Pool Scenarios
Level 3-1 begins the Pool levels, which are in daytime again, but take
place
in your backyard. This is six lanes wide instead of five; your swimming
pool
takes up the two middle lanes. Except for two Aquatic plants you will
find later (Sea-shrooms and Tangle Kelp), nothing can be
placed in the pool lanes unless a Lily Pad has been
placed there first (most plants, except Potato Mines and Spikeweed, can
be placed on Lily Pads). You'll need lots of Lily Pads; fortunately
they are cheap and recharge quickly. You meet the first Aquatic
zombies here, Ducky Tube zombies, which jump into the pool
wearing inner tubes; they might be regular, Flag, Conehead, or
Buckethead
zombies. Aquatic zombies will eat Lily Pads,
but they must eat whatever plants are on top of them first. The most
powerful weapon in Pool levels, unfortunately, is the Cattail, an
expensive powerup ($10,000) which won't be available until the
middle of the Fog (4-) levels. In the daytime levels (1-Day,
3-Pool, and 5-Roof), you cannot use mushrooms, which sleep during the
day, unless you have Coffee Beans (which don't appear until after level
5-3) to wake them up.
Dealing
with the Inferi
One of the nastiest tricks in the zombie arsenal is a
trio of Ducky Tube zombies which appear out of nowhere in the
two pool lanes during the Final Wave of Pool and Fog scenarios.
Presumably
they rise up out of the water, as they are covered in
seaweed, so I have taken to calling them Inferi.
Like regular Ducky Tube zombies, they can be a mixture of
regular, Conehead, and Buckethead zombies. They generally appear
anywhere from columns 5 through 9, in one or both lanes, usually in a
close group. They
tend to cause lots of short term damage to whatever is there (for me,
Cattails) -- even a regiment of eight Cattails usually doesn't destroy
them until they have wiped out one or two Cattails. It's
usually a good idea to have at least one of the likely slots empty
except for a Lily Pad. Some of
the ways of counteracting them include: protecting the
Cattails with Pumpkins, removing one with Tangle Kelp, quick
attacks with a Jalapeño or Cherry Bomb (from an open Lily Pad or from
the
edge of the grass nearest the pool) which should take out two
of the three at least, launching a Cob Cannon at the center of the most
likely attack area (this depends on where your Tall-nuts are, as the
Inferi tend to avoid them), or defending both sides of the pool with
Gloom-shrooms. None of these methods are foolproof;
luckily the Inferi attacks are rarely fatal the way attacks from
Gargantuars, Imps, Jack-in-the-Boxes, Ladders, and Diggers can be.
In levels 3-1, 3-2, 4-1, and 4-2 only two Inferi appear during
the Final Wave. Inferi also show up in all of the Pool and
Fog
Minigames except for ZomBotany 2, and in every
round of Survival:
Pool, Survival: Fog and Survival: Endless.
The second time through the Adventure, you should choose Cattails
(along
with Sunflowers and Lily Pads) for every level. Provided you
have the Rake, you do not need Potato Mine,
since you can get a Cattail planted before the second zombie reaches
your Sunflowers (you should have between 6 and 8 Sunflowers by the time
you have
enough Sun for a Cattail). You'll also want Tall-nuts and
Melon-pults in most scenarios, since Cattails alone don't
provide quite enough firepower.
Level 3-1
This is the only short Pool level. Because none of the mushrooms will
work yet, you only have nine plants
to choose from to fill your seven slots. You must have
Sunflowers, Lily Pads, and Potato Mines. This is a short
scenario, and you will not have time to plant too many shooters, so
I suggest choosing only one (Snow Pea or Repeater), and choosing
Chompers, Wall-nuts, and Cherry Bombs. You will face only regular and
Conehead zombies, of both land and
Ducky Tube varieties. Plant Sunflowers quickly in the first
three columns, using the Mine strategy to kill the first couple of
zombies until you have enough Sun to start planting a Snow
Pea or Repeater in column 4, eventually getting at least one
shooter in all six lanes (grass first). Start
planting Lily Pads after you have enough Sun (at least 75, so that you
can plant one and still have enough Sun for the next Sunflower), and
fill the pool lanes with the same plants (including Sunflowers) as the
other
lanes. Use Wall-nuts backed up by Chompers to slow up Coneheads.
You will find seeds for Squash.
If you have enough money (unlikely unless you already got a
blue diamond or two somewhere), Crazy
Dave will
offer to sell you an eighth seed slot for $5,000. You should
buy it.
Level 3-2
You will also face Buckethead, Football, and Newspaper zombies.
The Squash is a very useful weapon, and you should choose it. The
Squash can be placed ahead of time or used on the spot, to smash one or
more zombies in the same square. It recharges more quickly than Potato
Mine, so it can be used instead of (or in addition to) Potato Mine to
kill early zombies while you build Sunflowers and accumulate Sun.
3-2 is also a good place to
try for the Don't Pea in the Pool achievement:
don't pick any shooters, and instead
choose all of the available explosives; plant lots of Chompers and
Wall-nuts, and use Squash, Mines, and Cherry Bombs to blow up the more
powerful zombies.
Less than halfway through the level, you will see a wrapped
present. Click on this to get a message that Minigames are
unlocked. Football
zombies usually only appear very late, right before and during
the Final Wave. You will find seeds for Threepeater.
When the scenario is finished, the first three of
the 20 Minigames are available to play. Unless you already
have $5000 (or bought the 8th slot before 3-2), you probably want to play
these right away to earn some more money (follow the link to
get more
details). You should then have more
than enough money, and you should buy the 8th slot before you return to
the Adventure and level 3-3.
The second time
through the Adventure, choose Coffee Beans,
Magnet-shrooms,
Melon-pults, and Tall-nuts.
Level 3-3
Another short level, where you will face normal and Conehead zombies
(including Ducky Tubes), and
also
a new type, Snorkel zombies. These can swim underwater,
avoiding attacks until they encounter an empty or occupied
Lily Pad. You should try out the Threepeater, which fires peas
into three lanes at a time (the lane it is in and the two adjacent
lanes).
Presumably you have eight slots now, so you can take all of
the other plants besides the other three shooters. Threepeaters are
best in the second and fifth lanes, where they can combine to cover the
whole
backyard with a steady stream of peas. You can also try combining
Threepeaters with a Snow Pea in each lane. If possible, fill at
least three or four columns in the other four lanes with Sunflowers.
Snorkels
can be dealt with by blocking them with Wall-nuts on Lily
Pads; you should do this in both pool lanes before the Snorkels arrive
in the second half of the scenario.
You will find seeds for Tangle Kelp.
The second time
through the Adventure, choose Tall-nuts (use them to
block the Snorkels in the pool lanes) and Melon-pults.
Level 3-4
This is the first long level, running for 3 flags. You
face a wide array of zombies, both land and Aquatic, including
Conehead, Buckethead, Pole Vaulter, Newspaper, and Snorkel.
It's a good idea to
choose the inexpensive Tangle Kelp, which acts similarly to Potato
Mines, but can be placed directly in the pool lanes. It
pulls the first zombie it encounters underwater, and can be placed
ahead of time or in a pool square which already contains zombies (it
seems to grab one at random if there are more than one). I'd also
recommend taking Threepeater again and dropping
Chomper. Try to build a double wall of Wall-nuts
in as many lanes as possible, particularly the grass lanes (to stop
Pole Vaulters).
You will find the Key to Crazy Dave's Twiddydinkies
Shop, which
is the trunk of his green station wagon. You'll eventually be able to
buy all of the powerups here.
You should immediately spend $1000 to buy the Pool Cleaners,
which protect the
two lanes of your pool just as lawnmowers protect grass lanes. [If you
don't buy the Pool Cleaners, you have only lawnmowers guarding the two
pool lanes, which fall into the water after running over one or two
zombies nearby.]
You can wait until after 3-5 to buy the Garden Rake; it isn't
very useful in 3-5. The
Shop is accessible at any time between levels from the main menu, or
from the seed selection screen (lower right corner).
Save the rest of your money toward the ninth seed slot,
which costs $20,000.
The second time
through the Adventure, choose Tall-nuts and Melon-pults. This is the
first four-flag level.
Funneling
Garlic can be used to divert zombies from one lane into another.
This is especially effective in Pool and Fog scenarios, where two
Garlic can be
used to push all of the land-based zombies into only two lanes.
Below is an example from Level 3-4 (third time through), where two long
lines of Spikerocks are placed in the grass lanes which the zombies are
funneled into. The rightmost squares in each of those two lanes
can be left open to allow Cherry Bomb attacks (also attacking
clumps
of zombies blocked by the Tall-nuts) and Jalapeño
attacks along the full line of Spikerocks. The outer lanes are lined
with Starfruit which attack the zombies with
sideways star attacks as they
walk down the inside grass lanes (In Fog
scenarios, they could also be lined with
multiple Gloom-shrooms). The Garlic (doubled up to
stop Pole Vaulters) will need to
be replaced periodically. In scenarios
with Zombonis, Spikeweed/Spikerocks are needed to protect Garlic, which
would otherwise be run over. Funneling is also a
useful way to get the Explodonator
achievement.
Level 3-5
Crazy Dave introduces the Conveyor scenario Big
Trouble Little Zombie
(which reappears later as a Minigame). Level 3-5 features
tiny zombies,which are similar to their larger
counterparts, but easier to kill:
regular and Snorkel
minizombies take only 3 peas to kill, Conehead minizombies take 7,
and Football minizombies take 20. You must defend
against them with Peashooters, Lily Pads, Wall-nuts, and Cherry Bombs.
The conveyor gives you a random plant about every 4 seconds.
Use Wall-nuts in columns 5 and 6 to slow down and clump
the zombies together; get Wall-nuts in the pool lanes as soon as
possible to stop Snorkels. [Putting Wall-nuts in the last three
columns is usually unnecessary, as they will only get eaten too
quickly, and you won't need room for more than four or five Peashooters per
lane.] Use Cherry Bombs as needed to blow up
large clusters of zombies (especially Football zombies and Snorkels).
Place your
Peashooters in the first four or five columns. Level 3-5 is two
flags long (about
3-1/2 minutes). You
will find seeds for Jalapeño.
The
second time through the
Adventure, BTLZ runs three flags (5 minutes or
so), and
seems
identical to the later Minigame. You may need to put Wall-nuts in
column 7 if you get more than 12,
Return to Portal Combat if you came back
here from BTLZ to see the
description of 3-5.
Level 3-6
You should now buy the Garden Rake for $200; this
is placed at the start of
each level in the (random) lane where the first zombie will appear, and
destroys that zombie automatically as soon as it steps on the rake.
It lasts for three rounds of play, at which point you can buy
another. You can access the Shop from the button at the bottom
right of
the plant selection screen, even in the middle of the selection
process, to see if you need a rake (it will show as Sold Out on the
first Shop screen if you have a working rake; otherwise you can buy a
new one) and return to exactly where you were.
You face Zombonis for the first time: usually one of them will arrive
about
mid-level and one during the Final Wave. These lay down a
patch of ice and run over almost anything non-explosive in their path.
They are followed by Zombie Bobsled Teams if the Zombonis lay
down enough ice. Jalapeños are a must here; they destroy every zombie
in their lane and also melt the ice path
instantly. The rest of the zombies are pretty light this time (regular,
Conehead, and
Ducky Tube). Wall-nuts are not needed for the lighter zombies and will
get run over by Zombonis, so I would skip them as well as
Tangle Kelp, and go with the other four explosives (Chompers, Squash,
Potato Mines, and Cherry Bombs), all of
which are effective against Zombonis, plus one shooter (your preference
from Repeater,
Threepeater, or Snow Pea). You will find seeds for Spikeweed.
The
second time through the Adventure, you will see a lot more
Zombonis. Spikeweed and Spikerock are highly recommended.
Level 3-7
This is another long level (three flags). Snorkels and Bucketheads
return, and you will see at least three Zombonis this time; choose
Spikeweed as well as Jalapeño and Wall-nut (to stop the Snorkels).
Plant
Spikeweed at the far end of each grass lane as early as possible.
Ordinary zombies are damaged slightly as they
walk over Spikeweed, and the Spikeweed remains intact. Spikeweed
will pop the tires of Zombonis (this will also eliminate the
Spikeweed too) and prevent them from laying down any
ice. Spikeweed works well directly in front of Wall-nuts
(zombies eating the Wall-nut are attacked continuously by the
Spikeweed). You should also take Potato Mine or Squash, a
shooter, and either Cherry Bomb
or Chomper (Tangle Kelp probably isn't valuable enough to take up a
slot). You will
find
seeds for Torchwood.
The
second time through the Adventure, you should have
Tall-nuts and
Spikeweed/Spikerocks
(these will stop all of the Zombonis). You don't need much firepower
beyond Cattails, but Melon-pults will also be effective in such a long
scenario.
At least one explosive (Squash or Cherry Bomb) to deal with Bucketheads
is useful; there aren't enough to make it worthwhile to use two slots
for Coffee Bean and Magnet-shroom. 3-7 now runs about 12 minutes.
Level 3-8
You will face a new zombie, Dolphin Rider, which
acts like a Pole Vaulter in the pool lanes, jumping over the first
plant it reaches. The rest of the zombies are ordinary (regular,
Conehead, and Ducky
Tube), so Spikeweed, Cherry Bomb, and Jalapeño are not needed. You have
a
powerful new weapon, Torchwood, a flaming stump which turns every pea
which passes through it into a fireball which does double damage.
If you have been using Snow Peas, switch over to Repeaters or
Threepeaters here and choose Torchwood, Potato Mine, Squash,
Wall-nut, and Tangle Kelp. Fill the pool lanes with as many Lily Pads
and plants as possible to make Dolphin Rider zombies jump early, or
eliminate the Dolphin Riders with Tangle Kelp, which can even reach
backwards after the Dolphins jump over them. Since
Dolphin Riders are your most dangerous adversaries here, try to build a
double wall of Wall-nuts in the Pool lanes if you have time. You
will find seeds for Tall-nut.
The
second time through the Adventure, use Tall-nut to block Dolphin
Riders
in the pool lanes. Tangle Kelp is helpful too.
Level 3-9
This is the another long level, and the first level where the lack of
slots is keenly felt:
you only have eight slots, and could easily take 12 very useful
plants. Tall-Nuts are one of your most powerful defensive
weapons; they can't be leaped by Pole Vaulters or Dolphins (both of
which you see in 3-9), and take twice as long to eat as Wall-nuts.
Use them in the pool lanes to block Dolphin
Rider zombies. Zombonis and Bucketheads both return too, so
you should choose Spikeweed and Jalapeño again to help against
Zombonis and try and prevent the Zombie Bobsled Teams. Once
you have also taken Sunflowers, Lily Pads, and one
shooter,
you have only two slots left. You might want to skip Potato
Mine and take the cheap and versatile Squash instead, and then
take either Tangle
Kelp, Cherry Bomb, or Chomper. (You might even risk skipping Jalapeño, since you only see a few Zombonis.) Make sure you have a Rake. This is a long (four flag) level. You
will find a note from the zombies saying that they are coming to your
pool party.
On your
second time through the Adventure, you should have seven slots
open after Crazy Dave picks three plants for you. You need to
take (if they're not among Crazy Dave's choices) Sunflower,
Lily Pad, Cattail, Melon-pult, Tall-nut, Spikeweed, and Spikerock.
If you have any slots left, you can fill
them with Cherry Bomb, Squash, or Winter Melon.
Level 3-10
The last Pool level is a long (nearly 6 minutes) but fairly easy
Conveyor scenario (normal 4 second interval) where you face plain
zombies,
Coneheads, Bucketheads, Ducky Tubes, Snorkels, Dolphin Riders, and
Zombonis (and potentially Bobsleds). The conveyor provides you with a
random mix of Jalapeño,
Spikeweed, Lily Pad, Threepeater, Torchwood, Tall-nut, Squash, and
Tangle Kelp. Try to get Threepeaters in the first five or six columns,
Torchwood across the 6th or 7th,
Tall-nuts across the 7th or 8th, and Spikeweed across the grass lanes
of the 8th or 9th. You
should plant Threepeaters in the second and fifth lanes until the first
five or six columns are full, then start to fill in the pool lanes.
Save extra Spikeweed
to
replace ones destroyed by Zombonis, and use Squash and Jalapeño to
defend against Zombonis which break through in lanes without Spikeweed.
Even Zombonis which break through won't get much further than the
Torchwoods due to the heavy barrage of peas from all of your
Threepeaters. If you run out of Spikeweed or Torchwood due to an
onslaught of Zombonis, continue to defend the four inner lanes and let
Zombonis and other zombies come down the two empty outer lanes, where
the Threepeaters will eventually take care of most of them. You
will find seeds for Sea-shroom.
Fog Scenarios
The Fog levels take place in your backyard at night, with a thick fog
initially covering the rightmost
three columns of the board (and part of the 4th). The only plant you
have to help see through fog at the start
of the first level is Torchwood, which can only dispel a small patch
of fog (the square it is in
and the four squares directly above, below, left, and right of it).
For all Fog levels you should choose Sun-shroom, Puff-shroom, and Lily
Pad (and Plantern and Tall-nut starting in 4-2).
On your
second time through the Adventure, you should have
seven slots
open after Crazy Dave picks three plants for you. Six of these should
be (if they're not among
Dave's three choices) Sun-shroom, Puff-shroom, Lily Pad, Cattail,
Plantern, and Tall-nut. You will have at
least one slot open, which you can fill in the earlier levels with
Cherry Bomb, Squash, or Magnet-shroom, depending on what you already
have and what you are
facing on that level. Eventually you will want
more firepower, so you should choose Melon-pult if none of Crazy Dave's
choices are shooters or catapults.
In many levels from 4-3 onward (when you face Diggers or Balloons),
it's a good idea to get your first
Cattail planted as soon as possible, even before the first Plantern.
You should have enough Sun once
you have planted 12 Sun-shrooms, and the first one has swelled to full
size. If you face Pogos and
not Balloons (as in 4-8), however, the Plantern should go first.
Planting multiple Planterns in longer scenarios is a good
idea; if you depend on only one or two in the pool lanes you may lose
them to Inferi during the Final Wave.
Level 4-1
Luckily, 4-1 is short and easy (most of the zombies are plain,
Conehead, and Ducky Tube), and ends
before anything particularly dangerous happens. 4-1 does introduce the
Jack-in-the-Box zombie, which carries
a music box which usually explodes halfway through the fourth
repetition of
"Pop Goes the Weasel". You'll see two
or three of these, starting about mid-level. Use lots of Sun-shrooms
and Puff-shrooms. You should also pick
Torchwood, if you want to see through any of the fog (though that is
not a necessity here). If
you pick Torchwood, try to plant it in the eighth column in the second
and/or fifth lanes, to dispel as much
fog as possible; you might need Tall-nuts, Hypnos, or Squash to protect
them. You might not be able to generate enough Sun to get two
Torchwoods down. Since you don't have Cattails yet, it's a good idea to
pick either Sea-shroom or Threepeater, so that you can cover the pool
lanes without having to buy a Lily Pad
for every Puff-shroom. Sea-shrooms are free and can be placed directly
in the water without a Lily Pad, and work exactly like Puff-shrooms;
their only disadvantage is that they recharge slowly (about 30
seconds).
Squash and Tangle Kelp might be helpful here, although you only face
plain and Conehead Ducky Tubes in the pool lanes. You will
find seeds for Plantern.
It's possible, though difficult, to get No Fungus Among
Us on this
level. Take Sunflower, Lily Pad, Potato Mine, Squash, Peashooter,
Wall-nut, Tangle Kelp, and either Chomper or Cherry Bomb. On
Nintendo DS, you can instead get Photosensitive (choose
Puff-shroom,
Seashroom, and Tangle Kelp).
On your
second time through the Adventure,
Magnet-shroom is a good choice for your last slot,
since Jack-in-the-Box is your most
dangerous adversary.
Level 4-2
The fog increases, now covering 4-1/2 columns,
which is standard for most of the remaining Fog levels (including the
later
Minigames and Survival mode). You face Football zombies
again, in addition to the zombies from 4-1. In every
remaining Fog level, you definitely want to choose the
Plantern, which gives off light which
dispels almost all of the fog in a 5x5 area. Once you have 50 units
of Sun, place a Lily Pad in one of the pool lanes in
the
seventh
column, and put a Plantern on it once you get back up to 50 again.
Protect the Plantern with Hypno-shrooms
(which are also very valuable against Football zombies), and eventually
a Tall-nut. Tangle Kelp also help. You
can later place Planterns in multiple lanes as insurance against
breakthroughs. Two planterns, one above and one
below the pool, should be enough for you to see everything -- use
Tall-Nuts to protect them too. You
will find seeds for Cactus.
On your
second time through the Adventure,
choose Magnet-shroom again, to stop Jack-in-the-Box and
Football zombies.
Level 4-3
You will see the first Balloon
Zombies, which float over everything, but it's a short level and you'll
probably only see two or three of them, one fairly early and one or two
during the Final Wave. Balloons can be popped by a
Cactus in the same lane (or a Cattail in any pool lane
once you have that valuable powerup). It's advisable to
choose Cactus in every Fog level which contains Balloons (until you can
buy Cattails); the program will warn you at the end of the seed
selection process if you have not chosen any anti-Balloon plants
(Cactus, Blover, or Cattails) and give you a chance to re-pick.
You will also want Cactus to help protect your Pool lanes, since you
may not be able to spare a seed slot for Sea-shroom or Threepeater.
The only other way to destroy Balloons in 4-3 is to blow them
up with Jalapeño or Cherry Bomb (I'd choose one or both of these too,
along with Tangle Kelp if you still have a slot open). The rest of the
zombies are merely plains, Coneheads, and Ducky Tubes. The trickiest
part of this level is to build up enough Sun early to get a Plantern
down quickly so you can see where the first Balloon is coming from, and
still have enough Sun to plant a Cactus
quickly. You will find seeds for Blover.
This is
actually a very tricky level the second time
through the Adventure: if you use Cattails against the Balloons, you
will still barely have time to get a Cattail down
before the first balloon arrives -- and there are more
Balloons the second time through. It is a good idea to hold off
putting a Plantern in the pool until you can get your first
Cattail planted. At
least one or two of your Cattails should be well to the right,
in column 5 or 6: Cattails are more likely to shoot down
Balloons quickly (and prevent the Balloon zombie from dropping behind
your wall of Tall-nuts, possibly attacking Planterns) the farther
forward you
plant them. Jalapeño and Cherry Bomb are good choices for your last
seed slot or two, as you may need one to destroy an early
Balloon. You can also try choosing both Sun-shroom and Sunflower
to generate lots of Sun early.
Level 4-4
The Blover is a three-leaf clover which spins rapidly when
planted, producing a gust of wind which temporarily
dispels all of the fog as well as blowing away any Balloon zombies. The
Blover disappears after
one use. The Blover is
not a necessity if you use Planterns and Cactus effectively, but you
might still want to choose it as a backup -- this is one of the hardest
Adventure levels, and an easy one to mess up. Except
for Balloons, you face mostly less dangerous zombies
(regular, Conehead, and Ducky Tube), but the Dolphin Riders also return
here, so you definitely want Tall-Nuts again to stop them.
You'll face lots of Balloons and you'll eventually need a Cactus in
every lane. You should always have at least one explosive
(Squash, Jalapeño,
Cherry Bomb, or Hypno-shroom) in case your defense is not perfect. You
can
pick two of these if you don't pick Blover. An oddball alternate tactic
to try is to use lots of Blovers and forgo
Cactus and Planterns entirely (this is more effective against the
Balloons than
the fog, since you can put a Plantern in the pool, protected by a
Tall-nut, for less Sun than two Blovers). I'd suggest
Threepeaters if you try this.
You find Crazy Dave's magic Taco, and he gives
you a Blue diamond worth $1,000 for it.
Gloom-shroom and Cattails are now for sale in
Twiddydinkies. Buy the Cattails for
$10,000 immediately, if you have enough money. If
you're a little short of money after Level 4-5, play one of the three
Minigames to reach $10,000: you will want the Cattails
before you start 4-6. You can, of course, play the
three Minigames (and Puzzles after 4-6) as many times as you want, and
in theory could make thousands of dollars and buy all of the upgrades
and extra slots now, but I would regard this as gamesmanship and
contrary to the spirit of Plants vs. Zombies.
Level 4-5 -- Introducing Vasebreaker
After buying the magic Taco, Crazy Dave returns to introduce
Vasebreaker, a three-phase puzzle game without fog.
You are presented initially
with three columns of (mostly) brown vases, which you break to randomly
reveal either zombies or plants. The plants may be put anywhere to
defend against the zombies.
This is an easy introduction to one of the two series of Puzzles,
though you have lawnmowers to save you here and none in
the full Vasebreaker puzzles. The 3-column phase is extremely
easy: you have 5 Squash and 5 Peashooters to defend against a
Buckethead and 4 plain zombies.
Get a Peashooter and a Squash into each lane if possible; make sure you
get a Squash in front of the Buckethead (otherwise you
will lose a mower). The Garden Rake will kill one zombie if you have
it, but if you don't have
one, wait until 4-6 to buy a fresh Rake, since a Rake will be used on
any and
all of the 3 phases until its three uses run out. All of the vases are
brown. This phase is so easy, in fact, that you would have to try hard
to lose: you
can even click all 15 vases in rapid succession, and still have time to
crush all five zombies with Squash, without even bothering to plant
Peashooters.
The 4-column phase has 5 Snow Peas, 4 Peashooters,
and 4 Squash against a Football, Buckethead, and 5 plain zombies.
Two of the vases (randomly placed) are green, and always
contain plants (often Squash). Save these until you
encounter the Football or Buckethead zombie.
The 5-column phase has 5 Snow Peas, 5 Peashooters, and 5 Hypno-shrooms
against
a Jack-in-the-Box, a Dancer, 2 Bucketheads, and 6 plain zombies.
Three of the vases are green. Try to hypnotize the Dancer and the
Bucketheads; you will sometimes not be able
to do so, and you will be saved by a mower if a Buckethead or mob of
Dancers gets through. You will find seeds for Split Pea.
Level 4-6
This is a short level, in which most
of the zombies are plain, Conehead, and Ducky Tube. You'll
also encounter two or three Digger zombies, which will tunnel
under your defenses in the grass lanes. If they reach the far left end
of
their lane, they emerge from underground, turn right, and start eating
plants (probably Sun-shrooms). You have no Magnet-shrooms yet
to stop them by stealing their equipment before they start digging.
One way to stop Diggers (in general) is with Potato Mines
right behind a wall of Tall-nuts, but this takes either very
careful planning or good luck (in guessing which lanes the Diggers will
come through),
and you won't have time to do much in this level (nor are the Potato
Mines much use otherwise in Fog levels, since you have Puffs).
Cherry Bombs or Jalapeños can stop some of the Diggers too,
but you might not have enough Sun or room to plant
them. You can attack Diggers when they emerge with Hypno-shroom or
Squash,
but you probably have enough seed slots for only one of those,
and you're still probably going to lose a few Sun-shrooms
anyway. Hypnotizing Diggers is a very effective tactic, since they have
a long way to go
and lots of time to attack zombies coming the other way. Cattails
in your pool lane will also help defend against Diggers when they
emerge (the farther left your Cattails
are, the more likely they are to shoot at Diggers, rather than zombies
advancing from the right).
The new plant, Split Pea, shoots in both directions: one pea at a time
forward and two at a time backward.
I don't recommend taking it. As always you need Sun-shroom,
Puff-shroom, Lily Pad, Plantern, and
Tall-nut. Don't forget that you also want Cattails for the four
remaining regular levels of Fog,
leaving only two slots. I'd also suggest Hypno-shroom (or Squash) and
either Cherry Bomb or Jalapeño.
About halfway through 4-6, Puzzle Mode is unlocked, giving
you access to the first Puzzle (and the second and third after you win
the previous ones) in each series of 10. You will find seeds
for Starfruit. If you want to play the first three
levels of each Puzzle Mode now,
jump ahead to the
descriptions of Vasebreaker
and I, Zombie.
The
second time through the Adventure, use Magnet-shrooms to stop as
many Diggers as possible. Plant your first Cattail as quickly as
possible. Jalapeño is a useful choice; you probably need one to stop
the first Digger before you can get Magnet-shrooms planted. If you have
room, Cherry Bombs also help. Puff-shrooms and
Cattails should provide enough firepower to get by.
Level 4-7
The fog becomes still thicker, increasing to 5-1/2 columns.
Strangely, this extra-thick fog is only found in the last
three non-conveyor levels of Fog, and not in either of the Survival:
Fog scenarios. I would not recommend choosing the new plant,
Starfruit, which shoots stars in five directions, but stick with the
same selection as in 4-6. You
will encounter a couple more Diggers here, as well as Buckethead and
Jack-in-the-Box. Get a Cattail down as quickly as possible
after placing the first Plantern, even before protecting the Plantern
with a Hypno-shroom or Tall-nut. Try to have both of your
explosives recharged and available when the Final Wave starts, to
handle the Inferi and the rest of the FW zombies. You
will find seeds for Pumpkin.
The
second time through, Magnet-shrooms are a must. Melon-pults help
too, since Cattails are barely enough firepower. Plant your first
Cattail as soon as possible.
Level 4-8
Pumpkins are a very useful defensive plant, but you
probably don't have enough slots for them yet. This
is a short level, with mostly light zombies (regular, Conehead,
and Ducky Tube). For the first time, you'll see a couple of Pogo
zombies (one mid-level and one in the Final Wave), which are very
dangerous since you can't see them through the
thick fog and they jump over almost everything
except Tall-nuts and Squash, both of which are a must for this level.
You don't have Magnets yet to take away their pogo sticks, so you'll
need to use
Tall-nuts to block them or Squash to stop them (after a Pogo leaps over
it, a Squash will jump
backwards to smash it). Get a Plantern set up as quickly as you can; it
might be more effective to put two of them in grass lanes (instead of
the pool) and protect them with Tall-nuts, so that the Tall-nuts also
do double duty blocking Pogos. Jalapeños
are effective against Pogos too, since you can play them anywhere in
the Pogo's lane. You
will find seeds for Magnet-shroom.
The
second time through, choose Squash and Tall-nuts, plus Cherry Bomb
or Jalapeño if you have
slots left. You won't see enough Pogos to make Magnet-shrooms useful,
but you'll want
to plant Plantern before Cattail anyway so you can see the first Pogo
as
quickly as possible.
Level 4-9
You will face a number of Buckethead, Pogo, and Balloon
zombies, as well as plain, Conehead, and Ducky Tube
zombies. Magnet-shrooms are worthwhile here, as a
cluster in the pool lanes behind a couple of Tall-nuts do a good job of
neutralizing Bucketheads and Pogos. You find another note
from the zombies.
The
second time through, Magnet-shrooms are very helpful. Plant your
first Cattail as soon as possible to stop the
Balloons and defend your pool lanes. If you have a seed slot left, this
is a good level to
try using Imitater Tall-nuts -- try to build a double wall of Tall-nuts
in every lane.
Level 4-10
As always, the set of 10 levels ends with a Conveyor Belt. The setting
this time is a thunderstorm at
night. There is no fog now, but it is pitch-black and you can
only see for less than a second every 4-5 seconds when a
lightning flash illuminates the sky. A silly and random scenario.
Sometimes you will lose mowers early due to insufficient
usable plants (in one game I had 9 Sea-shrooms in the first dozen or so
plants). The Blover is virtually useless,
since there's no fog, Balloon zombies are rare,
and you normally have plenty of Cactuses. You will
normally face regular zombies, Coneheads, Bucketheads, Ducky Tubes,
Jack-in-the-Boxes, Balloons, Pogos, and Diggers. The plants on the
conveyor can be Cactus, Pumpkin, Lily Pad, Starfruit, Magnet-shroom,
Split Pea, Blover, and Sea-shroom. Put at least two Cacti in the far
left of every lane if you can, and jam as many Starfruit as you can
into the middle columns of the grass lanes, to set up a crossfire over
the whole lawn. Use Pumpkins to
protect Magnets in the pool lanes and the forwardmost Starfruit in
grass lanes. You
will find seeds for Cabbage-pult.
In the
second time through
the Adventure, you will see the secret
zombie for the first time in 4-10, about mid-level (he even
appears in the preview).
Unlike the earlier 10th (conveyor) levels, this lasts a flag longer the
second time through.
Up on the Housetop -- The Roof Levels
Level 5-1 begins the Roof levels. It's daytime again, so sun will fall
from the sky and you will also
need Sunflowers. Zombies are now trying to get in through your chimney.
The rooftop is the hardest of
the five environments, because you cannot use some of your best
weapons: Cattails, Spikeweed, and Spikerock. The
Roof is also angled, and the regular shooters (Peashooter, Repeater,
Cactus, etc.) will only reach one
square forward if they're placed in the four leftmost columns, so don't
bother choosing them (you would need to
plant them well to the right). Instead you'll need to use catapult
weapons (Cabbage-pults in
the earlier levels, Kernel-pults later, Melon-pults in 5-9). You cannot
plant anything on the roof unless there is a Flower Pot
there, and you don't even have seeds for them until level 5-2. Luckily
5-1 is a short and easy level and starts with five
columns of Pots already planted. Flower Pots are exactly like Lily
Pads: they are cheap and recharge quickly,
and you'll need a steady supply. [Strangely enough, Flower Pots are
also plants, and zombies will eat them after they eat
whatever is planted in them.] Shooters which shoot
backwards (Starfruit and Split Pea) will continue to hit zombies moving
down the slope of the roof until they reach the third column, at which
point peas and stars will fly over the zombies' heads.
You will also face, even in the very first level, a dangerous new
hazard, Bungee zombies, which
drop from the sky and can land anywhere in your defenses. You only have
a brief warning (a cry from the zombies and targets marking where they
are about to drop), and no reliable defense until level 5-7. Bungees
come in two varieties. I call the first Stealing Bungees (these show up
in the level preview), which show a bullseye target, then drop down and
steal a plant,
and disappear. You can destroy them with a well-placed Cherry Bomb or
Jalapeño if
you do it quickly. The second kind, which I call Dropping Bungees (they
do
not show up in the preview), show a shadow where
they are about to land, then drop
down and start eating plants as normal. These might be regular,
Conehead, or Buckethead zombies, depending on the kinds of zombies in
the preview. Two of the most useful plants, Umbrella Leaves
and Melon-pults, are not found until the later Roof levels.
On your
second time through the Adventure, you should always choose Sunflower,
Flower Pot, and Melon-pult if they are not among the three
plants preselected by Crazy Dave.
Umbrella Leaf should be chosen, if you have space,
at least in levels with Catapults or
Stealing Bungees. Since Melon-pults take a while to build up, you need
either Potato
Mine or Squash (to help with early zombies
while you build up Sunflowers and Sun) or
Cabbage-pult (to get something in each lane until
you can plant Melon-pults). You should also usually choose Tall-nut,
though you may want or need to skip it in some
levels (particularly 5-6, where the zombies are light and Tall-nut will
not help
against Catapult zombies). If Crazy Dave gives you a Kernel-pult
in the
later levels (5-7 through 5-9), you might try and find a slot for Cob
Cannon,
especially in 5-8 and 5-9 where you face Gargantuars.
Level 5-1
You can only plant in the first five columns. You will face regular and
Conehead zombies
and both kinds of Bungees. You can't do much about Bungees yet except
to replant what they steal, unless you can time a Cherry Bomb or
Jalapeño perfectly.
You need Sunflowers and Cabbage-pults (which
hurl cabbages which cause twice the damage of a pea, killing a plain
zombie with five hits). I would suggest Potato Mines, Cherry
Bombs, Jalapeños, Squash, Tall-nuts, and Pumpkins. Plant as many
Sunflowers and
Cabbage as you can; you might need to use a Mine or two early until you
have enough Sun. Put a row of Tall-nuts and eventually
Pumpkins in the front (column 5). You will probably have to
plant three rows of attacking plants eventually, digging up Sunflowers
in the third column and replacing them with Cabbage-pults. If
a Stealing Zombie targets an empty Flower Pot, you should instantly
drop a plant there;
it is better to lose a plant than to permanently lose a Flower Pot
(this advice only applies to 5-1, as Flower Pots are easy to replace
starting in 5-2). You will find seeds for Flower Pot.
The
second time through, you can use Flower Pot, Umbrella
Leaf, and Melon-pult. Tall-nut is not necessary.
Crazy Dave has new items for sale. You should buy Roof Cleaners
immediately for $3,000 -- they work
just like Lawnmowers and Pool Cleaners (as usual, make sure you have a
Rake
too). You'll start making some of the cost back immediately, as you get
$50 per unused
Roof Cleaner at the end of each Roof level (up to $250 per level), just
as with mowers and Pool
Cleaners. Even the early Roof levels might be difficult without Roof
Cleaners;
without them, my first time ever playing through the game, it took six
tries to win
level 5-4. Spikerocks and Gold Magnets are also available,
but Spikerocks are useless on the Roof (they will
be very useful when you play Bobsled Bonanza and start playing
Survival levels), and Gold Magnets are a luxury
-- you can buy these both later when you have plenty of money.
Level 5-2
You only have four columns of Flower Pots at the
beginning, but you can now buy new ones, and you will
be able to plant anywhere on the Roof once you have first
placed a Flower Pot. You face
Pole Vaulters and Bucketheads as well as all of the 5-1 zombies.
You'll need to drop one of your explosives to open up a seed slot for
Flower Pots. You can afford to skip Potato Mine, since the Garden Rake
can handle
the first zombie while you plant enough Sunflowers to get a
Cabbage-pult in
the second zombie's lane, and Squash can handle any
other early zombies until you can get a Cabbage-pult in each lane.
You will find seeds for Kernel-pult.
Level 5-2 is a good place to try for the Grounded achievement.
Choose Repeater instead of Cabbage-pult, and try to build a wall
of Tall-nuts in column 8 with two or three columns of Repeaters behind
them, starting in column 5 just past the flat part of the roof.
An interesting challenge in 5-2 (and later levels) is to win using only
the
first four columns (or three in later levels), without planting any new
Pots (I call this Close Quarters). Pumpkins
will help a lot.
Level 5-3
The remainder of the Roof
scenarios have three
columns of Pots preplanted. There
are no Stealing Bungees in this short level (some Dropping Bungees
appear in
the Final Wave). You will face regular and Conehead zombies, and a new
hazard, Ladder
zombies, which place a ladder on the first Wall-nut, Tall-nut, or
Pumpkin they reach, allowing trailing zombies to climb the ladder and
bypass your defensive wall.
You should choose the new Kernel-pult, which shoots
kernels of corn at the zombies. It also randomly flings a large
pat of butter which temporarily halts a zombie (like an
Ice-Shroom, but only affecting the zombie whose
head it lands on). Plant a
mix of Cabbage-pults and Kernel-pults in each lane. You
should also choose Cherry Bomb, Squash,
and Jalapeño (skipping Potato Mine as in 5-2) to deal with the Ladders
(you'll see perhaps four or five, starting on the mid-level
flag) and help with the Coneheads. A ladder can be destroyed by a
Cherry Bomb or Jalapeño, or by digging up the plant it is
placed on. (Another oddball strategy is not to choose any defensive
plants, relying on firepower alone to stop the zombies, but giving the
Ladders nothing to climb over). You
will find seeds for Coffee Bean.
The
second time through, use Coffee Bean and Magnet-shroom to
stop the Ladder zombies.
Level 5-4
The Pogo zombies return, along with more Ladders and Footballs (plus
the usual plain and Conehead). This is a long level, and one of the
hardest of all the
Adventure levels. I think it is definitely worth taking
up two of your eight seed slots for the Coffee Bean and Magnet-shroom,
since magnets can disarm all of the three most dangerous adversaries.
Take Cabbage-pult, but not Kernel-pult. You
need Squash and Tall-nuts to stop the Pogos, and something to deal with
the Ladders, so I would skip the Potato Mine again and choose Cherry
Bombs. Make sure you have a Rake when the level starts.
Use Squash early to deal with the first few zombies while you build up
Sunflowers and Sun. Place
at least three Magnet-shrooms (awakened with Coffee Beans of course) in
column 7, directly behind a wall of Tall-nuts in column 8 (and more
Tall-nuts in column 9 if you can).
Try to build a deep arsenal of cabbages, at least three in each lane.
You will get a couple of Dropping Bungees (plain and/or
Conehead) during the Final Wave,
and inevitably some will land behind your defensive wall (use
Squash or Cherry Bombs to finish them off, or reblock them with
Tall-nuts). Another idea is to
put a column of Cabbage-pults at the very back to deal with Dropping
Bungees (you can plant Sunflowers there initially and later replace
them with Cabbages).
The
second time through, I suggest Tall-nut, Coffee Bean,
Magnet-shroom, and both Cabbage and Melon.
Umbrella Leaf is not useful enough in this level to take up a
slot. If Crazy Dave gives you nothing useful, you will also have to
forgo Potato Mine and Squash. Use
Cabbage and Tall-nuts to stop the early zombies, gradually building up
Melon-pults and putting Magnet-shrooms behind your defensive wall of
Tall-nuts. If you have a slot to spare, you might even add Imitater
Sunflower, as shortage of Sun may be an issue.
You
will find a Watering Can, which unlocks the Zen
Garden, a mode of play where you raise, water, and
fertilize plants in order to make money -- Daytime plants can be sold
for $8,000 each, and Mushrooms and Aquatic plants for
$10,000 each, when fully grown. Crazy Dave will give you two
Marigold sprouts (even though these don't appear as a regular plant
until
5-8) and a bag of Fertilizer for free, to start your Garden.
Three other Garden accessories (Golden Watering Can, Phonograph,
and Gardening Glove) are also for sale, along with Bug Spray, but you
don't need these yet. Keep saving money for a ninth seed slot.
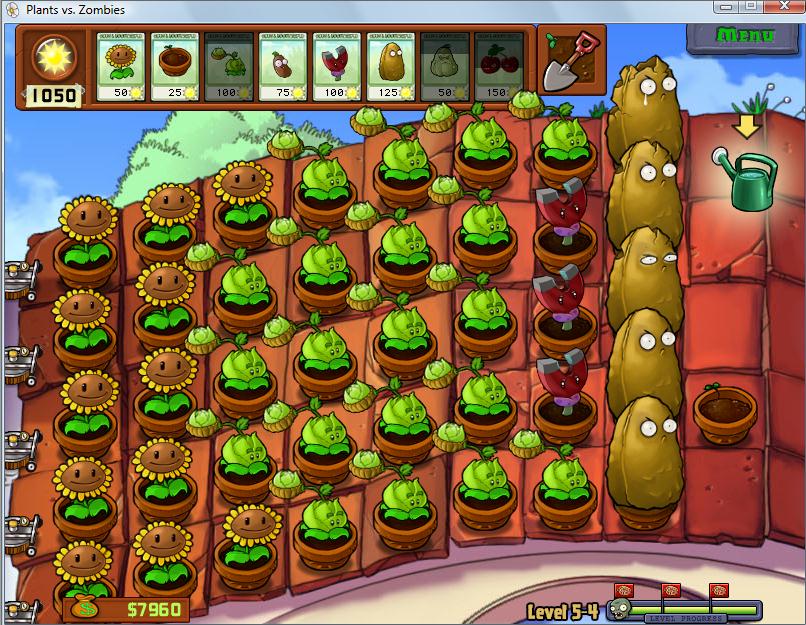
The end of level 5-4, showing a defensive formation of
Tall-nuts,
Magnet-shrooms, and Cabbage-pults. The Watering Can has been
found.
Level 5-5
In this frantic but not too difficult Conveyor scenario, you start with
three empty columns of Flower Pots, and face
a barrage of Dropping Bungees (regular, Conehead, Buckethead, and
Ladder). The conveyor belt will provide you with Chompers, Flower
Pots, Pumpkins, and Cherry Bombs (so there is essentially no difference
between any of the Bungees, except the Ladders). Put several Chompers
in
each lane (starting from the rightmost Pots) and protect them with
Pumpkins.
Use extra Pots to slowly push your defensive line forward, but
keep a Pot or two in reserve in case you need to place a critical
Cherry Bomb. Use Cherry Bombs to defend against Bungees dropping
behind your defenses (you can often wipe out two or three with a well
placed Cherry Bomb, since the left-hand end of each row usually
contains empty Pots. Also use them to wipe out large groups of
zombies already on the ground, and to destroy Ladder zombies and
ladders they've already placed (to prevent breakthroughs).
If there is a group of ladders (already placed) close
together, it is worth digging up a Chomper to make room to
plant a Cherry Bomb to destroy two or three ladders, especially
if some zombies are nearby too. Sometimes the supply of Cherry Bombs
dries up towards the end, so try to save a few for
the Final Wave. Since the Bungees drop randomly, the Rake might
miss the first few Bungees, until one drops to the right
of the Rake in the same lane. You will find seeds for Garlic.
Level 5-5 will sometimes give you an opportunity to get the Explodonator
achievement by blowing up 10 zombies with a single Cherry Bomb.
Level 5-6
Some players swear by Garlic, and have carefully
designed schemes using Garlic and Gloom-shrooms (an upgrade plant), but
I would not select Garlic here. You will face plain and Conehead
zombies
(including some Dropping Bungees late in the scenario), and also a new
hazard, the Catapult zombie. It drives a mobile catapult which
normally stops in the eighth column, and then starts flinging
basketballs towards your back columns, probably causing some damage
to Sunflowers. Put your Tall-nuts no further
forward than column 7 (otherwise the catapults will run them over).
Take Cabbage-pult and skip Kernel-pult; attack the catapults
with Squash, Cherry Bombs, Jalapeños,
and Chompers. Make sure you have a rake, and use Squash if
necessary to stop early zombies while you build up
Sunflowers. You will find seeds for Umbrella Leaf.
The
second time through, make sure you have Umbrella Leaf, Melon-pult,
and several explosives, including Squash; you can skip Tall-nut if you
wish. You probably need a few Cabbage to hold off the early zombies
until you have enough Sun to start planting Melons. Provided you
have four Umbrella Leaves properly placed to
cover the first six columns, the Catapult zombies, which begin to
arrive late in the second flag, cannot cause any real
damage.
Level 5-7
Another long level. You now have Umbrella Leaves, and should
choose them on all of the remaining Roof levels. The
Umbrella Leaf defends against Bungees dropping
anywhere in a 3x3 square with the Umbrella Leaf at the center.
Umbrellas also defend against the basketballs hurled by
Catapult zombies. Four well-placed Umbrellas can
defend six columns of your defense (see screenshot below).
You will face regular, Conehead, Ladder, Bungee (both kinds),
and lots of Catapult zombies. A typical plant selection is also
shown in the screenshot (it's wise to have both Cherry Bombs
and Jalapeños to deal with the Ladders; Squash instead of Potato Mine
is fine too). You will find seeds for Marigold.
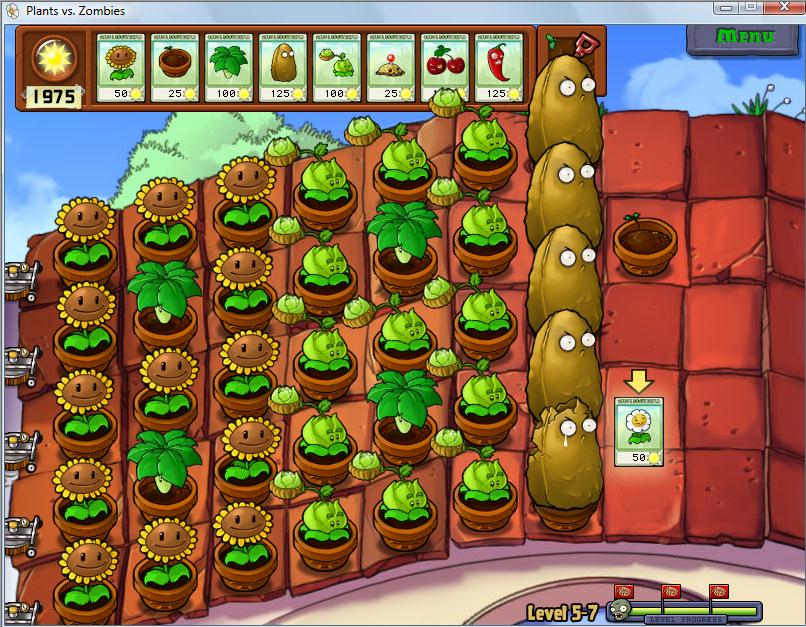
Rooftop defense: Bungees and Catapults cannot touch the first six
columns of the Roof, which are protected by four Umbrella Leaves.
The
second time through, choose Umbrella Leaf, either Potato Mine or
Squash,
and either Cherry Bomb or Jalapeño (Ladders are one of your
main concerns), Cabbage, and Melon; you can skip Tall-nut if
you wish. Fill in any remaining slots with explosives (or Cob Cannon if
you already have Kernel-pult). Build as many Melon-pults as you can.
Chompers behind Tall-nuts can also be effective against Ladders.
Level 5-8
Most of the zombies in this level are either plain zombies or Coneheads
(and Dropping Bungees), but you
will also face Gargantuars for the first time, usually one mid-level
and one during the Final Wave. These are too strong to be killed
by a single explosion. You will need to hit them twice, and after
they are hit once and badly injured, they will fling the Imp they carry
a random distance forward. An effective tactic is to hit them
with a Squash or Cherry Bomb, and then plant a Jalapeño
to finish them off and also destroy the Imp. I would not
choose Tall-nuts this time, since they are not needed against the
weaker
zombies and ineffective against Gargantuars, which will simply smash
them. Umbrella Leaf isn't especially useful either, since you don't see
Catapults and only see Bungees during the Final Wave. Instead,
take both Cabbage-pult and Kernel-pult
(which can help slow down Gargantuars as well as the
Coneheads), plus Squash (easier to use than Potato Mine
against Gargantuar), Cherry Bomb, and Jalapeño. You will find
seeds for Melon-pult.
The
second time through the Adventure, you will see four or five
Gargantuars. In addition to Sunflower,
Flower Pot, and Melon-pult, make sure you have Squash, Cherry Bomb and
Jalapeño (you can skip
Tall-nut, and perhaps Umbrella Leaf and Potato Mine too, since you can
use Squash in the early stage instead of Potato Mine). If you
have seed slots left, you might take Winter Melon, Cabbage, or perhaps
Imitater Sunflower or Twin Sunflower (or Cob Cannon if you already have
Kernel-pult).
Level 5-9
Another long (four flag) level, where you're facing almost the full arsenal of Roof
zombies: regular,
Conehead, Buckethead, Stealing and Dropping Bungees, Jack-in-the-Box,
Ladder, Catapult, and Gargantuar. You should choose the new Melon-pult,
a
powerful attacker which flings watermelons at zombies (it takes only
three of these to kill a normal
zombie), and the Tall-nut. It takes some time to build up Melons,
so you might want Cabbage-pults too, along with Squash, Umbrella
Leaves, and either Cherry Bombs or Jalapeños. You will usually only see
one Gargantuar, during
the Final Wave. You will find a note from Dr. Edgar Zomboss,
warning you to
surrender your house (and brains) or else.
In the
second time through the Adventure, if you
have enough seed slots, it might again be worth using two slots for
Coffee Bean and Magnet-shroom, if two of the three plants Crazy Dave
picks
are useful (or if he gives you a Coffee Bean). Umbrella Leaf is a must,
along with Squash and Jalapeño at
least. You will get torn up by Gargantuars if you try to get
by with Jalapeño as your only explosive.
Level
5-10
The grand finale of the Adventure is another conveyor belt scenario,
defending your
rooftop at night against the giant mechanical robot of Dr. Edgar
Zomboss. The
robot is capable of generating a steady flow of not only zombies, but
giant fireballs
and iceballs, and can also throw down Recreational Vehicles which smash
an area 2 lanes wide and 3
columns deep. Fireballs and
iceballs, if not stopped, will destroy every plant in the lane they are
in, as well as the Roof Cleaner protecting that lane, but they cannot
eat brains: a second fireball or iceball in the same lane will not
cause you to lose directly. A fireball can be stopped by
planting an Ice-shroom anywhere; an iceball can be stopped
by planting a Jalapeño in the same lane. The preview area is empty, but
you face a wide
assortment of zombies including Gargantuars (and Imps), Catapults,
Zombonis, Footballs, Pole Vaults,
Pogos, and Stealing Bungees. This scenario, as well as the later
minigame Dr. Zomboss's
Revenge, is mainly a matter of survival -- keep planting
Cabbage-pults, Kernel-pults, and
Melon-pults as fast as you get them. Save up Ice-shrooms to use against
fireballs or large numbers of zombies (freezing them temporarily), and
Jalapeños to use against iceballs and big targets like Zombonis and
Gargantuars. You might want to keep a few Flower Pots in reserve to fix
RV or other heavy damage in your back columns. Eventually, if you
persist, you should bring down the giant robot in a shower of
sparks.
I lost the first time I played 5-10 (also Dr. Zomboss's
Revenge), but
won
the next few times, before I realized that destroying the smaller
zombies dropped by Dr.
Zomboss does not help you get through the scenario. The green progress
meter in the
lower right corner only measures damage to the giant robot, which
occurs only when it bends its head down before placing iceballs and
fireballs. When the robot bends down, it allows all of the
catapult plants to damage it slightly when they fire; heavier
damage can be inflicted by a Jalapeño. Freezing the robot with
an Ice-shroom leaves it down for longer and allows the catapults to
attack it for longer too, and it can be hit with multiple Jalapeño
attacks when it is frozen. But after I learned this, I
actually did worse (a little knowledge is a dangerous
thing), because I overused the Ice-shrooms and Jalapeños and
left myself vulnerable to iceballs and fireballs, and lost many more
lawnmowers. It seems to take somewhere around 16 Jalapeño
attacks (while the robot is bent down) to destroy the robot
and win the level.
Achievements
The first version of Plants vs. Zombies on Steam
featured 12
special Achievement awards, some trivial, some silly, and
some very difficult. Steam's site gives the percentage of
players who have obtained each award; these percentages are quite low
and must include every player who's even tried the game once on Steam.
PopCap eventually expanded the list to 20 achievements (dropping one,
for some reason, and adding 9 new ones), and added them to their Game
of
the Year
edition released in July of 2010. Steam's version has 21, as Disco
is
Undead
remains in the Steam version. By the time you finish the Adventure the
first time, you should
have no fewer than five and as many as ten of the 20 achievements
completed (I got 9
the first time I played Game of the Year with a new character).
A few of the achievements have longer or different names on Steam and
some of the newer platforms.
I must say that I didn't think the Steam version added much. The
tiny status boxes which pop up in the lower right hand corner of
your screen when you reach one of the 12 achievements behaved
erratically: sometimes they didn't pop up at all, sometimes they
appeared in the corner of the game window, sometimes in the corner of
the monitor screen. There isn't any way to see a summary
of your achievements within the game; you need to login to the Steam
website. I also can't see a way to have it keep separate
stats for different identities. There are also some issues
with the online data storage (Steam Cloud), which has caused
players to lose data -- I lost two complete characters that had
finished all 21 achievements. Worse yet, once you have all of the
achievements, I can't see how to start fresh with a new character --
when I add a new character all of the achievements are already there.
If you had an existing character before upgrading to the Game of the
Year edition, only five of the achievements will be recognized from any
earlier play: Home Lawn Security, Nobel
Peas Prize, Morticulturalist,
Zombologist, and Towering Wisdom.
I'm not sure why this is, though it
seems to be a conscious decision by the designers, as data for
Immortal, China Shop, Better
Off Dead, and Beyond the Grave are clearly
available for any saved characters. In any event, you will have to
reach the 10/15/20 goals again for I, Zombie Endless,
Vasebreaker
Endless, and Survival: Endless even if
you already got them, in
addition to beating all of the minigames again. You can pick up
Spudow!, Mustache, and Penny
Pincher almost anywhere, and Roll Some
Heads in either of the Wall-nut Bowling
Minigames.
Some of the achievements (including some new ones I suggest) are
enjoyable alternate ways to play in
particular environments: even after you have earned an achievement, it
can be fun to try to do it again at a harder level. This applies
particularly to Good Morning in Day, No Fungus Among Us
in Night or
Fog, Pool's Closed in Pool or Fog, Grounded or Close
Quarters on Roof,
and Cemetery Ridge in Night. If Crazy Dave gives
you a plant you don't want to use, this will not keep you from getting
the achievement as long as you don't plant it.
In order of difficulty (as I see it) the standard 20 achievements are:
(Ask Me About) Mustache Mode: Enable Mustache Mode
by typing the word mustache
on your
keyboard at any time. Typing it again turns mustaches off again.
[Silly. There are also
lots of other Easter eggs which do other things to the zombies (and
lawnmowers). Try: future, trickedout, sukhbir, daisies, dance, pinata.
I would have dropped this one instead of
Disco is Undead.]
Spudow!: Blow up a zombie using a Potato Mine.
[Trivial: You should get
this in level 1-6, right after you find seeds for the Mine; it's hard
to see how you can get very far in Adventure mode without doing this.
Using mines to destroy early zombies while building up sunflowers is
one of the fundamental tactics of the game. One of only three or four
achievements, along with Mustache, and possibly Explodonator and Sunny Days, which you
can probably get during the one-hour free trial.]
Disco is Undead: Hypnotize the lead Dancer zombie
with a Hypno-shroom.
[Easy. Good places to do this are Level 2-8, 2-9, or the third phase of
Level
4-5, or during the Third Vase
level of Vasebreaker. Found in Steam, where
it was originally called Walk This Way; omitted
from the Popcap Game of the Year expansion. Called Thrilling
the Zombies on iPad.]
Penny Pincher: Collect 30 coins in a row on one
level without letting
any disappear.
[Not very difficult, requiring only concentration. I first got it on
Level
2-10 the first time through the Adventure.
You may get it as early as Level 2-5.]
Don't Pea in the Pool: Win a Pool level without
using any
Peashooters (including Repeaters, Snow Peas, Split Peas, and Gatlings).
[Too easy. You should be able to get it the first time through the
Adventure in Level 3-2. Use Potato Mines, Squash,
Chompers, Wall-nuts, and Cherry Bombs, without any shooters at all.
You can even do it on 3-1, without Squash. Pick
Snow Peas
but don't use them (I've done it without even using Cherry Bombs,
killing all of the zombies with Chompers and Potato Mines). I don't
think it would be especially hard
to
go through the entire 50 levels of the Adventure, the second time
through, without firing a single pea, except in the conveyor levels
1-10,
3-10, and 4-10.]
Explodonator: Blow up 10 zombies with a single
Cherry Bomb. [The description says full-sized
zombies, but in the PC Steam and Game of the Year versions at least, it
can be done in Level 3-5 or Big
Trouble
Little Zombie. A
good place to actually get 10 full-sized zombies at once is in
Level 5-5, the bungee Roof scenario. Funneling techniques can be
used to get it elsewhere. I've also gotten it on Level 1-7 and 1-10 the
first time through.]
Popcorn Party: Defeat 2 Gargantuars with Cob Cannons
in a single level.
[Fairly
easy in Survival (Hard) or Endless. You might be able to get it in a
later Roof level of the Adventure, the second time
through, if you have enough seed slots for a Cob Cannon.
The Cob
Cannon isn't available until you finish the Adventure for the first
time.]
Sunny Days: Get 8000 Sun on a single level.
[Actually the game allows you to
accumulate 8000 during a set of 5 rounds of any Survival scenario.
It's relatively easy to do in any Survival (Hard) scenario
using Twin Sunflowers, but there is a silly trick enabling you to
earn this achievement in even an average Adventure level, by building a
long line of Tall-nuts in front of the last zombie, while
not shooting anything at it. I've done it as early as Level 1-8 on the
first time through the Adventure. It can also be done in
ZomBotany 2 without any tricks, using a very aggressive Maximum Sun strategy.]
Roll Some Heads: Knock down 5 zombies with ricochets
from a single Wall-nut. [Moderately
hard; probably easier in Wall-nut Bowling 2 than in Wall-nut Bowling.
Since you can play the Wall-Nut Bowling
Minigame after finishing Level 3-2, you have a good chance of getting
Roll Some Heads before you finish the Adventure. I don't
know if you can do it in Level 1-5 before coins appear; I have never
done so.]
Home Lawn Security: Complete Adventure mode, winning
the Silver Sunflower Trophy.
Grounded: Win a Roof level without using any
catapult plants. [Hard;
you
need to build a wall of Tall-nuts in column 7 or 8 (or even 9) and get
Shooters behind them in columns 5 and 6 at least. You may be able to
get this the first time through the Adventure, in Level 5-2 (or even
5-1!). I've
managed to get it in the normal Survival: Roof, and also in
Pogo Party. Snow Peas may be very effective in column 5,
with Repeaters in front of them. Multiple Repeaters, amplified by
Torchwood in column 7 or 8 and protected by Tall-nuts, can also work.]
Beyond the Grave: Beat all 20 Minigames. [Not too
hard, and part of the
requirement for the Gold Sunflower Trophy.]
Morticulturalist: Collect all 49 plants. [Costs
$100,000 for all nine
plant upgrades. Called Master of Morticulture on
XBox.]
Nobel Peas Prize: Win the Gold Sunflower Trophy.
Zombologist: Discover the top secret zombie. Spoiler.
[More
challenging is to kill it. Called Cryptozombologist
on Steam.]
Immortal: Reach 20 flags in Survival:
Endless. You will actually receive the award at the beginning
of
flag 21. [Fairly
hard; I lost a number of times at 19 before
making 20 for the first time. It took
a long time to get good enough to reach 20 consistently, but I
gradually refined my setups and eventually got to 30. When
I reached 30 for the first time, I had so much damage on the upper
side of the lawn that I lost on the 31st flag to wave after wave of
Pole Vaulting
zombies. I have since gotten as far as 49,
also reaching 45 once, 41 once, and 40 twice. Some
players have gotten well up into the 200's. On
the iPad and XBox versions you must survive 40 waves to get the
Alive and Planting achievement.]
Towering Wisdom: Grow the Tree of Wisdom to 100
feet. [Not so much hard
as time-consuming; this is likely the last of
the 20 you will get -- just play long enough to earn enough money. It
costs $250,000 in plant food alone. The
easiest way to earn large amounts of money is to find and
sell as many plants as possible from your Zen Gardens. Called
Smarty Branches on XBox, and Cerebral
Canopy in Nintendo DS.]
Better Off Dead: Reach a streak of 10 in I,
Zombie: Endless.
[Fairly
difficult. It helps to accumulate a lot of Sun in the early levels.
I've reached as high as 21 (by getting five Scaredy levels!), 18 four times, and 16 on two other occasions.
Luck helps: getting a level with Scaredy-shrooms greatly increases your
chances, though 10 can be done on occasion (with careful play) without
a Scaredy level.]
China Shop: Reach a streak of 15 in Vasebreaker:
Endless.
[Difficult. It took a long time for me to get this one; I finally
managed 16, and got there a number of times. Eventually I
improved enough to
get through level 15 a few times without
using any Cherry Bombs (my best is 21 levels, accumulating 1025
Sun. Unfortunately on that occasion I lost on level 22). I
have managed to
get to 20 reasonably often and occasionally to 30 or beyond. My current
record is 34 (twice).]
No Fungus Among Us:
Win a
Night or Fog level without planting any mushrooms. [Fairly
hard; I got it on Fog Level 4-1 the first time through the adventure.]
You need to play as if it was Day or Pool. Make
sure you have a rake. You are allowed to use Grave Busters (at Night),
which are
not mushrooms. Take Sunflowers, Potato Mines,
Squash, Grave Busters, Wall-Nuts, Cabbage-pults, and Cherry Bombs
(without Puff-shrooms, Magnet-shrooms, or other
mushrooms). Get Sunflowers down as quickly as possible, using Potato
Mines, Wall-nuts, and Squash to stop the
early zombies while you slowly build up Sunflowers, until you have time
to plant Cabbage-pults. Start
crushing graves once you have Cabbage in all or most lanes. Aim
eventually for three columns each of
Sunflowers and Cabbage, with a Wall-nut at the front of each lane.
Cabbage-pults and Peashooters are the
best choices, since they are cheap and you can get one in each lane
much
more quickly than more expensive weapons; Kernel-pults may also be
worth a try if you have a slot free. Similarly,
Wall-nuts are preferable to Tall-nuts. This is an achievement where the
cheaper plants can really shine. The earliest
stage of a scenario is the hardest with No
Fungus Among Us; it's not much harder to get the
achievement in Survival: Night (Hard)
than it is in 2-1 or 4-1. Once you have plenty of Sunflowers you can
upgrade to stronger plants in the later flags of Survival.
Good Morning:
Win a Day level using Coffee Beans and mushrooms only.
[Very difficult; it requires careful timing of when to activate
different plants.]
The easiest place to get Good Morning is in
1-1 or 1-2 the second time (or more) through the Adventure. Choose
Coffee Beans, Sunshrooms, Puff Shrooms,
Scaredy-shrooms, Ice-shrooms, Hypno-shrooms, and Doom-shrooms (if you
have 10 slots). Make
sure you have a rake.
Plant a Sun-shroom and wake it up as soon as possible, then a second.
Clog up every lane with (sleeping) Puff-shrooms, which you only
need to slow down the approaching zombies; they'll all be eaten and you
shouldn't bother to awaken any. The first zombie should be killed
by a rake. The second should appear while you are waiting for
enough Sun to awaken your second Sun-shroom. As soon as you have
two Sun-shrooms awake, plant a Scaredy-shroom in the
second zombie's lane, as far left as possible, and wake it up as soon
as possible (using
falling Sun as well as Sun from your first two awake Sun-shrooms).
Gradually get a Scaredy-shroom in each lane, one
lane at a time as new zombies appear, still clogging with Puff-shrooms
as needed. Plant and wake up more Sun-shrooms, one at a time, as soon
as you can. You
should be able to eventually build up five or six awake
Sun-shrooms, and three columns of Scaredy-shrooms. You may
need to plant and awaken an Ice-shroom or a Doom-Shroom if you start to
get overwhelmed
with too many zombies. Eventually your arsenal of Scaredy-shrooms
will be big enough to handle all of the zombies.
The lower levels can
be won with Sun-shrooms, Scaredy-shrooms, and Puff-shrooms only. If you
are trying a level with Coneheads, you may need to use a Hypno-shroom
on the first Conehead which appears, particularly if you don't have a
Scaredy-shroom in its lane yet. It took me a lot of practice to be able
to win consistently even on Level 1-1 or 1-2. At the higher
levels Imitater Puff-shrooms may be useful, though I've
done GM all the way
through the Day levels without them. Magnet-shrooms
are useful in 1-8 and 1-9 to stop Bucketheads (skip either Ice-Shrooms
or Doom-shrooms to make room). I often play without Fume-shrooms,
since you don't see Screen Doors, but you might try them, since they
are more effective attacking larger groups of zombies starting at level
1-3 or so. The levels with Pole Vault zombies are actually
the hardest; you need a constant flow of Puff-shrooms placed to the far
right. Sun-shrooms and even Scaredy-shrooms may be needed to make
the PV's jump.
It also
may help to plant
Sun-shrooms in the second (or even third) column and the first set of
Scaredy-shrooms
in the first column; this can give you a few extra critical seconds
before zombies reach the Scaredy-shrooms (the Sun-shrooms may also act
as cannon fodder in a pinch). You can
also get Good Morning by completing
the first flag of Survival: Day;
you can use
other plants on the later
levels since you will already have the achievement. I eventually
managed, after many tries, to finish all five flags without losing any
mowers,
using only mushrooms (and no Imitaters); see the screenshot
below. It requires a mix of all
of the mushroom plants: Fume-shrooms starting on the second flag to
handle Screen Doors and waves of multiple zombies, Magnet-shrooms when
the Football zombies start to appear (they also help with Bucketheads
and Screen Doors), occasional Ice-shrooms to slow down all of the
zombies, and Hypno-shrooms and Doom-shrooms to stop
breakthroughs. I don't think it's possible in Survival: Day
(Hard),
since you have nothing except Doom-shrooms to stop
Balloons,
and not enough firepower to stop Gargantuars. I finished flag 7 by
cheating
and pretending that Blovers were mushrooms, which got me past the
Balloons in 5/6. But I was overwhelmed on the 8th flag by
waves of Pole Vaulters, Pogos, and Bucketheads, which stripped my
defense and I lost just as the first Gargantuars appeared. On
another try I was lucky not to see too many of the stronger zombies,
and made it through flag 8, but even there I was obliterated by
Zombonis and Catapults (there's little defense against them, since you
can't use Spikeweeds or Umbrella Leaves), and had already lost three
mowers. By the time flag 9 started I had little Sun or
Sun-shrooms, and lost very quickly.
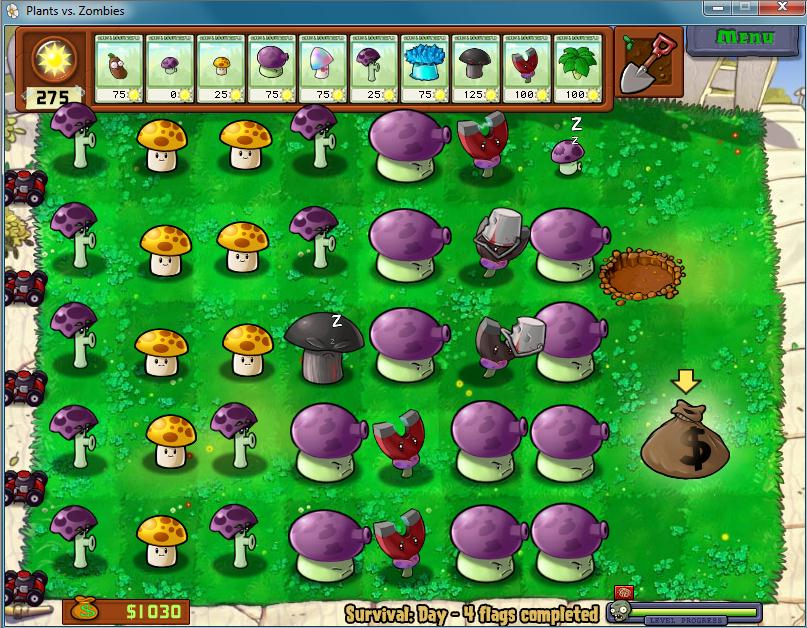
A win in Survival: Day played Good Morning style.
I don't think it's
possible to get Good Morning on the Roof, even
if you are allowed Flower Pots, since none of the Mushrooms shoot over
the edge of the Roof. I have done it in the Pool on Level
3-1, but
using Lily Pads (this would not count for the achievement). Even
more challenging is to do Survival:
Pool using only mushrooms and Lily Pads.
Additional
Achievements
These are available on some of the newer handheld
versions like iPad, XBox Live Arcade, and Nintendo DS. I have not
played any of these
yet, so below are my best guesses based on the PC game.
20 Below: Immobilize
20 full-sized zombies with a single Ice-shroom. [Should be
easy during the Final Wave of many Night and Fog scenarios; harder
in Whack
a Zombie (don't crush any graves).]
Blind Faith:
Complete an extremely foggy level without using Planterns or
Blovers. [I think you can only get this in Levels 4-7, 4-8,
or 4-9. Not especially hard. Torchwood may help. On Nintendo DS it is
called Nebulaphile, and you cannot disturb the Fog at all, even
with
Torchwood.]
Chill Out: Feel the rhythm, feel the rhyme, you've one level
to
destroy three bobsleds, its Jalapeño time!
[You need to destroy them before the Bobsledders disembark. Easiest by
far in Bobsled Bonanza. Most other scenarios (e.g. Level 3-6
first time through)
don't have enough Zombonis to allow three Bobsleds to appear. Even in
Survival, where you might get enough Bobsleds, you normally
want to try to prevent Zombonis from
making
ice paths which would allow the Bobsleds to appear. I have
managed it in 3-6 the second time through the Adventure. Even if
you let the Zombonis run free (by not planting Spikeweeds), the
Zombonis will not last long enough to lay long ice paths, and there
will be very little time to attack with Jalapeños.]
Close Shave - Win any level after all 5 lawnmowers
have been used (or 6: I assume Pool Cleaners count in all three
lawnmower achievements). [Trivial in either version of Wall-Nut Bowling
if
you stop rolling after all of the Final Wave zombies have appeared;
possible in other scenarios if you remove all of your shooters during
the Final Wave.]
Defcorn 5:
Build 5 Cob Cannons in a single level. [Should be easy
during any Survival level or long Adventure levels.]
Down the Hole!: Dig your
way to see the Chinese Zombies. [Trivial. Just keep
scrolling down in the Achievements menu.]
Flower Power:
Keep 10 Twin Sunflowers alive in a single level. [Easy
during any reasonably long scenario.]
Last Mown Standing:
Defeat the last zombie in a level with a lawn mower. [Relatively
easy if you leave one lane undefended by shooters. Can be done by
accident in Column Like You See 'Em and probably other
scenarios, or
intentionally in Whack a Zombie. I've done it unwillingly
in It's Raining Seeds with a Pool Cleaner.]
Lawn Mower Man:
Kill 10 zombies with a single Lawn Mower. [Relatively easy in
Column Like You See 'Em, either version of Wall-Nut Bowling, or Whack
a Zombie,
among
others. You can
probably get all three lawnmower achievements at the same time.]
Melon-y Lane: Plant a Winter Melon on every lane. [Easy
in any scenario at least two flags long, once you have the Winter Melon
powerup.]
Monster Mash: Crush
5 zombies with a single Squash. [Easy if you hold up a
large group with a Tall-Nut or Wall-nut/Pumpkin combo. Bobsled
Bonanza is a good place to try for it.]
Nom Nom Nom: Win a level using only the Sunflower,
Wall-nut, and Chomper. [Not too hard if you do it on Level 1-8 the
first time through. Hard otherwise; I won at 1-2 the second time
through, but lost
three mowers. I'm not sure if you're allowed Imitater Wall-nuts
or Chompers. I can't see how to do it anywhere the second time through
(since all of the levels are at least two flags long) without either
using Imitaters or losing mowers during the Final Wave. It's not
too hard to do if you use Tall-nuts instead of Wall-nuts.]
Photosensitive: Complete a Night level without
collecting any Sun. [Found in Nintendo DS only. Ridiculously easy
in 2-1 the first or second time through; just
plant Puff-shrooms nonstop. I've also done it on 2-2 (the
first, but not the second time) and
4-1 (first and second time -- Imitater Sea-shroom may help). You
have enough Sun for one Wall-nut; I usually put it in front of the
largest group of graves. In 2-2, I tried two Scaredy-shroom; I won, but
lost all five mowers. In 4-1, use your 50 Sun for two Tangle Kelps;
use them to stop Conehead Ducky Tubes, perhaps early, before you have
built up enough Sea-shroom, after a Jack-in-the Box disaster which
destroys some Sea-shrooms, or to stop an Inferi Conehead during the
Final
Wave. 4-2 is probably impossible because of Jack-in-the-Box and
later Football zombies: one Magnet-shroom can't cover the whole
backyard.]
Pool's Closed: Complete a pool level without using water
plants. In selection scenarios, the game will remind you that you
haven't chosen any water plants (unless Crazy Dave gives you some);
just click that you're sure. [Relatively easy, at least in scenarios
without Snorkels or
Dolphin Riders. Using Threepeaters, Starfruit, and Cherry Bombs,
I got as far as 3-7 without losing a Pool Cleaner. You
probably need at least five Threepeaters per lane to stop Dolphin
Riders. I
finally managed to beat Level 3-8, without losing any Pool Cleaners, by
using Threepeaters, Cob Cannons, and Ice-shrooms, and skipping
Starfruit and Cherry Bombs (plant Ice-shrooms every time they become
available, and activate one with a Coffee Bean when you hear the
dolphin sound, until you have enough Threepeaters to stop Dolphins
directly. You many still need Ice-shrooms if you get more than
one Dolphin at once in the same lane). I
have won this way in Zombie Nimble, Zombie Quick, but so far
have lost one or both
Pool Cleaners to Dolphins despite covering the pool lanes with three or
four
Threepeaters per inner grass lane and lots of Starfruit. You can also
win Pool's Closed
in Bobsled Bonanza, ZomBotany 2 (both easy enough with
Threepeaters), Last Stand (watch out
for Dolphin Riders), It's Raining Seeds (provided you get
enough
Threepeaters and Starfruit), and Big Trouble, Little Zombie
(much
harder: if you find BTLZ too hard, or if your conveyor fills up, you
can plant Lily Pads in the water but not put anything on them, though
officially you wouldn't get the achievement this way. I haven't
had more than five Lily Pads: it seems that the conveyor stops giving
them to you if you don't use them.) This is
a much more
interesting achievement than Don't
Pea in the Pool, and would have
been a better choice for the standard set of 20 PC achievements.]
Pyromaniac: Complete a
level using only explosive plants to kill zombies. [This
achievement doesn't count Squash or Ice-shroom as explosives. You
can only attack zombies with Potato Mine, Cherry Bomb, Jalapeño,
Doom-shroom, and Cob Cannon (and you have to build a Cob-Cannon quickly
in a zombie-less lane before the Kernel-pults can fire anything at
zombies). I got this, along with Flower Power, the
second
time through 1-1, without Doom-Shroom or Cob Cannon, using the three
simpler explosives along with a mix of Wall-Nuts (luckily Crazy Dave
gave me
those), Tall-Nuts, and Pumpkins.]
Second Life:
Complete Adventure mode a second time. [You'll want to do this
anyway to get some of the other Achievements.]
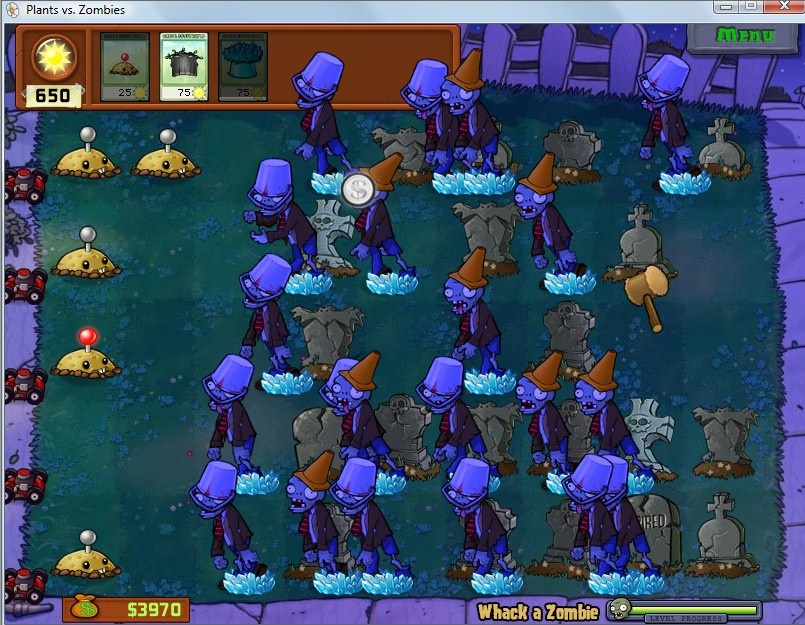
The 20 Below achievement in Whack a Zombie: 21
zombies frozen
by one
Ice-Shroom. No graves were crushed, allowing for the maximum 20 graves.
Other Suggested
Challenges
Here are some original challenges you can try. You won't get an
official award for any of these, of course.
Lose Level 1-2 the first time through (tutorial mode).
Win Level 1-5 (Wall-nut Bowling) without losing any
lawnmowers or using any Explod-o-nuts.
Cemetery Ridge -- Win every Night Level (including 2-5 and 2-10)
without
using
any Grave Busters.
In the Dark -- Win a Fog Level without using any water plants or
fog
dispellers. (Combines Blind Faith (at any amount of fog, but you're not allowed Torchwood either)
and Pool's Closed). I've also managed a few times to win Level 4-1 (and 4-2 once) without losing
any mowers or Pool Cleaners, getting In the Dark and No
Fungus Among Us
simultaneously (the hardest
task I've achieved so far).
Win Level 4-3 the first time through the Adventure without using Cactus.
Cole Slaw -- Win Level 5-1 with Sunflowers and Cabbage-pults
only. On higher levels you may also use Flower Pots, but
except for level 5-6 I have not achieved this without losing mowers (I
succeeded on 5-3 without losing mowers by using Imitater
Cabbage-pults).
Succotash -- Win Level 5-1 or
higher with Sunflowers, Pots, and Kernel-pults. (I have only won
Level 5-4 by adding Cob Cannons.)

Close Quarters -- Win Level 5-2 (or even higher Roof levels)
without planting any extra Flower Pots.
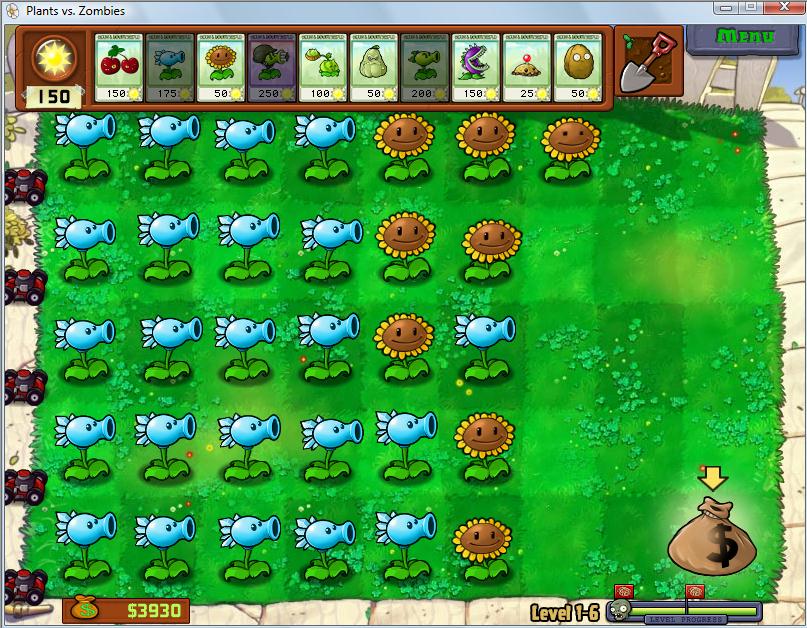
Crazy Dave Trio -- Win any adventure level using only the three
plants Crazy Dave
gives
you.
Maginot Line-- Build a full wall of Tall-nuts in column 8 of
Level 5-7
or one of the other Catapult scenarios.
Accumulate 9990 Sun.
Destroy a Bungee zombie with a Cherry Bomb or Jalapeño; destroy a
Balloon zombie with a Cherry Bomb or Jalapeño. [Certainly takes
more skill than Spudow!]
Win Wall-Nut Bowling without losing any lawnmowers, and getting
at least one gold coin.
Easter Island -- Build a quintuple wall of Tall-nuts in every
lane.
Win Bobsled Bonanza without using Jalapeños, or
without using Tall-nuts, or without
using any shooters or catapults such as Cattails or Melon-pults.
Stonehenge -- Get eight simultaneous Spikerocks in Bobsled
Bonanza. The best I've ever managed legitimately is 10,
though you could get more using the Sunny
Days trick of not firing on the last zombie or two during the
Final Wave.
Magnetic Personality -- Win Pogo Party without
using Tall-nuts (this is very difficult; pictured on the first
page -- it will be easier if you use Pumpkins. For an
additional challenge, do Grounded at the same time.)
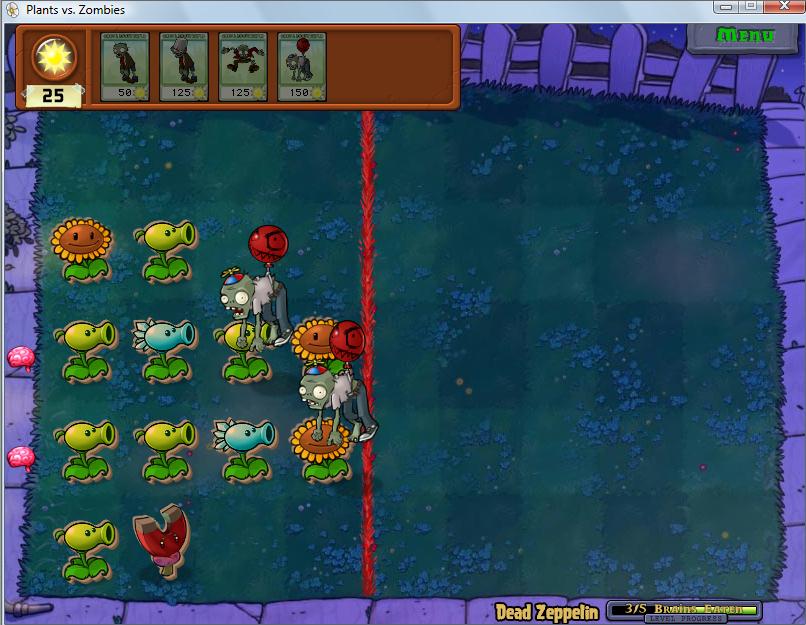
Aerial Assault -- Win Dead Zeppelin by
eating all five brains with Balloon zombies.
Track Meet -- Win Me Smash! using only Pole Vaulting
zombies.
Two Minute Waltz -- Win ZomBoogie in under 2 minutes.
Clean Sweep -- Eliminate every plant in All your brainz r
belong to us.
Jackhammer -- Win Whack-a-Zombie without using Potato
Mines or Ice-shrooms, and without losing any lawnmowers. (If you're
simultaneously trying for
20 Below, you may use one Ice-shroom during the Final Wave.)
Win Column Like You See 'Em without using any
Jalapeños, and without losing any Roof Cleaners.
Win Seeing Stars using only Sunflowers and Starfruit.
Original Equipment -- Win all of the Survival (Hard)
levels
without using
any upgraded plants (including Imitater);
Fog and Roof are particularly difficult. I've only made it
through 19 flags in Survival: Endless.
Rake's Progress -- Kill the
last zombie in a level with the Garden Rake.
With my original character, I have filled my Zen Gardens with every
available plant, reached over 1200 feet with the Tree of
Wisdom, collected the maximum amount of money, earned all 20
achievements, completed the Adventure 5 times, and achieved 35 on Vasebreaker:
Endless, 16 on I, Zombie: Endless and 45
on Survival: Endless. The only goals left,
beyond oddball stunts like those above, are to extend my best results
on the Endlesses.
After the Adventure
Finishing level 5-10 completes the Adventure mode, and
you win the Silver Sunflower Trophy (with a reward
of three blue diamonds worth $3000). This
will probably take between seven and ten hours of play. The program
then plays an animated music video (sung by Laura Shigihara as
the Sunflower) with the credits. Completing Adventure mode also unlocks
three more
Minigames (It's Raining Seeds, Beghouled,
and Invisi-ghoul),
the next Puzzle in each series (Chain Reaction and Totally
Nuts), and the first
three Survival Modes (easy versions of Day, Night, and Pool). You can
tackle any of the three
groups in any order (or interspersed), though I would suggest doing all
of the Puzzles first, since they are quicker and will add to your bank
account, particularly the I, Zombies
which earn more than $1000 per puzzle solved. All of the remaining
powerups (Winter
Melon, Cob Cannon, Imitater, and Wall-Nut First Aid)
also become available at Twiddydinkies, but your next purchase
(assuming you already have eight
slots and Cattails) should be the 9th seed slot for $20,000. You should
be able to reach $20,000 by
playing through the six remaining regular levels of both Puzzles (Vasebreaker
and I, Zombie).
The 9th slot will help particularly
if you are going to tackle the early Survival modes and some of
the Minigames. All of the Zen Gardens (Mushroom, Aquarium, and Tree of
Wisdom) are also now available, along with all of the
Gardening
tools
(except for
the Wheelbarrow, which you can only buy after you purchase the Mushroom
or Aquarium Garden, and Tree Food, which becomes available once you
have
the Tree of Wisdom).
Once you have nine slots, your next plant upgrade should probably be
the
Gatling Pea -- this can be planted over a Repeater to turn it from a
double peashooter into a quadruple
peashooter. This works well with Torchwood, which turns peas into
fireballs which cause twice as much damage again -- so one Gatling Pea
behind a Torchwood now shoots the equivalent of eight
peas at a time, and can kill even a Screen Door or Buckethead zombie in
just over eight bursts. Gatlings are quite useful when starting the
Survival levels, particularly in Day scenarios, and
also effective in Last Stand. Winter Melons,
Gloom-shrooms, and
Spikerocks are also very useful powerups. By the time you work
through most or all of the Minigames and Puzzles, and perhaps the early
Survival levels, you should have enough money to buy most of the
important plant powerups (including Twin Sunflower and
Wall-nut First Aid). Buying Cob Cannon and Imitater, and the
10th seed slot, will probably not be possible until almost the end of
the Hard Survival
levels. The main way of making the tens of thousands of dollars
needed to buy the most expensive upgrades is to find free Zen Garden
plants in the various scenarios, and grow and sell them in your Zen
Garden.
In order to win the Gold Sunflower Trophy (and a
reward of five
diamonds), you must
unlock and win all 20
Minigames, the 9 non-Endless levels of Vasebreaker
and I, Zombie, and the 10 non-Endless levels of
Survival Mode (an expanded version of the idea introduced in the Last
Stand Minigame). This might take eight or ten more hours
after
getting the Silver Sunflower. Survival Mode works like ordinary
Adventure scenarios, where you start with 25 Sun and no plants, and
have to build up a powerful defense, but it resembles Last
Stand
in
being a multi-phase battle. At the end of every phase, you are allowed
to select a new set of plants, and any sun you have accumulated is
saved. There are regular (survive six flags -- three long battles) and
Hard (survive ten flags -- five long battles) levels of Survival in
Day, Night, Pool, Fog, and Roof modes. There is also a Survival:
Endless game in Pool mode.
Playing
the Adventure again
You can (and should!) play the Adventure mode again,
but only starting at the beginning: one of the game's few design
drawbacks is that you cannot select an individual Adventure level to
play; you must play them in sequence (the iPad and some of the other
newer versions have a Quickplay
option, allowing you to play selected levels after you finish the
Adventure once). When you play Adventure mode the
second (and subsequent) times, Crazy Dave will pick three plants for
you on each level (three different ones at random,
though most are potentially useful). You have available
all of the plants you have
found (and bought as powerups), which makes the early levels even
easier (the first three Day levels are now the standard five lanes
wide). Remember that most levels (except the first three and last -10
conveyors, and variety Levels 2-5 and 4-5)
will be one flag longer the second time through. Playing Adventure mode
a second time allows you to try out
different combinations of plants, especially trying to make the best
use of the
ones Dave picks for you. If you fail a level and retry, you
will get the same three plants, unless you save and exit the program
(another
slight bug in my view: my second time through the Adventure I lost four
times on 5-9 when Dave chose Peashooter, Pumpkin, and Garlic. I
quit after four tries, and never got a chance to finish the job, as he
switched to Starfruit, Cherry Bomb, and Squash when I tried again a few
hours later). You will also get the same arrangement of gravestones in
Night scenarios if you restart a level without exiting the program.
Specific tips for individual levels
(particularly for seed selection) are highlighted in yellow.
Remember to try and use what Dave gives you:
if any of his choices are an adequate substitute for what you would
normally pick, it may free up a slot for something else (a typical
example is to use Sunflowers if Dave gives them to you in a Night or
Fog scenario, skipping Sun-shrooms). If Dave gives you a
plant that can be upgraded, consider also taking the upgrade (e.g. Cob
Cannons if he gives you Kernel-pults). Playing the Adventure a
second time will also let you get at least two achievements impossible
the first time (more on the handheld versions).
The
Minigames
There are 20 of these, which take place in six
different environments:
Day: ZomBotany, Wall-nut Bowling, Slot Machine, Seeing Stars,
Wall-nut Bowling 2
Night: Beghouled, Beghouled Twist, Portal Combat,
Whack-a-Zombie
Pool: Big Trouble Little Zombie, Bobsled Bonanza, Zombie
Nimble Zombie Quick, Last Stand, ZomBotany 2
Fog: It's Raining Seeds, Invisi-ghoul
Roof: Column Like You See 'Em, Pogo Party, Dr. Zomboss's
Revenge
Aquarium Garden: Zombiquarium
ZomBotany
ZomBotany is a strange and difficult Day scenario
where the zombies have somehow been crossed with
plants (here the zombies have Peashooters and Wall-nuts heads); the Peashooter/zombies shoot
peas back at
you when they are walking forward, and the Wall-nut/zombies take a lot
of damage; both of them try to eat any plants they encounter just like
normal zombies. I got slaughtered the first time I tried this. You'll
need lots of
Sunflowers, and Wall-nuts (or better, Tall-Nuts) to protect them
(Pumpkins help too). It's
a good idea to fill almost one whole lane with sunflowers, using Mines
to destroy early
zombies in lanes with no other plants in them (peas fired by zombies
fly harmlessly past both Mines -- armed or not -- and lawnmowers).
A normal plant like a Sunflower or Chomper will be destroyed by 16 hits
from Peashooter/zombies; a Peashooter/zombie is destroyed by 10 peas,
just
like a normal zombie. Threepeaters are a good choice of weapon (put as
many as possible in lanes 2 and 4,
protected by Wall-nuts), since they can fire at Peashooter/zombies
which
cannot always fire back. It's also possible to win without any
shooters at all, just lots of Sunflowers and Tall-nuts (and Wall-nuts too), and an endless
stream of Potato Mines, Squash, Chompers, Cherry Bombs, and Jalapeños.
Later, when you have bought some of the upgrades, the Maximum
Sun
strategy (Sunflowers, Imitater Sunflowers, and Twin Sunflowers) can
work
well here too.
Wall-nut Bowling
Wall-Nut Bowling is a much longer and harder version
of level 1-5, which might take several tries to win
(three for me the first time, though I've improved a lot with
practice). In addition to regular and Conehead zombies, you will
face Bucketheads, which take three hits from plain Wall-nuts, and Pole
Vaulting Zombies, which jump over the first Wall-nut they encounter
(they then walk as usual and are destroyed by a single hit). Try
to save up as many Explode-o-nuts as possible and use them to destroy
large groups of zombies. Once you have lost one or more lawnmowers,
concentrate on knocking out any zombies in those lanes and let the
remaining lawnmowers cover their own lanes. You earn coins
for every zombie hit by a ricochet: the first ricochet earns one $10
coin, the second with the same Wall-nut gets two $10 coins, the third
gets three, and the fourth, fifth, and sixth each get a $50
gold coin (I don't think there's room for more than six
ricochets from the same Wall-nut). Spend the time
while wall-nuts are rolling collecting coins. You will get the Roll
Some Heads achievement the first time you earn a gold coin
for at
least four
ricochets. This is one of the hardest scenarios for me to win
without losing any mowers.
Slot Machine
Slot Machine is a relatively easy game
where you play a slot machine (at 25 Sun per pull), winning plants and
extra sunlight whenever you get two or three of a
kind. You face only plain, Conehead, and Buckethead zombies;
the slot machine will give you Sun, Sunflowers, Peashooters, Snow Peas,
and
Wall-nuts (and occasionally Diamonds). Pull the slot machine
continuously (every 4 or 5 seconds). Place Peashooters, Snow
Peas, and Sunflowers, as you win them, to
the far left, and Wall-nuts in the middle columns (preferably 6 and 7).
Sometimes a zombie can break through early if you don't get enough
defenders early,
but the lawnmowers should protect you long enough to accumulate 1000
Sun. Two of a kind gets you a plant or 100 Sun, three of a kind
wins three plants or 500 Sun. You don't have a shovel in this
game, so don't place Wall-nuts too far to the left, since you may fill
the whole area behind them if you get a lot of Sunflowers.
The other Minigames cannot be unlocked until you finish Adventure
mode; after that, winning each Minigame unlocks a new one, until all 20
are available.
Return to 3-3 if you came here after 3-2.
It's Raining Seeds
It's Raining Seeds is a very long Fog
(and rain) scenario,
somewhat
similar to the conveyor scenarios, but plants fall randomly from the
sky and you cannot save them for very long: they disappear a few
seconds after reaching the bottom of the screen. You will
receive a variety of plants, which might include every non-upgrade
plant except Sunflower, Sun-shroom, Grave Buster, Flower Pot, Coffee
Bean, and Umbrella Leaf. You will face Football, Buckethead, Conehead,
Newspaper, Jack-in-the-Box, Screen
Door, Bungee, and Ducky Tube zombies. It helps to get
an early Plantern (or a Torchwood in a pinch) in column 7,
preferably in one of the pool lanes if you have already placed a Lily
Pad there. Protect your Planterns with Tall-nuts, Wall-nuts,
Garlic, Chompers, Hypno-shrooms, or whatever else is provided.
Try to get a shooter or catapult at the far left end of every
lane (especially the grass lanes) as soon as possible. This
is not an especially hard Minigame, but sometimes you will lose a
lawnmower or two early if you cannot get
enough defenders in every row. If you do lose any mowers, make
sure to heavily protect those lanes (Garlic is a good idea if you get
any) to prevent a second breakthrough (this applies to Invisi-ghoul
too).
Beghouled, Beghouled Twist, and Insaniquarium
The remainder of the Minigames are a mixture of easy and hard
games, including zombified versions of other PopCap games (I think they
missed the boat, though, by not including PotatoMinesweeper).
Beghouled and Beghouled Twist
are versions of Bejeweled
and Bejeweled
Twist, where zombies attack a 5x8 array of plants,
while you try to make groups in Match-3 fashion by either swaps or
clockwise twists (Beghouled Twist does not allow
twists which do not make matches, and with a small playing field and no
counterclockwise twists, it frankly doesn't work as well as Bejeweled
Twist).
In both games you try to make 75 matches before any
zombies get through. Matching three in a row earns you a ball worth 25
Sun; four in a row is worth two balls and five in a row (very
difficult) is worth five
balls. With sufficient Sun you can upgrade Peashooters to
Repeaters (do this first: I think it's easier to get every upgrade
before the
game ends if you do the more expensive upgrades first), Wall-Nuts to
Tall-Nuts, and Puff-Shrooms to Fume-Shrooms.
You can also repair craters caused by plants being eaten, and buy a
fresh array of plants (though the game will do this for free after a
few seconds if you run completely out of moves). The zombies you
face are regular, Conehead, Buckethead, Football, Screen Door, and
Newspaper. Neither game is exceptionally hard, nor is Zombiquarium,
a one-shot version of George Fan's earlier PopCap game Insaniquarium
(feed brains to Snorkel Zombies in a giant aquarium, keeping them alive
long enough to collect 1000 Sun). Reportedly, Plants vs.
Zombies was originally conceived as a sequel to Insaniquarium.
Invisi-ghoul
In Invisi-ghoul, a Fog conveyor scenario without
fog (it takes place in your backyard at
night), you cannot see the attacking zombies; you can only tell where
they are
by seeing where your plants' attacks stop (careful: butter from
Kernel-Pults appears in the row above where the
zombie is), by planting an Ice-Shroom (you will briefly see
ice patches where there are zombies on land), or by seeing where your
plants
are being attacked (plants, including Wall-nuts and Lily Pads, light up
briefly when a zombie starts to eat them). You get a random plant about
every 8 seconds; your weapons are
Peashooter, Wall-nut, Ice-shroom, Squash, Lily Pad, and Kernel-pult;
these are pretty weak for
facing a variety of unknown foes (the preview is blank, of course)
including
Bucketheads, Dolphin Riders, Jack-in-the-Boxes, and Zombonis.
You have no Magnet-shrooms and nothing to directly stop Zombonis except
Squash. Pay
close attention to the sounds of Dolphin Riders and Bucketheads.
It is easy to lose Mowers or Pool Cleaners early, since
zombies will be undetectable in rows empty of plants.
Start
planting from
the far left, and slowly build towards the center, though Wall-nuts
should
be placed much farther forward. One of the hardest Minigames, and
you will sometimes lose due to sheer bad luck. Two
Peashooters
at the back of a lane are just sufficient to stop a Zomboni.
Seeing Stars
Seeing Stars (Day) is a quirky but very easy game in
which you must plant 14 Starfruit in a
star-shaped pattern marked on the lawn (only
Starfruit can be planted in the starred squares). You
only face regular, Conehead, and Buckethead zombies.
Get plenty of sunflowers down quickly (using Mines or Squash to knock
out the early zombies as usual)
and use Tall-Nuts to protect them and the Starfruit. You don't really
need
anything else, although you are allowed to select plants as usual up to
your number of available seed slots. The Starfruit provide
plenty of firepower all over your lawn as they accumulate. Starfruit
can be planted anywhere, though there is no reason to plant them
anywhere but
in the 14 starred squares. Until you have a fair number of
Starfruit planted, leave the leftmost square in the middle lane vacant
in case you need to plant a Squash or
other explosive there to stop a zombie which has gotten through.
After Zombiquarium and Beghouled Twist
(described above along with Beghouled),
the next three Minigames are all conveyor scenarios.
Big Trouble Little Zombie
Big Trouble Little Zombie
is a Pool conveyor scenario exactly like Adventure
Level 3-5, except
longer. Once again you have Peashooters, Lily
Pads, Cherry Bombs, and Walnuts against smaller
versions of regular, Conehead, Snorkel, and Football
zombies. The Minigame runs three flags long (about 5-1/2
minutes). If you find this scenario too easy, try it without
using Lily Pads.
Portal Combat
Portal Combat is a strange Night conveyor
scenario
(you get a random plant about every 6
seconds) where there are two pairs of teleporting doorways (both
zombies and attacks
pass through these). Watch out for the Balloon zombies; place Cactuses
at the far left of every row
as quickly as possible. You also face plain, Buckethead, and Football
zombies. Save up
your Cherry Bombs for emergencies (zombies coming through a portal
close to the left side) or to take out large groups. Put
groups of Peashooters and Repeaters together behind a Torchwood to
shoot through the
portals. Use Wallnuts to slow up large groups of zombies and
protect your shooters and Torchwood as usual. Wall-nuts can also
be used to block the right side of a portal near the right edge of the
lawn to help keep some of the zombies from getting through it.
Bad luck in the location of portals can cause you to lose mowers, and
sometimes the level; a portal on the far left edge is often very hard
to stop.
Column Like You See 'Em
Column Like You See 'Em is a
conveyor belt Roof scenario where everything you place is repeated in
every lane of the same column. This can be tough, depending on how many
Jalapeños
you get. You start with eight rows of empty Flower Pots planted. You
will face regular
zombies, Coneheads, Bucketheads, Footballs, Ladders, Jack-in-the
Boxes, Gargantuars, and a few Dropping Bungees. Your
first six plants, in order, are always Potato Mine, Tall-nut,
Melon-pult, Magnet-shroom, Coffee Bean, and a second Melon-pult, and you won't get any more
of any of those
plants except (usually) Melons. You will
later usually get
an assortment of Flower Pots, more Melons, Pumpkins, Squash, Chompers,
and
Jalapeños. Save your Jalapeños mainly to attack Gargantuars.
Place the Potato Mine in the seventh column from the left (the second
column of Pots the zombies will reach), the Tall-nuts in front of
them (the first column the zombies will reach), and the
Magnets in the sixth column behind the Mines
(waking them up with the Coffee Beans which follow). Try to place at
least
three columns of Melons in back, starting from the far left. Place your
first Pumpkin on the Magnet-shrooms; keeping these intact as long as
possible will help against Ladders, Jack-in-the-Boxes, Footballs, and
Bucketheads. It's tempting to use a second Pumpkin to protect
your Tall-nuts
while they're still intact, but it's probably not worthwhile, since
they are usually either bypassed by Ladders or smashed by
Gargantuars. Instead you should use any remaining Pumpkins in the
four rightmost columns (right to left) to protect the Melon-pults,
and to slow down Imps and any attackers which break through the line of
Magnet-shrooms. If you get Chompers, put a column of
them directly behind the Magnets.
When
the first Ladder zombies arrive, it's probably most effective to ignore
them and let them climb over the Tall-nuts, leaving them intact (the
Magnets should eventually remove
the ladders from the Tall-nuts). A wave of
Jack-in-the-Boxes
will arrive shortly after the Ladder zombies; one of the dangers in
this scenario is that Jack-in-the Boxes sometimes explode prematurely,
before Pop Goes the Weasel has played the usual number of times.
You might be
able to attack them
directly by placing a new
column of Pots in front of the Tall-nuts and placing Squash or Chompers
in them immediately (you must do this quickly, or the Pots will be
eaten before you can plant the Squash or
Chompers). Otherwise,
you might want
to use one column of Jalapeños to
temporarily wipe out the board, especially if you have at least
two saved up. When the first wave of
Gargantuars arrive, you will probably want to attack with at least one
set of Jalapeños, and trust
your arsenal of Melons to finish them off. During the Final
Wave
you will face another wave of Gargantuars; if you have at least
two Jalapeños saved up, you should have
no trouble finishing off the Final Wave successfully. If you
get three or four Jalapeños
in all, you should easily win the scenario without
losing
any Roof Cleaners. If you never get more than one or two Jalapeños,
you might need to hold off using any until the Final Wave, even if some
or all of your Roof Cleaners are set off. If you are lucky enough
to get four or five Melons, you can fill up your entire back section
and can probably hold off everything in the Final Wave without
Jalapeños. The toughest games, though, are ones where you never
get any Melon-pults beyond the initial two.
Bobsled Bonanza
Bobsled Bonanza is one of the best of the Minigames;
a very tough Pool scenario featuring Zombonis
(zombies driving Zambonis) and Bobsled Zombies (four man teams of
zombies in bobsleds). The game starts with paths of ice covering five
squares of each grass lane (so you will not have your Garden Rake).
You cannot plant on ice paths, which can only be wiped out with
Jalapeños. Zombonis also lay down fresh paths of ice, and
will continue down an entire lane until destroyed. Bobsleds must follow
an ice path, then disappear as the Bobsled Zombies get out and walk
(since you start with four ice paths, you will sometimes see Bobsleds
first, which are more dangerous). If a Bobsled receives enough
damage, the four Zombies will get out of it even before it reaches the
end of an ice path.
If you do not have the full ten slots, the most valuable plants, in
order, are probably: Sunflower, Lily
Pad, Jalapeño, Cattails, Spikeweed, Spikerock, Tall-nut, Squash, Cherry
Bomb, Chomper, and
Potato Mine. Spikerock makes your defense so much easier that it might
be worth buying the upgrade before you play it for
the first time. Tall-nuts are utterly useless against Zombonis, which
will just run them over, but they are very useful in dealing with
Bobsleds, which cannot run them over and must stop in the square just
in front of the Tall-nut. Spikeweeds (and Spikerocks if you have the
powerup) can also destroy Zombonis. Destroying a Zomboni also removes a
Spikeweed, or damages one of the three spikes of a Spikerock. It is
quite possible to win without choosing Tall-nuts: Squash, Potato Mines,
Cherry Bombs, and Jalapeños are effective at destroying both vehicles.
Chompers can also eat vehicles, but (unlike Cherry Bombs) must be
planted in front of, not on top of, vehicles. But Chompers are
more effective against Bobsleds than Squash are, since the Bobsled
Zombies will get out of their sled before a squash can crush the whole
vehicle, and the Squash will only pick off one or two zombies.
If you get an early flood of sleds, the only effective weapons are
Jalapeños,
Chompers, and Tall-nuts, and it will be harder to build up Sunflowers
early (Mines only work if you can guess ahead of time where to put
them). If the first few vehicles are Zombonis, your task will
be easier. If heavily damaged by projectiles (e.g. from Cattails),
Bobsleds will stop short on an ice path
before they hit a Mine or Chomper.
If a lane is completely full of ice and plants, and you want to launch
a Jalapeño,
you will need to dig up the sunflower at the far left, launch a
Jalapeño from there, then replant the sunflower. Whenever you
use a Jalapeño, try to follow up by placing something in the now-empty
lane: ideally a Spikeweed (followed quickly by Spikerock if possible),
otherwise a Squash in the rightmost square, or Potato Mine a few
squares back (so it has time to arm). If you
do not have the Spikerock upgrade, you will need to plant Spikeweeds
steadily in at least one of the last two columns of every grass lane to
replace the ones which destroy (and are destroyed by) Zombonis.
One of your most effective weapons (if you have the upgrade)
can be
Cattails,
which produce constant fire on vehicles and walking bobsledders. The
Cattails will also deal with the handful of aquatic zombies which show
up at the end. Don't be perturbed if you use a lawnmower or
two early before you've accumulated enough Sun to provide a constant
flow of
explosives.
It is even possible, but difficult, to win this
scenario without using Jalapeños. You need to keep a constant supply of
defenders (Potato Mines, Squash, Chompers) at the end of each ice path.
Use Cherry Bombs wherever you can (in particular, you can destroy
vehicles in
lanes 2 and 5 using Cherry Bombs from adjacent Lily pads). If you
have ten seed slots, you'll have a couple to spare, since you won't
need Spikeweeds or Spikerocks (you also might not need Tall-nuts). You
might try Pumpkins or Wall-nuts (either of which can be used at the end
of the ice paths to stop Bobsleds), Twin Sunflowers (since you have
less space for Sunflowers), or even something wacky like Kernel-pults
and Cob Cannons. If you can build up six or eight Cattails,
most of the vehicles will be destroyed before they even reach the end
of the ice path.
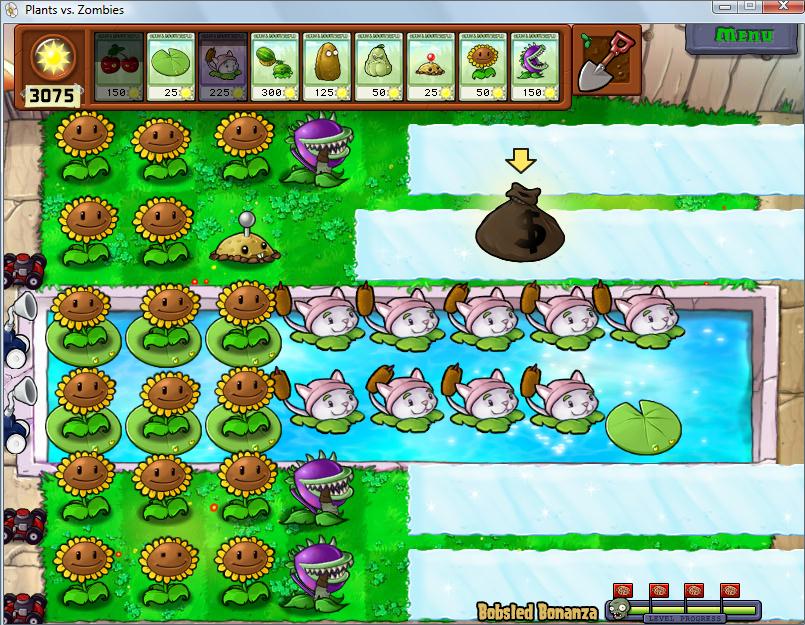
A win in Bobsled Bonanza without using Jalapeños or
Spikeweed
Zombie Nimble Zombie Quick
Zombie Nimble Zombie Quick is a Pool
scenario on amphetamines. Everything happens twice as fast: a normal
zombie which takes just over a minute to traverse a lane does it in
about 30 seconds. Plants recharge and Sun is produced twice as fast
too. Not an especially hard scenario if your reflexes can keep up with
the speed of play. Normal Pool tactics will work just fine here
(particularly using Cattails); just do everything quickly. You
don't face anything out of the ordinary (not even Bucketheads) except
Pole Vaulters and Dolphin Riders, so be sure to pick Tall-nuts, and
place them in the
pool lanes first (to stop the very fast Dolphins).
Whack a Zombie
Whack a Zombie is similar to level 2-5,
but longer and tougher (your chances improve if you get Sun early,
which pops up randomly sometimes when you smash a zombie). When I
started playing, I planted Potato Mines, in the most dangerous rows
first, as soon as I had Sun. But I think a better strategy is to forgo
the mines, at least initially, and start destroying graves right away
(usually those alone in a lane, or the closest ones first). Try to wipe
out every grave in as many lanes as possible. New ones will spring up
periodically (anywhere in the six rightmost columns), but
eventually you should have enough Sun to wipe out all
but two or three lanes. Once you've figured out what lanes are
going to be left, plant Potato Mines in those lanes if you have enough
Sun (try
to save enough for at least two more Grave Busters). If you remove all
but a handful of graves towards the right end of two adjacent lanes,
stop
destroying graves, as I believe every grave you remove makes it more
likely a new one will pop up in a different lane. Reducing to fewer than
four graves almost always seems to make two graves pop up at the same
time.
If necessary, you can plant an
Ice-shroom right after the Final Wave of zombies come out of every
grave remaining, which should give you plenty of time
to smash them all (any that are left after they unfreeze are still
moving slowly).
Below is my first flawless round of Whack A Zombie: every lane
protected by
at least one Potato Mine, no lawnmowers used up, and graves
left in only three lanes:
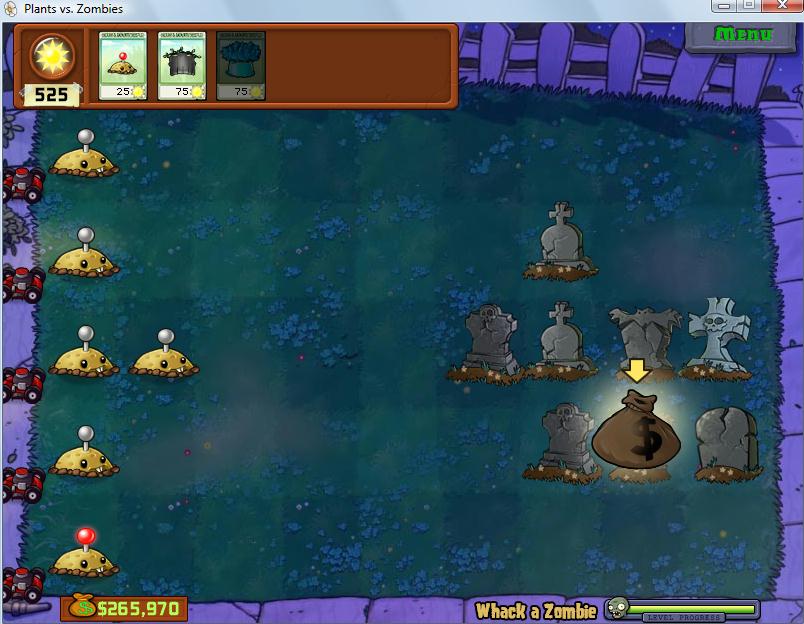
But it is quite possible to win without using Ice-Shrooms or Potato
Mines if you can eliminate enough graves. Usually you
will need to be saved by a couple of lawnmowers at least, but I have
won quite a
few times with all of my lawnmowers intact, and only a few graves left,
since adopting the Grave Buster strategy, and I only occasionally need
Ice-shrooms
any more. Crushing graves earns money, and you can
easily make $2000 in a round of WAZ. Once you have won and
the money bag pops up, you can still crush as many graves as you have
Sun left for, before clicking on the money bag to collect it. It
is worth crushing extra graves, as you will get a coin for each grave
crushed, and sometimes a gold coin or even occasionally a Zen Garden
plant. You should try to squash the last zombie far enough
to the left so that you can crush graves and collect their coins
without accidentally clicking on the money bag before you are finished.
If you do not crush any graves, but rely on your trusty
mallet along with
Potato Mines and Ice Shrooms, you will have 20 graves by the Final
Wave: It is hard, but not impossible, to win this way without losing some
lawnmowers. This is a much less profitable way to play, but you
can try for the 20 Below achievement if it's available on your
platform.
Last Stand
Last Stand, a Pool scenario, is a sort of warmup for
Survival Mode, and a fun way to try out various
combinations of plants. You get 5000 Sun and no Sunflowers: from
your full array of plants you
select and build up a defense ahead of time, attempting to survive five
flags
(battles each roughly equivalent to a standard Adventure level) against
progressively harder zombies, with a resupply of 250 extra Sun at the
end of each flag. Last Stand is also one of the few
scenarios with no lawnmowers (or pool cleaners). You
cannot select Puff-shrooms or Sea-shrooms, which are free and therefore
not allowed in Last
Stand (other mushrooms may be selected if you choose
Coffee Beans). You also cannot take Sun-generating
plants. The program does not prevent you from
selecting plants which are useless in Pool mode (Plantern
and Flower Pot), though these are shaded like the free plants,
mushrooms, and sun generators. Once you have the full set of powerups, Last
Stand
is not terribly hard: a full row of Melons/Winter Melons and some
Cattails,
behind a row of Tall-Nuts
(below), can survive five flags with minimal reinforcements. [Without
powerups, Snow Peas plus Melon-pults will do in place of Winter
Melons, but this is less effective since the Snow Peas take up more
space and hit only one zombie at a time, while Winter Melons cause
splash damage and will slow down zombies in adjacent lanes.] Sometimes
the Garden Rake even survives until sometime in the second flag. Your
most plentiful adversaries are the usual assortment of
plain, Conehead, and Buckethead zombies (both on land and on Ducky
Tubes), plus Football, Screen Door, Pole
Vaulting, Newspaper, and Dolphin Rider zombies. You will see most or
all of these on every flag including the first.
The most dangerous opponents in this scenario, however, are
Jack-in-the-Box
and Ladder zombies. These usually do not show up until
the later flags (you might not see Ladders at all if you use a defense
without Tall-nuts). Assuming some typical defense behind a wall of
Tall-nuts, you need to keep an eye on any
Ladders or Jack-in-the-Boxes that get too close to your defensive wall,
and pick them off individually with Squash or something similar; a
Jack-in-the-Box explosion can easily demolish three adjacent Tall-nuts,
and Ladders can easily cause a stream of zombies to come pouring over
the wall (two Ladders in succession, which you might see occasionally,
can even breach a double wall). Space is not usually a huge problem
here, though it's better to have your defensive wall as far
back as possible. Pumpkins are not useful; Tall-nuts offer more
protection for the same price: a double wall of
Tall-nuts, for example, would be almost as cheap and far more effective
than
a single wall of Tall-nuts protected by Pumpkins (but you
can't afford to spend too much on extra protection at the expense of
firepower).
An initial setup for Last Stand -- start with four
Magnet-shrooms (plus a fifth upgraded to Gold Magnet), six Melon-pults
(three upgraded to Winter Melons in alternate lanes), and
three
Cattails. Add a fourth Cattail at the end of the
first flag. Upgrade a Melon-pult to a Winter Melon at the end of each
of the next three flags.
The Gold
Magnet allows the scenario to run without intervention; you only need
to watch out for Ladders and Jack-in-the-Boxes (and Zen Garden plants).
This setup ended with a
win, with no explosives used and no visible damage to the
Tall-nuts. You might need to use a Squash or Cherry Bomb to
destroy a Ladder or Jack-in-the-box, or to destroy a large clump of
zombies eating a Tall-nut during a Final Wave. If you have fewer than
ten slots you can skip Gold Magnet and Cherry Bomb. (Pushing back
three of the columns doesn't seem to work as well; it puts those
Magnet-shrooms too far back to be as effective on the pool lanes.)
ZomBotany 2
ZomBotany 2 is a much harder Pool version of
ZomBotany, with zombies also having Squash, Tall-nut, Jalapeño, and
Gatling heads. The latter two should be destroyed as soon as
possible with a Squash, Chomper, Cherry Bomb, or Jalapeño.
Cattails behind Wall-nuts (or Tall-nuts) in the pool lanes are a must;
eventually you want to protect every lane with Tall-nuts, Pumpkins, or
both (you'll need to replace them occasionally). You need
plenty of explosives to deal with the more dangerous hybrids, but
unlike ZomBotany, firepower is essential, and the
more the better:
Threepeaters may also
help. Peas fired
by zombies pass over empty Lily Pads without damaging them.
Unlike other Pool scenarios, there are no Inferi during the
Final Wave.
Wall-nut Bowling 2
Wall-Nut Bowling 2 adds Giant Wall-nuts
to the regular Wall-Nut Bowling. These are not
Tall-nuts (which obviously would not roll properly), but extra-large
Wall-nuts which wipe out every zombie in a lane (like a Jalapeño),
including Pole Vaulting zombies which have not jumped yet . You should
try to save
these up, in addition to the Explode-o-nuts, to use when you can do the
maximum damage. Wall-nut Bowling 2 is a nice
combination of arcade skill and strategy; it is a challenge to
win without losing any lawnmowers. In addition to Coneheads,
Newspapers, Dancers, and
Bucketheads, you also face Screen Door zombies, which take four direct
hits from regular Wall-Nuts to destroy. Screen Doors
are vulnerable to ricochet hits, which wipe them out at once.
Ricochet hits on other zombies cause normal damage.
It might be worthwhile occasionally using an Explode-o-nut to
destroy a single Screen Door zombie at the head of a lane, but look for
opportunities to take
out several Screen Doors and Bucketheads with an Explode-o-nut or Giant
Wall-nut. Giant Wall-nuts are also effective in
lanes with Dancers (and two Backups), Pole Vaulters, and Newspapers.
Pogo Party
Pogo Party is loosely based on Fog Level 4-8 and
Roof Level 5-4, but much longer and
harder. You will face an almost unbroken series of Pogo Zombies. It is
one of the hardest of the 20
Minigames. The early part is hardest; if you can avoid losing any Roof
Cleaners to
the first few Pogo zombies, you should be able to win. I do not suggest
trying to use
Magnet-shrooms. Use Squash and Tall-nuts to stop the early Pogos,
slowly building up a full wall of Tall-nuts.
Imitater Sunflower or Tall-nuts might help too. Jalapeños and Cherry
Bombs might also be useful early in picking off
Pogos which have passed your defensive line in a lane where you haven't
planted a Tall-nut yet. Cherry Bombs
might also prove helpful in finishing off clumps of zombies. Chompers
cannot eat hopping Pogos,
but are useful directly behind Tall-nuts to eat Pogos
which have crashed into them. I prefer, however, to build a
double wall of Tall-nuts (or even more if using Imitater Tall-nut),
which renders Chompers superfluous. Use Cabbage-pults or Melon-pults
(or both) to destroy the Pogos after they have crashed into your
defensive wall. Umbrella Leaves are an unnecessary luxury: Dropping
Bungees appear
during the Final Wave, but they are usually too few to do much
damage.
Dr. Zomboss's Revenge
The final Minigame, Dr. Zomboss's Revenge, is a
harder version of the final Adventure
level, 5-10.
Tips
on individual Vasebreaker levels and Vasebreaker:
Endless
When Puzzle Mode is unlocked during
4-6, you have access to the first
three levels of Vasebreaker and
I, Zombie. The first level, simply called Vasebreaker,
has five columns of vases, with 5 Peashooters, 5 Snow Peas, and 5
Squash against 6 regular and 3 Buckethead zombies, and a
Jack-in-the-Box. This is a fairly easy level; try to get one of each
plant
into each lane as quickly as possible, particularly trying to make sure
that you get a Squash in front of each Buckethead if possible.
Sometimes you will lose by bad luck if the Jack-in-the-Box blows up and
destroys a chunk of your defenses.
This unlocks To the Left, which has five columns
too, but shifted one to the left, so the rightmost
column is empty. This is the first level where Repeaters which shoot to
the left are introduced. Obviously
you want to put these behind the advancing zombies. You have 7
Backwards Repeaters, 3 Snow Peas, 3 Wall-nuts, and 2
Mines against a Jack-in-the-Box, 3 Bucketheads, and 6 plain zombies.
Try to get Mines or Wall-nuts in front of each Buckethead.
Third Vase reintroduces the Dancer Zombie (which
summons a quartet of backup
dancers) and makes the Hypno-shroom available (this is found after
level 2-5 and causes a zombie which reaches it to turn in the opposite
direction and attack the next zombie it encounters). Play Hypno-shrooms
on the Dancer if possible; not only will this get you the special
Achievement Disco is Undead if you are playing on
Steam, it will also make the Dancer summon hypnotized
backups if it survives long enough. You have 6 Backwards Repeaters, 4
Snow Peas, 3 Hypno-shrooms, 3 Wall-nuts, and 2 Squash against
a Jack-in-the-Box, a Dancer, 2 Bucketheads, and 8 plain zombies.
The remaining Vasebreaker levels can only be
unlocked, one at a time, after finishing Adventure mode.
Return to 4-7 or go to the early
levels of I, Zombie.
There are six more regular levels of Vasebreaker
before you reach Vasebreaker: Endless. All of
these except Hokey Pokey have a full seven columns
of vases. Each Vasebreaker
level has at least
two green vases which always contain plants. It is tempting to break
these first, but I believe a better strategy
(especially in the harder and Endless levels) is to break vases
starting in the rightmost column, until you know
where you are likely to need help. Once you see where the worst
problems are, particularly
after the Gargantuar appears, then break one (or both if necessary) of
the green vases -- often at least one of these will contain a valuable
Squash. Once I started saving the green vases until I needed them, I
went past level 10 many times (and eventually started reaching 20),
where I had never managed more than 8 using the green-first strategy.
Chain Reaction has eight Jack-in-the-Boxes which
tend to blow up in rapid succession. You also
have to worry about one Football zombie, and you will probably need a
Hypno-shroom to stop it. Be careful
about filling both open left squares of a lane with Puff-shrooms: you
might need room
to place a Hypno-shroom. The other 7 zombies are regular; you have 10
Puff-shrooms, 5 Hypno-shrooms, and 4
Backwards Repeaters.
M is for Metal is a very tough scenario with 3
Football and 5 Buckethead zombies (plus a Jack-in-the-Box and 6 plain
zombies);
3 Magnet-shrooms disarm them, 2 Snow Peas and 3 Pumpkins help to slow
them down, and
2 Hypno-shrooms turn them around. You also have 6 Backwards
Repeaters and 4 Squash.
Scary Potter adds 5 Pole Vaulting Zombies. There are also
2 Football Zombies, 7 plain zombies, and a Jack-in-the-Box, but no
Bucketheads. You have 5 Tall-nuts (try to block each lane), 4
Torchwood, 2 Squash, 2 Threepeaters, and 7 Backwards Repeaters.
Torchwood can be used in both directions, with
Threepeaters from the left and
Repeaters from the right.
Hokey Pokey is an unusual level, 6 columns deep,
with no shooters: you have 13 Spikeweed, 3 Wall-nuts, and
3 Squash, against a Buckethead and 10 plain zombies -- just remember
that two Spikeweeds will kill a
plain zombie if it takes long enough to cross. To be sure of killing
the plain zombies, put a Wall-nut
behind a Spikeweed, or put three Spikeweeds in a row. You will almost
certainly need to kill the Buckethead with a Squash
(unless you can get it to eat through two separate Wall-nuts while
standing on Spikeweed, or cross six Spikeweeds before eating a
Wall-nut).
Another Chain Reaction is one of the
trickiest levels, and you will often lose by bad luck. If Pogo zombies
come out too early in lanes you haven't been able to defend, you might
not have time to find Squashes or Tall-Nuts to stop them. Green vases
seem to be mostly Puff-shrooms or backwards-firing Repeaters, though
you might get lucky and find a Squash. Do not fill both open left
squares of a lane with Puff-shrooms: you will need room to place a
Squash or Tall-Nut. Once you have Tall-Nuts and Squashes in all of the
lanes, you should usually be able to win, unless a Jack-in-the-Box
destroys a Tall-nut blocking a Pogo. You have 7
Puff-shrooms, 5 Squash, 3 Tall-nuts, and 4 Backwards Repeaters against
8 Jack-in-the-Boxes, 4 Pogos, and 4 plain zombies.
Ace of Vase is basically a warmup to Vasebreaker:
Endless, including a Gargantuar, but you will
receive no Sun to produce Cherry Bombs (instead you have an extra
Peashooter).
Vasebreaker: Endless
In Vasebreaker: Endless, you will face 15
zombies: one Gargantuar, one Jack-in-the-Box, five
Bucketheads, and eight normal zombies. You will have 19 plants:
a Potato Mine, a Wall-Nut, a Plantern, two Threepeaters, two
Snow Peas, one Peashooter, five Squash and six backwards Repeaters. You
also find one vase with Sun, between one and three balls (25-75
units). You can save up as much Sun as you find, and once you have
saved up 150 Sun, you will have access to a Cherry Bomb. Try to get a
Repeater at the right end of each lane, and some kind of defense
(Wall-Nut, Potato Mine, Squash, or several shooting plants) at the left
side of each lane, particularly the more dangerous lanes (with many
vases still unbroken, or one or more Bucketheads already advancing).
Use squashes whenever possible to attack Gargantuar and Bucketheads.
Wall-Nuts and Snow Peas can help slow down Bucketheads, but you will
usually need extra firepower (from both ends if possible) to destroy
them. They take the equivalent of about 55 peas of damage. If you have
time, wait for the Potato Mine to arm itself after placing
it, before breaking any more vases in that lane. If you have a Garden
Rake, it
will appear at the beginning of the first level, and will disappear on
the second level, even if it was not triggered. You can put a plant in
the same square as the Garden Rake -- and you'll often want to do so in
Vasebreaker.
It will take two Squashes (or a Squash and a Cherry
Bomb), or one plus additional firepower, to stop the
Gargantuar. But the real danger of the Gargantuar is that it will
eventually fling an Imp forward, usually to about the second square in
the lane. This usually happens after you hit Gargantuar with a Squash;
if you can hit it with two in succession, you might be able to destroy
it before it can throw its Imp forward. If you don't have anything
guarding the left end of the lane, you might have to waste a squash or
place a backwards Repeater in an unnatural location (e.g. in the second
column, directly behind the Imp) to get rid of it. I have lost more
often because of Imps than because of Gargantuars directly. Putting a
squash in the second column of a row containing a Gargantuar
(either already moving or revealed by a Plantern) usually
doesn't work unless the Gargantuar is in the third column; the Squash
will usually be triggered either by an Imp, or whetever is in the third
column when the Gargantuar smashes its vase.
Vasebreaker is a Night, not Fog scenario:
Planterns serve only to illuminate the contents of unbroken vases
adjacent to them. When the Plantern turns up, find the spot with the
most adjacent unbroken vases to place it. If you have time, smash the
middle of a 3x3 block and place the Plantern there as soon as the
zombie (if there is one there) moves forward. Once you have seen what
is there, you probably want to place the shooters right away, saving
any Squashes for later. It is usually best to place Wall-nuts and
Squash in the second column from the left, and shooters (especially
Threepeaters) and Potato Mines in the far left column. In particular,
it is a waste to put a Squash in the first column and a Potato Mine in
front of it, because the Squash is stupid and will jump at the same
time the mine explodes, wasting both on the same zombie (but the Squash
is capable of crushing several zombies in the same square
simultaneously: look for chances to do this when a Wall-nut has several
zombies bottled up). Another useful technique is to get
several zombies moving in tandem so that, again, a single Squash can
crush them all. You can do this by breaking each vase in a
row in turn just as the already-moving zombie(s) arrive directly over
it.
It helps to keep track, in each level, of whether you've seen the
Gargantuar and the Jack-in-the-Box, and how many Bucketheads are left.
Knowing that all five Bucketheads are either visible or
already destroyed, or that there is, for example, one left, can help
you plan your strategy for dealing with the remaining hidden vases --
particularly where to place any remaining Squash, a Wall-nut, Potato
Mine, or the contents of green vases. Remembering that there is a
Jack-in-the-Box still hidden can sometimes prevent disasters where you
uncover a Jack-in-the Box and it destroys a critical Wall-nut, Potato
Mine, or Squash. If you know that the last brown
vase is a Jack-in-the-Box, or can see the Jack-in-the-Box illuminated
by a Plantern, you should leave it until last unless you are sure that
smashing its vase cannot harm any of your critical plants.
Once you reach the 11th level, you will face two Gargantuars
per level (everything else is the same except that there are only 7
plain zombies instead of 8). You should try to have enough Sun
saved for at least one or two Cherry Bombs (the more the better; I've
had as much as 1200 Sun, temporarily, on
level 21). Don't count on being able to use more than one per level;
they do take time to recharge (just under 50 seconds from the time of
the first explosion), and you won't be able to use two in rapid
succession. It takes a lot of practice to get better at getting
through double-Gargantuar levels without using Cherry Bombs -- the
problem is that you don't get much practice until you're consistently
good at
the early levels. One tactic that may help is to get Snow
Peas, as often as possible, into the back of lanes with Gargantuars in
them.
If you hope to get to level 20 or further, you need to get
as far as possible without using any Cherry Bombs at all (I've managed
15 several times, getting as far as 21 levels once and 20 levels
once). You
need
to learn to beat two-Gargantuar levels, as often as possible, without
using Cherry Bombs. I have now managed
to finish level 20 fairly often:
naturally, the levels starting at 21
have three Gargantuars and six regular zombies. You
also need to learn to win some levels past 20 (with
three or more Gargantuars) without using any Cherry Bombs. On
my first two occasions reaching level 20 with over 700 Sun,
I messed up level 21 both times by letting an Imp slip
through. I've
now made it through
level 25 many times, occasionally beating
three
straight levels past 20 without using any Cherry Bombs. The
highest level I have completed so far is 37, using 9 Cherry Bombs along the way. Nine times I've
managed 30 or more.
In levels beyond 20, with 3 or 4 Gargantuars per level, if
you work on the top (or bottom) three lanes, using a Cherry Bomb if
necessary, you can then wait for the Cherry Bomb to recharge before
tackling the remaining lanes, in case you need to use a second Cherry
Bomb.
I,Zombie
After Level 4-6 you can also play the first three levels
of I, Zombie (winning each level
earns a blue diamond and unlocks the next level).
This Puzzle puts you in the zombies' place, giving
you 150 Sun and a selection of zombies, challenging you to break
through all five lanes to eat the brain at the end of each. Zombies
must be produced by means of Sun, just as plants are in the regular
scenarios. Some of the
plants (typically as many as 9 in the easy levels) are sunflowers:
these generate 200 Sun each when eaten, enabling you to create more
zombies.
I, Zombie, the first level, gives you three kinds of
zombies (regular,
Buckethead, and Football). Nine of the 20 plants are sunflowers, and
the rest
are a mix of Peashooters, Snow Peas, and Squash. Attack the lanes with
the most sunflowers first. Use plain zombies to trigger Squash,
Bucketheads to attack most lanes without Squash,
and Football zombies to attack the most heavily defended lanes,
especially with a
Snow Pea in the back. You should easily finish this level with 1000 Sun
or more left.
I, Zombie Too brings in Spikeweed (which slow down
and injure zombies) and reduces the sunflowers from 9
to 7. You now have regular, Screen Door, and Buckethead zombies. You'll
find the slightly cheaper Screen
Door zombies just as effective as Bucketheads in lanes with no more
than one Spikeweed. In fact they are more effective if there are any
Snow Peas, as their
screen doors prevent them from being slowed by the frozen peas; a lane
with two Snow Peas at the back will kill a Buckethead before it reaches
the brain, while a Screen Door will get through easily.
Remember that a regular or Screen Door Zombie (or a Dancer or Imp in I,
Zombie Endless)
can cross one Spikeweed but not two. Regular zombies
are only useful here in mopping up lanes with no more than one
Spikeweed, or a shooter only in the first slot.
Can You Dig It? adds Torchwood, Potato Mine, and
Split Pea (along with Peashooters and Sunflowers),
against regular, Buckethead, and Digger zombies. The Digger can tunnel
under anything except Potato
Mines (which blow it up as usual), ending up at the far left and eating
its way backwards to the right. It is ideal for lanes without Split
Peas and Potato Mines, as it can easily eat anything facing right,
including Torchwood and Sunflowers. It can survive a Split Pea
only at the very back (it will eat it before the Split Pea can destroy
it with double peas). Diggers do not eat brains; when a whole
lane is wiped out by a Digger, you will have to send in a regular
zombie (or Imp in later levels) to eat the brain. As with many of the
thematic I, Zombie
puzzles, it is possible, despite the title, to win without using Digger
zombies (in fact you can
win with nothing but plain zombies, or nothing but Bucketheads).
The remaining I, Zombie levels can
only be unlocked, one at a time, after finishing Adventure mode.
Return to 4-7 or Go to Vasebreaker
There are six more levels of I, Zombie before you
reach I, Zombie Endless. Most of them
are not hard if you take the right approach. Again, winning each level
earns a diamond and unlocks the next level.
Totally Nuts is very easy: just play Ladder zombies
in each lane (starting with one with the most
sunflowers). After you have enough Sun to play five Ladders, use
Bucketheads (or a second Ladder in lanes with Snow Peas) to mop up any
lanes where the Ladder zombies didn't get
through to the brain.
Dead Zeppelin pits regular, Buckethead,
Bungee, and Balloon zombies against a Magnet-Shroom, two Cactuses, and
an assortment of Peashooters and Snow Peas. Play a Buckethead in a row
with more than one Sunflower, which should pick up enough Sun even
after the Magnet pulls off the bucket to send another Buckethead into
the lane with the Magnet-shroom (or take it out with a Bungee if you
will have enough Sun afterwards to send another Buckethead). You can
take out the Cactuses with either Bucketheads or Bungees. Once both
Cactuses are gone, you can plow through any rows left with Bucketheads
or just fly over them with Balloons if you have enough Sun (it's
usually possible, despite the title, to win without Balloons; an extra
challenge is to eat all five brains with Balloons).
Me Smash! gives you regular, Pole
Vaulting, and Buckethead zombies, as well as Gargantuar. The
lanes are now five plants deep instead of four. Sunflower-rich
lanes are usually guarded by Garlic in the front, so
leap one or both of these with Pole Vaulting zombies and accumulate
enough Sun to let a Gargantuar loose in each remaining lane; remember
that they can take a hit from a Squash, so they can smash their way
through almost any lane you will encounter. They might even get through
a lane with two Squash, if they can throw an Imp forward to remove one
of the Squash. You can even take out the second Garlic lane with a
Gargantuar, since they can smash Garlic easily too. You gain Sun
as normal when a Gargantuar smashes a Sunflower. [You can win
without using the Gargantuar too.]
Most lanes in ZomBoogie have three or four hazards
(either Chompers or Potato Mines). I think the designer's
intention was that you clear out an entire lane (second or fourth or
both), then use Dancer Zombies to wipe out the adjoining lanes, but
there are more than enough Sunflowers to finish the entire level with
nothing but plain zombies (actually I'd rather have Imps, since they're
faster). The Bucketheads are completely useless, and I don't think you
will gain any advantage using Pole Vaulting zombies except to jump over
a Chomper or Potato Mine which is the only defender in its lane
(this might be one left over at the back of a lane, or with only
Sunflowers behind it).
Three Hit Wonder gives you six different kinds of
zombies to
get past Magnet-shrooms, Potato Mines, Squash,
Wall-nuts, and Peashooters. You can usually use Conehead zombies to do
the
dirty work of first eliminating both Magnet-shrooms (and perhaps the
Squash
too); after that Bucketheads can get through the rest (though Ladder
zombies should be faster in lanes with Wall-nuts). Occasionally
you might find a Magnet well defended by both a Wall-nut and a
Peashooter; you might want to use a Bungee to snatch that Magnet.
You might also have to start sometimes by grabbing some lightly
protected Sunflowers to build up some early Sun.
All your brainz r belong to us is the only level
where the plants are six deep. You
have eight Zombies to choose from (though not Dancers; unlike Ace
of Vase in Vasebreaker,
the last regular level is not precisely a warmup for I,
Zombie: Endless).
The problem here is often how to get enough Sun at the very beginning,
as the Sunflowers
might be deep in their lanes or well-protected. You
probably want to eliminate the Magnet-shroom first (Coneheads as usual
are the weapon of choice, unless the Magnet is deep and you can
generate enough Sun to use a Bungee and still have enough Sun to
proceed), and climb over the Tall-Nut with a Ladder zombie (otherwise
it takes too long to eat through if anything is shooting at you). Once
the ladder is up, you can work on that lane as needed with Bucketheads
or Football zombies. You might also occasionally be able to attack the
Tall-nut lane with a Digger. The Starfruit and Threepeater also
need to be eliminated, using Bungees or Diggers if the arrangement
doesn't seem suitable for Bucketheads or Footballs. Winning this level
finishes one portion of the requirements for a Gold Sunflower, and
unlocks I, Zombie Endless.
I, Zombie Endless
The levels in the Endless version are an assortment of
different types, not one fixed pattern as in Vasebreaker
Endless. The most common pattern is similar to All your
brainz r belong to us, with usually one Magnet-Shroom, one
Umbrella Plant, one Threepeater, and often one Starfruit. The
rest of the plants are an assortment of Snow Peas,
Split Peas, Repeaters, Puff-shrooms,
Spikeweeds, and Kernel-pults (sometimes with Squash, Chompers and
Potato Mines too). The first round almost always starts with 8
Sunflowers; be careful not to run out of Sun on the very
first level before you reach some Sunflowers.
The second round usually gives you 7 Sunflowers, the number
gradually (but irregularly)
decreasing as the streak gets longer. There are also several
alternate
patterns which are interspersed at random.
The easiest, but rarest, of these is a Scaredy pattern with as many as
12 Sunflowers
guarded by Scaredy-shrooms and Puff-shrooms -- this is an opportunity
to build up a large surplus of Sun. This pattern should be attacked by
five Bucketheads simultaneously, one in each lane -- the
Scaredy-shrooms in each
lane shrink in unison as the zombies push forward at the same time.
Another pattern mixes mostly Magnet-shrooms, Fume-shrooms, and
Puff-shrooms -- this needs to be attacked with Coneheads, one at a time
per lane, until all of
the Magnets are gone. The same is true if there are mostly
Magnet-shrooms and Starfruit. A third variety pattern, similar to ZomBoogie,
has few if any shooters, mostly defending with Potato Mines and
Chompers (sometimes Puff-shrooms and Fume-shrooms). If there are no
shooters, attack with Imps to gradually clear each lane; lanes with
shooters require Coneheads or perhaps Diggers. Dancer
Zombies can sometimes be effective; start them all the way to the right
to improve your chances of getting all of the Sunflowers in the side
lanes. Avoid using a Dancer in a lane with Spikeweeds (the
Dancers tend to stop frequently, and will be badly damaged by stopping
on a Spikeweed) or Fume-shrooms (the backup dancer in front will not
shield the Dancer).
A fourth pattern (shown
below) is
a mixture of mostly Snow Peas, Repeaters, and Split Peas. I would
attack the pattern below with Diggers in the top two lanes (multiple
Snow Peas but no Split Peas), a Ladder Zombie in the middle lane, a
Digger and a Buckethead in the fourth lane (the Buckethead should be
placed first so it can eat the rightmost Split Pea before the Digger
emerges from the back), and a Football zombie in the bottom lane (it
should eat the Snow Pea and speed up before the other shooters do too
much damage).
A winter pattern in I, Zombie: Endless.
Diggers are useful for attacking lanes
without Split Peas or Starfruit, particularly those with any
combination of Chompers, Wall-nuts, Threepeaters, Snow Peas, and
Repeaters, which are hard to overcome by assaults from the front.
A Digger can be attacked when it emerges
if the rearmost plant is a Kernel-pult, Split Pea, or
Starfruit, and sometimes by a Chomper. The Digger should
survive any of these attacks except for the Chomper, providing nothing
else is shooting at it. Sometimes when a Magnet-shroom is
deep in
its lane and well-protected, you may want to sacrifice a Buckethead or
Ladder to activate the Magnet (the Buckethead or Ladder should make
some progress before its bucket or ladder is removed). As
soon as
the Magnet is activated, you can put a Digger in its lane, which should
reach the end of the lane before the Magnet is activated again to
remove the Digger's pick. If the Magnet is protected by a
Split
Pea or Starfruit, and not protected by an Umbrella Leaf, stealing the
Magnet with a Bungee may be preferable.
An important tactic you will sometimes want to use is to send two
zombies in tandem. For example, putting down one Conehead and then
another right behind it in the same lane, as fast as you can play them,
is generally much more effective than sending one Conehead, then
sending another when the first one dies. Two Coneheads together
will eat plants faster, and the forward one will shield the rear one
from damage. This is particularly useful in lanes guarded by a Chomper,
which can only eat one of the
two. Tandems are almost a must for attacking lanes
with Kernel-pults (which can only butter one at a time),
unless
you can attack from behind with a Digger. Conehead
tandems are often the best way to attack a lane which contains a
Magnet-shroom. Be careful, however, not to
send a tandem into a lane with a Squash or Potato Mine (frequently seen
in ZomBoogie
setups),
which can destroy both Coneheads at once (unless you
leave enough
space between them). Tandems also don't
work well against Fume-shrooms, which attack both zombies
simultaneously.
You get a coin (usually silver, but sometimes gold) for every
brain you eat. For every three levels you win, you will get an extra
reward, usually a blue diamond, or occasionally a chocolate bar or Zen
plant. It is possible to compile a streak of 10 or more (in order
to get the Better off Dead achievement)
even without getting a Scaredy level, but you will need
accurate play and reasonable luck (few if any levels with only 1 or 2
Sunflowers). Generally speaking, you should expect to build up a
lot of sun in the early levels with 8 and 7 (and sometimes 6)
Sunflowers. You need to have well over 1000 Sun by the
end of level 2 to have much hope of advancing very far. Scaredy
levels should allow you, simply by sending
out 5 Bucketheads, to gain anywhere from 575 Sun (6 Sunflowers, which
I've only seen once) to 1775
Sun (12 Sunflowers). Levels with 5
Sunflowers should often allow you to break even or
perhaps even gain a little Sun; with 4 Sunflowers you'll probably lose
a little Sun. Levels with 3, 2, or 1 Sunflowers will cause
you to use up lots of your Sun reserve; a few 2's and 1's can even
knock out a huge reserve built up from Scaredys. You have a
better chance of getting Better Off Dead with an
ordinary start (say
8,7,5,4) followed by a stream of 3's and 4's than an early Scaredy
followed by a stream of 2's and 1's.
When you get down to low amounts of Sun, be sure that you eat enough
Sunflowers at the beginning of a level before you fall below 50
Sun. The worst mistake I ever made in any Plants vs. Zombies scenario was in I, Zombie Endless.
I had 375 Sun left at the start of the 10th level, which showed 4
Sunflowers: more than enough to get through level 10. However,
the strategy I used attacked the lanes in the wrong order and I didn't
eat any of the Sunflowers until I was down to 25 Sun, not enough to
send even an Imp to eat an undefended Sunflower.
Survival Mode
Survival Mode works like ordinary Adventure scenarios, where you start
with 50 Sun and no plants, and
have to build up a powerful defense, but it resembles Last
Stand
in
being a multi-phase battle. There are eleven scenarios in the
Survival series: five regular and five Hard levels (one in each of the
five environments),
and an Endless scenario in Pool mode. Each of these has five rounds
(single flags in the regular levels and double flags in the Hard and
Endless levels). These rounds are similar to the rounds in Last
Stand,
except that
at the start of each round you can select a completely new set of seeds
(and all of your existing plants stay, even if you do not select seeds
for them), and any sun you have accumulated is saved. This allows you
to gradually
build up a varied and powerful defense. There is a preview for each
flag which shows what zombies you
will encounter on that flag, however (unlike most of the Adventure
levels, Minigames, and Puzzles) there
is no exact pattern of what kinds of zombies you will face on each of
the five flags of each scenario. Generally,
however, you will still face the less dangerous zombies on the first
flag, and gradually one or two of the more
dangerous ones are introduced on succeeding flags.
If you have finished all of the standard Puzzles and Minigames, you
have
probably started collecting Zen Garden plants, provided you have at
least one plant upgrade. After you
have bought a ninth seed slot for $20,000, you can start to buy more
plant upgrades, unless you have a mushroom or Aquatic plant sleeping in
your
daytime Garden. In this event, your priority should be saving the
$30,000 needed to buy the Mushroom or Aquarium Zen Garden to replant
the sleeper. I would also try to get
Spikerocks before starting Survival: Fog,
and Twin Sunflowers before starting Survival: Roof.
More sun planting strategies
Twin Sunflowers are not particularly useful in Adventure scenarios,
which are too short to gain
much advantage from the extra Sun. But they are valuable in all
Survival scenarios, especially the
Hard levels, and for that reason Sunflowers are preferred over
Sun-shrooms in Night and
Fog Survivals. In daytime Survival modes where you have Sun falling
from the sky, I recommend that
you start planting Twin Sunflowers as soon as you have enough Sun to do
so -- do not wait until
you have all of your Sunflowers (three columns recommended) planted. If
you don't believe this, try it both ways. I ran two tests of the first
two flags of Survival: Day (Hard), the first time
planting Twins as
soon as I had 150 Sun, the second time starting
to plant them only after planting three full columns of Sunflowers. The
difference was striking: using the early-Twin strategy, by the end of
the first flag I had 8 Twins (versus 5 with the
delayed-Twin strategy), and had planted over 1000 Sun worth of extra
plants (two extra Melon-pults,
two extra Tall-nuts, and an extra Spikeweed and Spikerock). As
with all slow-recharging plants (particularly powerups), starting to
plant Twin Sunflowers as early as possible
allows you to plant more of them more quickly. You might want to try,
in Hard and Endless Survival,
the Maximum Sun
strategy of choosing Sunflower, Imitater Sunflower, and
Twin Sunflower in the first flag, to quickly
build up three full columns of Sunflowers and upgrade some of them into
Twin Sunflowers. Using Twin Sunflowers also makes it easier to get the
Sunny Day achievement.
Normal Survival levels
The five normal Survival levels are five flags long. You will normally
(by the end of the 5th flag) face plain,
Conehead, Buckethead, Pole Vault, Newspaper, Screen Door, and Football
zombies in all five environments. You will also face
Dancers in Day, Night, and Pool. Fog and Roof have additional
adversaries. When you are in the Final Wave of a flag, do
not rush to finish off the
last few zombies with explosives. Use those extra few
seconds to plant an extra plant or two while your shooters finish them
off.
Survival: Day
You will want to build up a defense using Tall-nuts, Pumpkins, and
Magnets (so you will need Coffee Beans on whichever
levels you build Magnets). An arsenal of Repeaters (upgraded to
Gatlings) behind a Torchwood
in each lane will be effective.
Survival: Night
Five graves appear at the start, in the four rightmost columns; you
should definitely destroy these
before
the first Final Wave. One new grave appears in one of the four
rightmost columns during the Final Wave of
each flag,
including the first, even after you've destroyed the previous
ones. This will destroy an existing plant if there is no room anywhere
else
(and it will not appear in a space with a crater from a Doom-shroom),
so it is a good idea to leave at least one space somewhere in columns
6 through 9. It's probably
only necessary to choose a Grave Buster on the odd-numbered flags (i.e.
don't choose it on the
second flag, then choose it again on the third to immediately crush the
grave left over from the
second, and later the one which appears at the end of the third, skip
it again on the fourth flag, and choose
it on the fifth).
Survival: Pool
You will face regular, Conehead, and Ducky Tube zombies during the
first flag. You should
try to plant some Cattails as quickly as possible during the first
flag.
Survival: Fog
In a sense, Fog is the easiest environment, since you have both aquatic
plants and mushrooms at your disposal: every
plant is readily available and cheap (except for the unnecessary Coffee
Bean, Grave Buster, and Flower Pot). Fog
extends for 4-1/2 columns throughout the 5 flags. You will face
regular, Conehead, and Ducky Tube zombies during the
first flag. As in Adventure Fog levels, you should choose Sun-shroom,
Puff-shroom, Lily Pad, Cattails, Plantern,
Tall-nut, and Pumpkin at the start. To this you can add Squash and
Cherry Bombs if you have seed slots left. It is useful
to get a Plantern in column 7 in the Pool relatively quickly; you will
need to plant seven or eight Sun-shrooms
before you have enough spare Sun to place a Lily Pad in column 7, then
another Sun-shroom or two before you can put
down the Plantern. Your next goal is to get a Cattail as soon as
possible (though you might have to protect the
Plantern with another Lily Pad and a Tall-nut if a Ducky Tube shows up
early in that
lane. You will not have enough time or Sun during the first flag to get
down much more than two or three Cattails, a
Plantern/Tall-nut combination (maybe with a Pumpkin) in the pool,
possibly a second
Plantern in a grass lane, and three or four columns of Sun-shrooms (and
as many Puff-shrooms as you can) in the grass lanes.
You will not face Dancers, but in addition to the stronger zombies seen
on later flags in the first three Survival levels, you
might face Jack-in-the-Box, Balloon, Pogo, Snorkel, Digger, Dolphin
Rider,
Ladder, Zomboni, and Catapult zombies. Later
you will want to put Planterns behind Tall-nuts in any or all of the
grass lanes, and eventually dig up the
first Plantern to make room for another Cattail (or a Magnet-shroom) in
the pool. If you
put Tall-nuts in the eighth column during flags in which Catapults
or Zombonis appear, you will need to protect them with Spikeweed and
Spikerocks (if
you have them) in the ninth column. Magnet-shrooms
will eventually be helpful; place these directly behind your wall of
Tall-nuts. When you plant Cattails in the columns (5 and 6)
likely to be hit by Inferi Ducky Tubes, protect them with Pumpkins.
Survival: Roof
You will see Dropping Bungees during the Final Wave of every flag. The
first flag usually only has plain
and Conehead zombies. You should choose Sunflower, Flower Pot, Potato
Mine, Squash, Umbrella Leaf,
Cabbage-pult, and Melon-pult on the first flag, and try to get four
Umbrellas planted as soon as possible.
You will need to plant Potato Mine and Cabbage-pults to deal with the
initial wave of zombies, and gradually
build up Melon-pults. It might be helpful to have Cherry Bomb or
Jalapeño to deal with an unexpected breakthrough, particularly by
Dropping Zombies during the Final Wave. In later flags you might
face Stealing Bungee, Buckethead,
Newspaper, Pole Vault, Ladder, Football, Jack-in-the-Box, Screen Door,
Balloon, and Catapult
zombies. Your main weapons should be Melon-pults (with a Winter Melon
in each lane if possible) and Tall-nuts. If you are facing
Balloons (visible in the preview of each flag), you will need
either Cactus or Blovers, since Cattails are unavailable. Since
your defense is usually packed very tightly, it's probably preferable
to use Blovers rather than take up a slot in every lane for a Cactus,
especially since you might only get a wave or two of Balloons, perhaps
only during the Final Wave. Magnet-shrooms will help
against Ladder zombies.
Hard Survival levels
These are roughly twice as long (two flags in each of the five rounds)
and feature more
dangerous zombie opponents than the corresponding easy levels. Before
starting the five Hard levels, it's a
good idea to have all ten seed slots and all of the plant upgrades,
though it is possible to get
through without them. In particular, it helps to be able to plant
Spikeweed (and upgrade to Spikerock) in the 8th and/or
9th column of every grass lane in all of the Hard levels except Roof
(where they can't be planted in Flower Pots), before
the Catapults, Zombonis, and Gargantuars show up.
Survival: Day (Hard)
You will face regular, Conehead, and perhaps Buckethead zombies during
the
first double flag, and later any or all of Ladder, Pole Vault, Screen
Door,
Newspaper, Dancer, Jack-in-the-Box,
Football, Digger, Pogo, Catapult, Zomboni, and Gargantuar. If you
encounter Diggers, you must choose and plant Magnet-shrooms and
Coffee Beans to avoid devastation.
Survival: Night (Hard)
Nine graves appear at the start, in the five rightmost columns, with
one new grave at the end of each
double flag including 1/2, so use
the odd-level Grave Buster strategy again. You will face regular,
Conehead, and Buckethead zombies during the
first double flag. Later you might see Pole Vault, Newspaper, Screen
Door,
Ladder, Dancer, Digger, Jack-in-the-Box, Football, Pole
Vault, Pogo, Balloon, Catapult, and Gargantuar. Plant a lot of Magnets
early, to deal with Bucketheads and Diggers. Doom-shrooms might be
valuable during flags where Gargantuars will appear. A full column of
Spikerocks will likely eventually be needed
to deal with Catapults and Gargantuars. You also need some kind of
defense against Diggers which break
through, and Imps thrown by Gargantuars: a back rank of Melon-pults
protected by Pumpkins is one method (another way is two Gloom-shrooms
protected by Pumpkins).
Survival: Pool (Hard)
You will face regular, Conehead, and Buckethead zombies (including
Ducky
Tubes) during the first double flag. Later you might see Dolphin Rider,
Snorkel, Ladder,
Screen Door, Pogo, Digger, Jack-in-the-Box, Football, Newspaper,
Balloon, Catapult, Zomboni,
and Gargantuar. As in other Pool scenarios, you will want to plant
Cattails as soon as possible,
and get Tall-nuts in the 7th column of every lane, including the pool,
and Spikeweed/Spikerock in the grass lanes.
Survival: Fog (Hard)
Fog extends for 4-1/2 columns throughout the 5 flags. You
will face regular, Conehead, and Buckethead zombies (including Ducky
Tubes) during the first double flag. Later you will see any of Dolphin,
Snorkel, Ladder, Pogo, Pole Vault, Newspaper,
Screen Door, Dancer, Digger, Jack-in-the-Box, Football, Catapult,
Zomboni, Balloon, and Gargantuar.
You will probably want to use Sunflowers instead of Sun-shrooms, since
you want to upgrade to Twins eventually (an interesting idea is to pick
both Sun-shrooms and Sunflowers for the first double flag, gradually
replacing Sun-shrooms with Sunflowers). Plant lots of
Puff-shrooms early, gradually replacing them with Melon-pults. Plant at
least one Plantern and one or two Cattails as soon as
possible, and generally the same sort of defense as in Pool.
Defense at the finish of Survival: Fog (Hard). Two
planterns
illuminate the whole fog area. Six magnets protect against metal
zombies. Each lane is protected by a Pumpkined Tall-nut and a Winter
Melon. The four grass lanes have a Spikerock and four
regular Melon-pults each. Ten Cattails (four Pumpkined to protect
against Inferi) shoot over the whole lawn, protecting
particularly against Balloons, Imps and Diggers. The row of plants
behind the
Tall-nuts are pumpkined to protect against Backup Dancers. Four Twin
Sunflowers generate extra Sun.
Survival: Roof (Hard)
Roof scenarios are very difficult because, while you face many of the
most dangerous zombies, up to
Zombonis and Gargantuars, you are deprived of some of your useful
weapons, Cattails, Spikeweed, and Spikerock. You will not, however,
face
Diggers, which cannot tunnel under the tiles of your
roof. Umbrella Leaf is a must on the first flag, as you will face
Dropping Bungees during every Final Wave, and Stealing
Bungees also usually appear early. Plain, Conehead, and Buckethead
zombies appear on the first flag. Later you will
usually see Stealing Bungee, Ladder, Newspaper, Pogo, Pole Vault,
Screen Door,
Jack-in-the-Box, Football, Catapult, Zomboni, Balloon, and Gargantuar.
Once again Melon-pult and Winter
Melon should be your main weapons, though you might also want Cabbage
and/or Kernel-pults early on, and gradually upgrade the Kernel-pults to
Cob Cannons and dig up Cabbage and replace them with Melons.
Cactus take up too much space (they need to be placed right
behind Tall-nuts to hit Balloons quickly); I suggest using Blovers to
handle flags where Balloons appear, rather than waste Sun and space and
time planting Cacti. Your defenses are
probably not strong enough to stop all of the Zombonis and Gargantuars,
so expect a lot of damage to your front
lines of Tall-nuts, etc.
Survival: Roof (Hard) is usually the last (and hardest) of the
regular levels you
will play, and therefore winning it unlocks Survival: Endless, and earns you the Gold
Sunflower Trophy, five blue diamonds, and the Nobel Peas Prize
achievement.
Survival: Endless
The hardest part of the game is the Endless version of
Survival, which is unlocked when you have finished all ten of the
regular Survival levels. Survival: Endless is a
daytime Pool
scenario where you will face progressively harder (and more numerous)
foes in each round. As in the
limited Survival levels, you can choose as many plants each round as
you have seed slots
(presumably 10 slots by now; I wouldn't try tackling it until you have
bought the 10th slot for $80,000). The plant upgrades are all
available, but each time you buy a new upgraded plant the cost of that
plant increases by 50 Sun. So your first Cattail costs 225,
the next 275, the next 325, etc. If you lose a Cattail, the
cost drops by 50 (so the fourth one always costs 375 Sun).
You might eventually see every kind of zombie in Endless,
including the Giga-Gargantuar which does not appear anywhere else.
Progress towards 30 Flags -- this setup (shown at the end of
22 flags)
got me for the first time to 30 flags.
The screenshot above shows one of my most successful setups so far.
Four Cob Cannons in the pool provide lots of firepower, and
are
invulnerable to Gargantuars, Imps, and vehicles. A double column of
Spikerocks in the grass lanes stops the vehicles and slows down the
Gargantuars and Giga-Gargantuars. Winter Melons in each lane
slow
down everything and provide steady firepower, along with the Cattails.
Two Gloom-shrooms protect against Imps and Diggers.
Tall-nuts in each lane stop the run-of-the-mill zombies which cross the
Spikerocks. Pumpkins protect most of the plants. Eventually this setup
was overwhelmed by sheer numbers, and the grass
lanes were heavily damaged by the end of flag 26. By the end
of
30, I had four Cob Cannons, four Winter Melons, one Cattail, and one
Sunflower. I lost on flag 31 to multiple waves of Pole
Vaulters. I later completed 36 flags with a similar setup. My
current record is 49 flags; I've made 45 twice and 40 or more three
other times.
The Zen Garden and the Tree of Wisdom
If you depended on collecting coins and diamonds, it would
take forever to earn enough money to buy the more
expensive powerups, and the ninth ($20,000) and tenth
($80,000) seed slots. The Zen Garden is a way to make large
sums of money; once you get it after level 5-4, you will frequently
find new plants during play which are automatically added to your
garden, provided you have bought at least one plant upgrade.
The new plants need to be watered and fertilized periodically, and they
spit out coins when you do so. Normally a plant produces a $10
silver
coin when it is watered; it needs to be watered 3-5 times in succession
before it needs to be fertilized. Each plant has to be fertilized three
times
(for $150 each: a bag of 5 fertilizer treatments costs
$750). The first time, it grows from a tiny green sprout to a small
plant; the second time, it grows a little larger and produces two
$50 gold coins; the third time it grows to full size and produces two
$1000 blue diamonds. Once a plant is fertilized, you must wait at least
an hour (of real time) before it is ready to be watered and fertilized
again. You can also buy up to three
Marigold sprouts each day (again in real time, midnight local time)
from Crazy Dave;
Marigolds also generate coins as they are watered and
fertilized (and one blue diamond when fully grown). Once a plant grows
to full size, you can keep it (it will generate more coins
periodically) or
sell it to Crazy Dave (partially grown plants can be sold for
less money, but there is no reason to do so). Dave will pay $3,000 for
each Marigold, $8,000 for each daytime plant, and $10,000 for
each night and aquatic plant. Coins last for a full minute in Zen
Garden mode unless you change screens.
You don't need to buy bug spray if you sell plants as soon as they
grow to full size, but you need it if you want to start accumulating
plants (you can try to collect one of each of the 11 colors of
Marigolds, for example). Once a day
each fully-grown plant needs either to be sprayed with bug spray (which
costs $1,000 for 5 applications), or to have music played
for it. You actually lose money on bug
spray, since daytime plants only put out one $50 gold coin for each
application, and nighttime and aquatic plants put out three $50
coins. But you more or less make it up with the Phonograph, which has a
one-time cost of $15,000 and puts out coins at the same rate
as bug spray, once a day per plant, when you play music for it.
The screenshot below shows the basic Zen Garden in an early stage, with
a couple of powerups already purchased: the Golden Watering Can
($10,000)
allows you to water four plants at once (if they are in a square
formation and you place the cursor accurately). I would have rather
seen this designed so you could click the Can once, then click as many
plants as desired in succession (even better would be a Sprinkler
upgrade -- frankly the Zen Garden is the least interesting part of
Plants vs. Zombies). The Gardening Glove ($1,000) lets you shift plants
around in the Garden (you can actually get along without it, because
you can
move plants around within the same garden with a $200 Wheelbarrow,
which is designed mainly for transporting plants between Gardens; the
Gardening Glove is quicker, though.) There are seven sleeping plants in
the Garden below:
most of these will need to be moved later to the Mushroom Garden, which
costs $30,000 (plus a Wheelbarrow). The Lily Pad needs to go into a
third Garden, the Aquarium Garden, which costs another $30,000. Aquatic
plants, of course, don't
need to be watered.
Just below and to the left of the Pumpkin is Stinky The Snail (a
character originally from Insaniquarium),
who lives in your main Garden and will collect coins for you when he is
awake. Nudging him will wake him up, but he crawls really slowly unless
you give him chocolate (also found randomly in play), which will make
him go faster for an hour. Even amped up on chocolate, though, he
doesn't collect coins as fast as you can with the mouse. You
cannot accumulate more than 10 Chocolate Bars, and cannot buy more than
20 bags of fertilizer and 20 spray bottles of bug spray (all left
of the Gardening Glove).
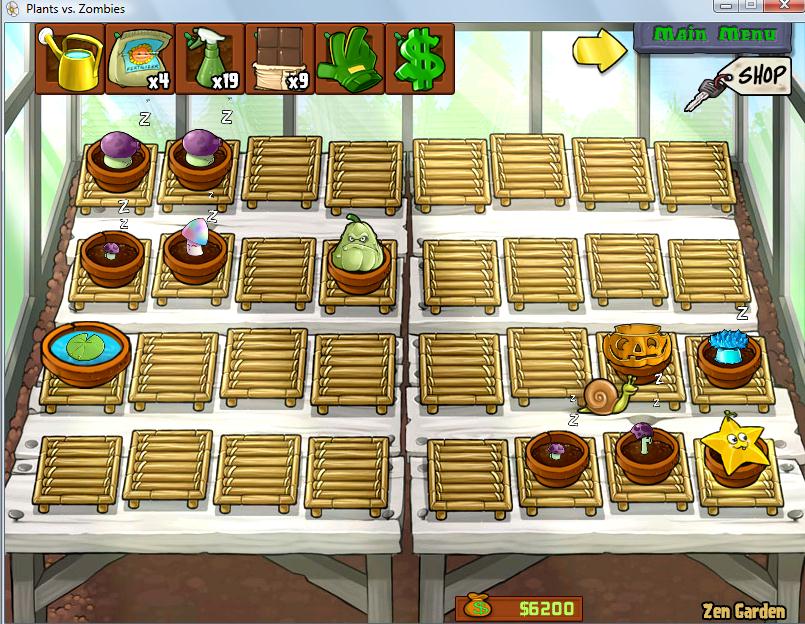
Since the Help file accessible from the main menu is a joke (a note
from the zombies
advising you on "correct" strategy), the two main sources of help are
the Suburban Almanac and the Tree
of Wisdom, the fourth element of the Zen
Garden. (PopCap's site does have a ReadMe
file). Once you have bought the Tree of
Wisdom for $10,000 and started feeding it the special
tree food, it will start giving you advice. Each bag of tree food
($2,500) grows the Tree one foot, and for the first 49 feet, gives
you a playing tip. Eventually you will have accumulated enough money to
buy all of the other powerups, and you will have nothing else to spend
money on except for the periodic Garden Rake, new Marigold sprouts, and
occasional fertilizer and bug spray. So you can either spend it
growing the Tree of Wisdom, or try to
collect as many different plants as possible in your Gardens.
Full-grown plants also like chocolate when they are happy: if you feed
Chocolate Bars
to eight or nine plants and one to Stinky, and let the game run
unattended for 15 or 20 minutes, Stinky can collect five thousnd
dollars or more.
Zombatar

In the Game of the Year edition, you can design your own zombie avatar
with
clothes, hair, hats, etc. This is saved to your desktop as a
.jpg
image, and also appears in the game as the Flag Zombie. You can create
and save a different zombatar for each new player character.
Easter Eggs

Easter eggs: zombie with mustache, future zombie, future
mustachioed Conehead, regular
and trickedout lawnmowers, daisies, candy from a zombie pinata
There are seven special effects which can be applied to the zombies (or
lawnmowers in one case) by typing in a secret code. These don't
help you in play at all; they just make the game funnier visually (or
add a sound effect). The first four are accessible immediately; the
last three become available only when you have a Tree of Wisdom and
have grown it
to a certain height. All of the codes (except sukhbir)
are given in the Tree of Wisdom playing tips. Mustache and future
affect the appearance of regular, Conehead, and Buckethead zombies only
(and
you can apply both at once). Backup Dancers in the new Game of
the Year release have mustaches by default.
mustache
future
trickedout
sukhbir
daisies -- at 100 feet (work on grass only)
dance -- at 500 feet
pinata -- at 1000 feet
Sound Effects
There are a whopping 167 different sound effects in Plants vs.
Zombies, created by Laura Shigihara. Her music is really good
too, but I suggest keeping it reasonably low in volume so you
can clearly hear the sounds, which not only sound wonderful (e.g. Wall-Nut
Bowling has, I think, real sounds from a bowling alley), but
also are very often useful in helping the player keep track of what is
happening, or what is about to happen:
Aquatic zombies make a splash when they enter the pool.
Bucketheads and Screen Door zombies make metallic sounds when hit by
peas or other projectiles.
A Gargantuar about to die gives a strangled roar.
Sun-shrooms make a noise as they swell to full size.
Bungee zombies give a cry just before they drop their targets.
Jack-in-the-Box zombies play "Pop Goes the Weasel" as they approach.
Balloon zombies make a sound of air coming out of a balloon as they are
about to come on screen.
Some minor bugs and limitations
Like most games which allow you to keep stats and game progress for
separate identities, the number of identities you can have at one
time is limited, in this case to eight. The only reason to do this is
to avoid having to program a scroll bar into the player
selection menu -- not a good enough reason nowadays, frankly. I'm on my
17th character counting the PopCap and Steam versions.
Every single plant and zombie is fully animated, and in very complex
scenarios the program response can be sluggish. Turning off 3D
Acceleration in the Options menu helps a lot, but in Fog scenarios this
makes the fog appear choppy-looking rather
than misty and smooth. [This was true on two different
computers, one running XP and one running Vista. As of
February 2011 I have a new computer with more memory and a faster
processor, running Windows 7. It runs much more smoothly
with 3D turned on all of the time.]
If you have more than one character, and set one of the Easter eggs, it
will remain in effect if you change characters.
This may result in an effect (e.g. daisies) which should normally be
unavailable for the height of the current character's Tree of Wisdom.
On a couple of occasions Cob-Cannons started mistargeting, exploding a
square above where they are supposed to. The Dancer music
has also stopped playing once or twice (the first time during a
Survival: Night
scenario).
You cannot accumulate more than 9990 Sun (programming laziness again?);
if the
amount would exceed 9990, any additional Sun is ignored (you can't even
reach 9995
if you get to 9980 and click on a 15-point ball of Sun: it still
truncates at 9990). I first managed to reach 9990
Sun in Survival: Pool (Hard), towards the end of the level:

You also
cannot accumulate a million dollars: money hits a ceiling of
$999,990 (the screenshot below also shows a full set of daytime plants
in the daytime Zen Garden:
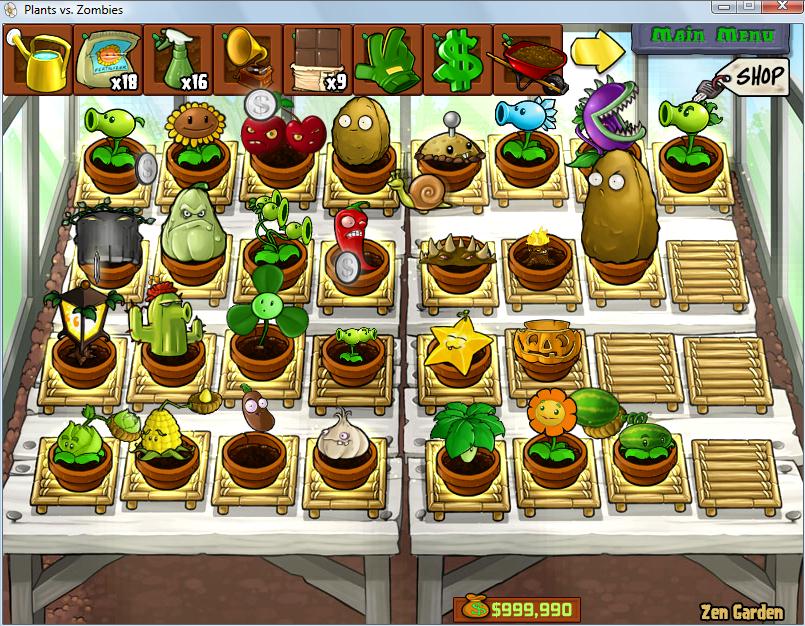
Inconsistent results?
It seems that the results of an interaction between a plant and a
zombie varies; perhaps there are some subtleties to the combat system
that
I am not aware of. A few examples:
Regular zombies cannot survive crossing two Spikeweeds in I, Zombie
Too, but can do so in
Last Stand and sometimes in the Vasebreaker
level Hokey Pokey. Spikeweeds
and Spikerocks attack in pulses, so this might depend on the timing of
exactly when zombies
start across them, so that a Spikeweed may cause four or five peas of
damage. Imps which take
3 hits from peas can cross one Spikeweed, since they move so fast they
only receive about two
peas' worth of damage.
In I, Zombie Endless, a Digger sometimes can eat an
entire row with a Chomper at the
far left, but sometimes the Chomper will eat it when it emerges.
A Squash behind a Pumpkin (whether empty or protecting a plant) will
sometimes attack the
zombie(s) eating the Pumpkin (sometimes right away, sometimes after a
delay), and sometimes
will not attack until the Pumpkin has been eaten.
What features could be added?
It seems inevitable that there will be a Plants vs. Zombies 2
eventually. Here
are some of the features I would like to see:
Progressive levels for Whack-a-Zombie, perhaps even
Whack-a-Zombie: Endless
ZomBotany 3 and Wall-nut
Bowling 3
(how many hits would a Gargantuar need?), perhaps a Sun-generated
(non-conveyor)
Wall-nut Bowling
Survival: Endless and Last Stand
in the other four environments (Day, Night, Fog,
Roof). It would particularly help to see a wider variety of zombies in Last
Stand
in order to see exactly how much damage they can take. Last
Stand against ZomBotany 1 and 2
plants would be a lot of fun too.
The ability to play any of the 50 Adventure levels individually once
they are unlocked (Quick Play is available in the handheld versions
like iPad, at
least).
Growing new plants in the Zen Garden rather than finding or buying
seeds for new plants
A solar collector which would collect Sun the same way Gold Magnets
collect coins and diamonds
A rooftop pool. At least one site explains how
to cheat using a hex
editor (to gain unlimited money, Sun, etc.). Why not
show us how to modify the game itself, to add even more features, like
a six-wide (or larger) front yard and roof? Also
other combined environments: Fog/Night, Pool/Night, Roof/Fog, Roof/Night, etc.
The ability to save initial setups for Last Stand,
and initial seed selections for other non-conveyor
Minigames, particularly Bobsled Bonanza and Pogo
Party. An undo button for Last Stand
setup would be nice
too.
Smarter Squash which would ignore plants that have just been killed, or
maybe be able to jump two squares or sideways.
Also smarter Magnet-shrooms which could target only one kind of zombie,
particularly Diggers. Also vertical (sideways) Jalapeños.
First Aid for Spikerocks
More statistics: only the best streaks in the three Endless scenarios,
and the number of times through the Adventure,
are currently displayed. I'd like to see win stats for each individual
level, number of secret
zombies (Spoiler) seen
and killed, etc.
Trees: these would be expensive and slow to recharge, but could
protect plants over a larger area, be unjumpable by
Ladders, entangle thrown Imps, etc.; a larger, taller tree might work
like a 5x5 Umbrella Leaf.
The Plants
Plants marked with one Stinky  have a slow recharge
time, just under 30 seconds. Plants marked with two Stinkys have a
very slow recharge
time,
just under 50 seconds. All other plants have a fast recharge time, 7-8
seconds.
have a slow recharge
time, just under 30 seconds. Plants marked with two Stinkys have a
very slow recharge
time,
just under 50 seconds. All other plants have a fast recharge time, 7-8
seconds.
Peashooter [1-1] 100 Shoots peas. 10 of these will
kill a
regular zombie;
about 28 will kill a Conehead and 65 will kill a
Buckethead or Screen Door.
Sunflower [1-2] 50 Generates a ball of 25 Sun about every 24
seconds (the first is faster, usually 6-7 seconds); almost every kind
of
plant requires Sun to
produce seeds to plant.
Cherry Bomb [1-3] 150 Blows up all
zombies
in a 3x3 area (even flying Imps and Balloons).
Cannot kill Gargantuar outright. Useful constantly, in any environment,
in almost every scenario, even the advanced Survivals.

Undamaged Wall-nut, and Wall-nuts after 24 and 48 bites (around 13
and
26 seconds when being eaten by a single zombie)
Wall-nut[1-4] 50 Blocks most
zombies
from advancing until
it is eaten (about
40 seconds by one zombie, around 23 seconds by two). Pole Vaulting,
Pogo, and Dolphin Rider zombies can jump over it; Gargantuars
smash it. You're not likely to want to use it very often after the
Tall-nut becomes available.
Explode-o-nut [1-5] --
Exploding version of
Wall-nut, seen in Wall-nut Bowling 1 and 2.
Equivalent
to a
Cherry Bomb when it hits a zombie, destroying everything in a 3x3 area.
Giant Wall-nut [Wall-nut
Bowling 2] --
Extra-large Wall-nut, seen
in Wall-nut Bowling 2. Equivalent to a Jalapeño,
destroying every zombie in its lane.
Potato Mine [1-6]
25 Blows up the first zombie that reaches its square (it may destroy an
entire group of closely-packed zombies). Like other explosives, it does
not usually kill Gargantuar
outright. Part of a basic strategy for most Day and
Roof scenarios. Takes
almost 16 seconds to arm itself after
planting, so it needs to be placed three or four squares ahead of a
zombie moving at normal speed. Not needed in Night/Fog scenarios,
as Puff-shrooms do a better job of slowing down the initial flow of
zombies while you build up Sun. Not needed in Pool scenarios if you
have Cattails and a Garden Rake, as the Rake can eliminate the first
zombie and you can plant a Cattail in time to get the second.
In
a pinch, when you cannot
plant a Mine far enough ahead of a moving zombie, you can either plant
one
inside a Pumpkin (it will have time to arm unless several zombies eat
the pumpkin, or unless the Pumpkin is crushed by a Gargantuar or
vehicle), or use the Potato Mine trick: plant a mine in a square where
zombies are already
leaning forward to eat a Pumpkin, Wall-nut, or Tall-nut in the square
ahead of them
(they will continue to do so, ignoring the Mine while it arms and then
explodes). This trick can sometimes help to get rid
of the last zombie during a Final Wave.
Snow Pea [1-7] 175 Shoots frozen peas which cause
normal
damage and also slow
zombies to a little above half speed (they eat more slowly too).
Frozen peas do not slow down zombies protected by screen doors or
newspapers.
Chomper [1-8] 150 Resembles a giant purple Venus
flytrap.
It eats the first
zombie that reaches the square
in front of it, but then takes about 42 seconds to chew and swallow. An
excellent defender behind a Tall-nut, as it can periodically eat
anything (except Gargantuar) which reaches the Tall-nut, then swallow
while the Tall-nut
absorbs some damage. Unlike Squash, which smashes every
zombie in the square it lands in, the Chomper can only eat one zombie
at a time. Extremely valuable in Bobsled Bonanza,
as a Chomper placed at the end of an ice path slightly ahead of time
will eat an entire Bobsled or Zomboni. Useless against Gargantuar,
unblocked
Pole Vaulter or Pogo, or Balloon.
Repeater [1-9] 200 Shoots two peas at a time. Can be
upgraded to a Gatling
Pea which shoots four peas at a
time. Works well behind Torchwood, which doubles the damage for each
pea.
Backwards Repeater [To The Left]
(--) Seen only in Vasebreaker.
Shoots two peas at a time to the left.
Puff-shroom [2-1] 0 Shoots small puffs of toxic
purple
fume, with the same
attacking power as a Peashooter, but
a range of only three squares. Since they are free and recharge
quickly, you should use them in all Night and Fog
scenarios, and plant them constantly in all five lanes to slow down and
eliminate the initial zombies.
Sun-shroom [2-2] 25 Cheaper and less powerful
mushroom
version of Sunflower.
Produces only 15 units of Sun when
initially planted, increasing to 25 when it swells to full size after
about 2 minutes.
Fume-shroom [2-3] 75 Shoots heavier toxic fumes
which
attack every zombie in
the four squares directly in front of it. Its fumes pass
through screen doors. It can be upgraded to the Gloom-shroom.
Grave Buster [2-4] 75 This is the only plant that can be
placed in a grave square, and is the only way to destroy
graves. It takes a little less than 5 seconds to work, and can be eaten
by zombies before it finishes removing a grave, so you might need big
explosives like Cherry Bombs, Jalapeños, Cob Cannons, or Doom-shroom to
clear an area around one or more graves
(or an Ice-shroom to freeze zombies) before using it. Although it is
only used in Night scenarios, it is not a mushroom
(despite its position in the Almanac and the seed selection menu) -- it
can grow in the daytime Zen Garden and sells for
$8,000 when full-grown, like other daytime plants, and can also be used
in a scenario where No Fungus Among Us is earned.
Hypno-shroom [2-6] 75 A zombie which
reaches a
Hypno-shroom instantly becomes
hypnotized, and turns back to the right and attacks any zombies it
meets coming the other way. Plants will not
attack hypnotized zombies. Hypno-shrooms do not work against
Gargantuars or vehicles, which flatten them instead of eating them.
They also have no effect on zombies which fly or jump over
them (Balloons, Pogos, and Pole Vaulters), and can be stolen by Bungees. Hypno-shrooms
should be used on the strongest opposing zombies, and
should be played before the target is too heavily damaged,
so that the hypnotized zombie can do as much damage as possible to
other zombies when it turns back the other way. Football zombies
are the ideal target. Hypno-shrooms work well with Ice-shrooms, since
the Ice-shrooms freeze only the unhypnotized zombies, leaving the
hypnotized ones free to eat anything in their path (this is especially
effective with hypnotized Dancers, which will summon
hypnotized Backups).
Scaredy-shroom
[2-7] 25 Shoots fumes (similar to Puff-shrooms) an unlimited
distance, but hides (and become defenseless) when any zombie enters an
adjacent square (in any direction, including adjoining lanes).
Sleeping Scaredy-shrooms do not hide. Important in Level
2-10; not particularly useful in selection scenarios, though its one
shining moment is getting the Good
Morning achievement.
Ice-shroom
[2-8]
75
Freezes
most zombies completely, including
Gargantuars, for about 5 seconds, preventing them from moving or
eating; the slowing effect
(similar to Snow Pea
or Winter Melon) lasts about 20 seconds. Disappears
after one use. Very effective against Dr.
Zomboss when the robot head bends down, as it freezes him and allows
all of the plants to attack him (Jalapeños cause a lot of damage when
he is down). Do not place in the path of
fireballs (from Torchwood), which will melt it instantly, before it can
even freeze any zombies (a sleeping Ice-shroom is not affected by
fireballs).
Ineffective against Zombonis, which are used to
cold temperatures, and Diggers while they are underground. Not very
effective against Pogo or Balloon zombies either, merely
slowing them down slightly instead of freezing them.
Doom-shroom
[2-9]
125
Explodes
immediately after being planted (or being activated by a
Coffee Bean in daytime), demolishing virtually everything in a 7x7
area, and leaving a crater which cannot be planted on (but which has no
effect on zombies crossing it). The crater lasts 3
minutes, partially disappearing at 1:30 (a good place to time
this is in Level 2-10; it often lasts
longer than even a double-flag phase of a Survival: Hard
scenario). It can also be placed in a Flower Pot,
where it will leave a crater on the Roof.
Surprisingly, a Doom-shroom can even be
planted on a Lily Pad; exploding there leaves a sort of oil slick with
the same characteristics as a crater. Doom-shrooms do not destroy
graves. Doom-shrooms do not harm plants, except that a Doom-shroom
placed inside a Pumpkin (or on a Lily Pad, or both) will destroy the
Pumpkin (and the Lily Pad, or both).
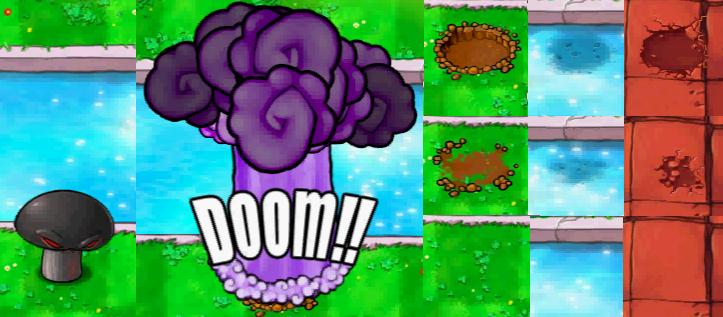
Exploding Doom-shroom; craters fading away in various
environments
Lily Pad [3-1] 25 Plant in water to allow most other
plants to be placed there. Only Sea-shrooms and
Tangle Kelp can be placed in water without a
Lily Pad. All other plants except Spikeweeds,
Spikerocks and Potato
Mines
can be placed on top of a Lily Pad.
Squash [3-2] 50 Jumps and
smashes any
zombies in the same
square, or one
square forward or backward in the same lane. Useful as a
replacement for Potato Mine in many scenarios, since it recharges more
quickly and arms immediately, so it can be played either instantly or
ahead of time. One of your most versatile weapons, cheap and
effective against nearly any adversary except Balloons and tunneling
Diggers. Makes a good first attack against Gargantuars, followed
by a second attack from a Jalapeño or other explosive (even
a second Squash).
Threepeater [3-3] 325 Shoots three peas at a time,
in its
lane and the two
adjacent lanes, with the same firing rate
and damage as a regular Peashooter. Most effective in groups in the
second lanes from the top and bottom, where they can cover the
whole lawn (and combine with a Torchwood in each lane for double
effect). Not useful in Fog scenarios for detecting where
hidden zombies are, since it fires three peas at a time whenever any
zombies are in range in any of its
lanes.
Tangle Kelp [3-4] 25 An aquatic Devil's
Snare, roughly equivalent to the Chomper (except that it
disappears after one use). The Tangle Kelp activates immediately,
dragging the first aquatic zombie in
its square underwater. It is played in water only and does not need a
Lily Pad. It may be played ahead of time like a
Potato Mine, or like a Cherry Bomb on a square already containing
aquatic zombies (but only
drags down one zombie at random in either case). Cheap and
effective, especially against Snorkel, Dolphin Rider, and Buckethead
Ducky Tube zombies, though it recharges slowly. Useful early
in Fog scenarios to protect a Plantern in the pool until you have
enough Sun to plant a Tall-Nut in front of it.
Jalapeño [3-6] 125 Powerful
weapon which sends a
wall of fire
down an entire
lane in both directions, destroying every zombie in that lane (except
Gargantuars, which are heavily damaged). Disappears after one use. Also
destroys all
vehicles, ladders, and ice in the lane. Very effective as a second
attack on a damaged
Gargantuar which has flung its Imp, as it finishes off the Gargantuar
as well as the Imp. Extremely effective against
Zombonis, as it destroys the vehicle and its entire ice path (follow up
with a Potato Mine or Spikeweed at the far right end of the lane).
Cannot destroy graves.
Spikeweed [3-7] 100 Damages zombies crossing them,
doing
about four or five
peas' worth for a
zombie crossing unimpeded at normal speed (an Imp or Pole Vaulting
zombie crosses so fast it takes only about 2 peas' damage).
It destroys Zombonis and Catapults by popping their tires. Cannot be
planted on Lily Pads or in Flower Pots (so they are
useless in Roof scenarios). Since they cause continuous damage to any
zombie crossing or standing on them, they are
particularly effective against zombies which are slowed (by Snow Peas
or Winter Melons),
frozen (by Kernel-pults or Ice-Shrooms), or blocked (by Pumpkins,
Wall-Nuts, and Tall-Nuts). You can actually kill a plain or Buckethead
zombie with only a Spikeweed in front of a Wall-nut. A Spikeweed cannot
be eaten; it is destroyed only by
Gargantuar, Zomboni, Catapult, and Jack-in-the-Box (it in turn destroys
Zomboni or Catapult, and damages Gargantuar). A Spikeweed at
the end of an ice path does not destroy
a Bobsled, but causes it to stop and discharge its four passengers
(this does not destroy the Spikeweed either).
Torchwood [3-8] 175 Turns peas into fireballs which
do
double damage. Plant in front of Peashooters, Repeaters, Gatlings, or
any
and all of the Threepeater lanes. Defenseless except for the shooters
behind them. Fireballs melt an Ice-shroom instantly,
possibly the only instance where a plant damages another plant,
and thaw frozen zombies.
Fireballs are not hot enough to melt
metal: they have no special effect on buckets, ladders, pogo sticks,
etc. Only one Torchwood is needed per lane;
multiple Torchwoods in the same lane do not increase their effect.
A Torchwood is cost-effective even with a single Repeater
behind it, and even more so with Gatlings, multiple Repeaters,
or multiple Threpeaters.
Tall-nut [3-9] 125 Extra-tall
Wall-nut
which blocks Pogo
zombies, Pole
Vaulting zombies, and Dolphin Rider zombies from jumping over it, and
takes twice as long to eat (about 80 seconds by a
single zombie). Vulnerable to Gargantuar (which smashes it), Zomboni
and Catapult (which run over it), Ladder zombies
(which climb over it and allow following zombies to do the same), and
Jack-in-the-Box zombies (which can blow up as many as
three adjacent Tall-nuts if they reach the end of their song).
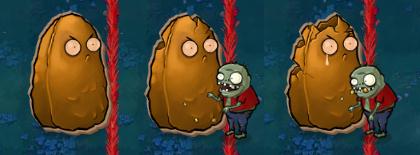
Undamaged Tall-nut; damage after about 48 and 96 bites (about 27 and 54
seconds when being eaten by one normal zombie).
Sea-shroom [4-1] 0 Equivalent to
Puff-shroom, but
floats in
water without
needing a Lily Pad. Since it's both an Aquatic plant and a night
mushroom, it is useful only in Fog scenarios (since it
is too expensive to use a Coffee Bean on each one in daytime Pool
scenarios). Unlike Puff-shroom, it is slow to recharge
(about 30 seconds). I don't usually find them worth taking up a seed
slot for in most Fog levels once you have Cattails.
Plantern [4-2] 25 Illuminates a
5x5 area
in Fog scenarios.
Defenseless; put
behind a Tall-nut or in a Pumpkin if possible. Also illuminates and
shows the contents of every vase in a 3x3
area in Vasebreaker Endless, where you get one per
level. Like Grave Buster, it is not a mushroom; it grows
in the daytime Zen Garden.
Cactus [4-3] 125 Shoots pointed darts, which attack
zombies with the same effect as peas.
Not particularly valuable (once you have Cattails) except when
fighting Balloons in Day or Roof scenarios.
Stretches upwards to shoot down any Balloon in its lane
(ignoring closer targets while it is shooting at a Balloon). Less
effective in the far left of lanes, because it
often allows a Balloon to get over a wall of Tall-nuts before shooting
it down. A Cactus on the sloped
part of a Roof can hit any Balloon in its lane which
has crossed from the flat area to the slope. Their
best location is usually directly behind Tall-nuts, but in Survival:
Roof scenarios, or when trying for the Grounded
achievement, you can
plant them at the far left anyway, since you can't afford to
waste space for them in the sloped area. Cacti are very
useful in It's Raining Seeds and Portal
Combat.
Blover [4-4] 100 Blows away fog and balloons
immediately after being planted,
disappearing after being used once. Fog
starts to return about 25 seconds after being blown away, taking about
15 seconds more to completely fill the fog zone. Not particularly
valuable once you have Planterns and Cactus (and especially once you
have bought the Cattails powerup), except in Roof scenarios where you
may not want to give up valuable space by planting a Cactus in each
lane.
Split Pea [4-6] 125 Shoots peas one at a time
forwards and
two at a time backwards. Useless in
selection scenarios, but an annoying defender in I, Zombie
scenarios.
Starfruit [4-7] 125 Shoots stars in five directions
(directly backwards and
sideways and diagonally forward at a 30 degree angle). Very limited
defensive capability straight forward, just enough to kill an Imp in
I, Zombie: it takes two Imps to eat a lone Starfruit in the
first slot (fifth
column from the left) in a lane; three Imps if it is in the second
slot.
Annoying defender in I, Zombie; useful in It's
Raining Seeds.

Undamaged Pumpkin, and Pumpkins after 24 and 48 bites.
Pumpkin [4-8]
125 Can be planted
alone (on Lily Pad in Pool or in Flower Pot in Roof scenarios), or on
top of almost any plant, surrounding it with a protective shell which
keeps it from being eaten until the Pumpkin
is eaten first. A Pumpkin takes about 40 seconds to be eaten by one
zombie (the same as a Wall-nut and about half the time of a Tall-nut).
Essentially the Pumpkin is a kind of Wall-nut, as it can be repaired by
Wall-nut First Aid, or have ladders placed on it by Ladder zombies.
Pumpkins
are useful in situations where space is at a premium; when you have
plenty of space (e.g. in Pogo Party or Last Stand), a
double wall of
Tall-nuts is more effective than a single wall protected by Pumpkins.
Pumpkins are also effective in scenarios without Pole
Vaulting, Pogo, or Dolphin Rider zombies, as they can be used instead
of Tall-nuts, especially when you are short of space or seed slots.
They are particularly useful in Pool and Fog
scenarios for protecting against Inferi in columns 5 through 7 of the
pool lanes.
A neat trick in an emergency, when you need an instant Potato Mine to
stop one zombie, and your Potato Mine is recharging, is to plant a
Pumpkin where you want to put the Potato Mine; before the zombie can
finish eating the Pumpkin, the Mine can recharge, be planted, and arm
itself. A Pumpkin is so fat that it prevents a zombie from
entering the square it is in until the Pumpkin is eaten -- this means
that a Squash in the square behind the Pumpkin will (usually)
not attack a zombie eating it, though a Chomper always seems to attack.
A Cherry Bomb placed in the square behind a Pumpkin will not
blow up a zombie eating it. Because Pumpkins need to be placed on a
Lily Pad in water, they
cannot protect Sea-shrooms or Tangle Kelp (they can protect Cattails
though, and you will want to do so frequently). They also cannot
protect Cob Cannons (which are too big, taking up two squares).
Magnet-shroom [4-9] 100 Pulls away metal objects
(buckets,
football helmets,
ladders, Pogo sticks, jack-in-the-boxes, mining helmets, and picks)
from nearby zombies (its range is two lanes and two or three squares in
a lane).
Defenseless; needs to be hidden behind Tall-nuts. Ineffective against
vehicles (too big), Coneheads (their
road cones are presumably rubber or plastic) and Pole Vaulting zombies
(fiberglass poles).
Takes about 15 seconds to recharge after grabbing an object, before
being ready to grab something
else.
Cabbage-pult [5-1] 100 Launches cabbages at the
zombies.
Each cabbage causes
the equivalent of
two peas worth of damage.
Flower Pot [5-2] 25 A plant which can be placed on
Roof squares,
allowing
other plants to be
placed inside it (the Roof equivalent to Lily Pad). Zombies will eat
empty Flower Pots (or
after eating what is in a full one). Flower Pots also hold plants in
the daytime Zen Garden.
Kernel-pult [5-3] 100 Launches kernels of corn (which cause
normal pea damage), and
randomly sends large
pats of butter
which freeze a zombie for about 4 seconds (and cause double pea
damage). Not powerful enough to do
much damage alone, but slow down zombies enough to allow other weapons
in the same lane to do much more damage. Two adjacent Kernel-pults
in the same lane can
be upgraded to a Cob-Cannon.
Coffee Bean [5-4] 75 Placed on Mushrooms during
daytime
(Day/Pool/Roof
scenarios) to awaken and activate them. Takes about two seconds to
activate. Most nighttime plants are not valuable enough to use during
daytime because
of the extra expense of using Coffee Beans (exceptions are
Magnet-shrooms, Doom-shrooms, and Gloom-shrooms). Essential in
obtaining the Good Morning
achievement.

Garlic [5-6] 50 Useless against Pogos, Pole
Vaulters, Dolphin Riders, and Balloons (which hop or fly right
over it), Gargantuars and vehicles (which smash it without eating it),
and Diggers (which tunnel under it). Almost any other
zombie will take a bite or two, make a face and a noise of disgust, and
move into an adjacent lane at
random. Eventually the Garlic will be eaten, after 20 zombies bite into
it. Zombies will
gradually dodge back and forth between two rows of Garlic in adjacent
grass lanes on
the Pool level, making slow progress forward. Garlic is a
powerful weapon when used with the Funneling
technique. It is also useful for quickly protecting Planterns and
Magnet-shrooms in Fog and other scenarios. Also vulnerable to
being stolen by Bungees or blown up by Jack-in-the-Boxes.
Umbrella Leaf [5-7] 100 Protects itself and adjacent
plants (in a 3x3 area)
from Bungee attacks and basketballs hurled by Catapult zombies.
Umbrellas do not protect against thrown Imps.
Marigold [5-8] 50 Generates
silver
and gold coins; about
one coin every 24
seconds. About 1 coin out of every 15 or 20 is gold. Marigolds come in
at least 11 colors in the Zen Garden.
Melon-pult [5-9] 300 Hurls watermelons at attacking
zombies, doing about 4
peas worth of damage per melon. Melon fragments can
hit zombies in adjacent squares and do lesser damage.
Plant and other Powerups
For each plant, the initial cost of the upgrade in dollars is
given in brackets, followed by the cost in Sun. In Survival:
Endless, the cost of each use of a powerup is
progressive; the cost goes up by 50 Sun each time (so Cattails will
successively cost 225, 275, 325, 375, 425, etc.).
All upgrade plants have a very slow recharge time (just under 50
seconds).
Gatling Pea [$5,000] 250 Plant on a Repeater. Fires
four Peas at a time. Very effective behind Torchwood, especially in
pairs. Very useful in scenarios where space is limited (e.g. when
trying for the Grounded achievement); when space is
plentiful (e.g.
Last Stand), two Repeaters are cheaper and just as
effective.
Twin Sunflower [$5,000] 150 Plant on a Sunflower.
Produces two balls
of sunlight (50 Sun total) at a time. Good for producing a lot of Sun
in limited space. Almost essential in Hard
and Endless Survival modes.
Gloom-shroom [$7,500] 150 Plant on a Fume-shroom.
Fires short-range
bursts of toxic purple fumes (four at a time) in
all 8 directions.
Cattail [$10,000] 225 One of the best weapons in the
game, but usable
only in Pool and Fog scenarios
(including Last Stand and Survival:
Endless). It turns a Lily Pad into a cat which fires pointed
darts from its tail, two at a time. These are equivalent to peas in
damage potential, so effectively it is a
Repeater, but it can shoot its darts into any of the six lanes, and in
any direction. It can also
shoot down Balloon zombies, and makes an excellent defender to pick off
stray zombies which get through your defenses (particularly Diggers and
Imps in Survival: Endless).
Each Cattail shoots at whatever zombie is closest to it (except that it
will always shoot at Balloons first), but a
battery of six or eight cattails can easily split its fire between two
or three different targets. Cattails are more likely to
shoot at Diggers the closer they are planted to the far left.
Winter Melon [$10,000] 200 Plant on a
Melon-pult. Hurls blue
Winter Melons which do damage like regular watermelons, and
also slow down zombies similarly to Snow Peas. A Winter
Melon which hits a zombie explodes like a normal melon, and the
fragments can hit and slow down zombies in squares adjacent to the one
originally hit,
so even having Winter Melons in every other lane can help to slow down
most of the zombies. Very effective in combination with one
or more regular Melon-pults in the
same lane. The Almanac is incorrect: Winter Melons
have the
same firing rate as Melon-pults.
Gold Magnet [$3,000] 50 Plant on top of
Magnet-shroom; collects coins
and diamonds automatically from anywhere (it will no longer collect
other metal objects). Automatically wakes up a sleeping Magnet-shroom;
it is not necessary to place a Coffee Bean on a Gold Magnet. Useful in
scenarios like Survival: Endless where the action is
fast and
furious, to allow you to concentrate on collecting Sun and
building. Gold Magnets do not collect Chocolate or Zen Garden plants.
Spikerock [$7,500] 125 Plant on top of Spikeweed.
Causes approximately double damage to zombies which cross it
(eight to ten peas' worth for a zombie crossing at normal speed).
Destroys Zomboni or Catapult, using up one of its three metal spikes
for every three vehicles destroyed,
and disappearing when it runs out of spikes. Also loses one
spike each time it is smashed by Gargantuar. Like Spikeweed,
it can only be destroyed by Gargantuar, Jack-in-the-Box, and wheeled
vehicles. In most scenarios, a Spikerock will last for the
whole scenario once planted (exceptions are Bobsled Bonanza
and Survival: Endless, where you will often have to
replace Spikeweed
destroyed by Zombonis or Gargantuars). Like Spikeweeds,
Spikerocks at the end of ice pathsdo not destroy Bobsleds,
but a Spikerock at the far right of a lane will prevent Bobsleds from
coming by stopping Zombinis (and thereby preventing an ice path from
forming).
Cob Cannon [$20,000] 500 Plant on top of two
adjacent Kernel-pults in
the same lane. Shoots a giant cob of corn with destructive power
of a Cherry Bomb, but needs no Sun to do so. Rearms
itself about every 30 seconds. Too wide to be protected
by a Pumpkin, and defenseless against
direct attack; even an Imp can eat it. Destroyed by any zombie
eating or crushing either end of it. Particularly vulnerable to Imps,
Diggers, Zombonis, and Gargantuars. Cob Cannons do not
destroy graves or ice paths. In order to avoid having your Cob
Cannon eaten by an Imp when there is a Gargantuar in the same
lane, try for two explosive attacks on the same Gargantuar as
close together as possible (two separate but almost simultaneous Cob
Cannon attacks are ideal).
If you hit it twice quickly enough, it will not have time to
fling its Imp. If the second attack is from a Jalapeño,
it will destroy the Imp anyway.
Imitater [$30,000] This allows
you to pick two of any normal (non-powerup) plant, so you can have, for
example, Sunflowers which recharge twice as often. The Imitater is
disguised as a potato ('tater, get it?) when it is planted, then after
about 3
seconds, it turns into the selected plant. Be careful in using it for
explosive plants (like Squash, Cherry Bomb, or Jalapeño) which you might need
instantly, as they may be eaten before they can transform.
Imitater Jalapeños can be launched effectively from
behind your defenses if you have a vacant square, or protected by
Pumpkins while they activate. This should be the last of the 49 plants
you buy, earning you the Morticulturalist
achievement.
Plant Accessories
Lawn Mower [free] A lawn mower destroys every zombie
(including
Gargantuar and Balloon) in a lane, when triggered by a zombie reaching
it. At the
end of each scenario, each unused
mower (and Pool and Roof cleaners) is worth a $50 bonus. Mowers and/or
Cleaners are found
in virtually every scenario except Last Stand, Beghouled,
Beghouled Twist, Zombiquarium, I, Zombie, and
Vasebreaker. When a lawnmower is triggered, the zombies will
leave that lane alone for a while afterwards.
Pool Cleaner [$1,000] Works exactly like lawnmower
in pool
lanes of
Pool and Fog scenarios.
Garden Rake [$200] Appears at the beginning of each
new level or scenario (but only once at the beginning of multi-phase
battles Last Stand and Survival,
and only on the first level of Vasebreaker:
Endless).
It is automatically placed in the lane
where the first zombie will appear, and destroys that zombie
automatically (except for a Gargantuar, which receives the normal
damage from an explosive). Does not appear in Bobsled Bonanza
due to ice, in Zombiquarium due to water, in Beghouled
and Beghouled Twist
due to the full field of plants, in Whack-a-Zombie
due to the graves, or in Level 5-10 or Dr. Zomboss's Revenge
due to the robot. Lasts for three consecutive scenarios,
after
which a new rake must be purchased.
The program does not remind you when you need to buy a new Rake; you
can check the Shop during seed selection
(if it is not Sold Out, you need one).
A Wall-nut (or Tall-nut) placed on a rake will prevent the rake from
triggering until the Wall-nut is eaten. Rakes are not essential
in Night and Fog scenarios where you have Puff-shrooms, nor in Column Like You See 'Em where you
face waves of zombies at the Start
Roof Cleaner [$3,000] Works exactly like lawnmower
on Roof.
Wall-nut First Aid [$2,000] -- Allows you to plant a
fresh Wall-nut, Tall-nut, or Pumpkin over a damaged one, without
digging up the old one. You will make the most
efficient use of Sun if you wait until it is heavily damaged before
replacing it. You can't mix types: if you want to plant, e.g., a
Tall-nut over a damaged Wall-nut, you still must dig up the Wall-nut
first.
(Zen Garden)
Gardening Glove [$1,000] Allows you to pick up and
move
plants within one garden. Useful for arranging plants in squares
of four for the Golden Watering Can. Not strictly necessary if
you have a Wheelbarrow.
Wheelbarrow [$200] Allows you to move plants between
gardens. Cannot be bought until you have bought one of the two
additional gardens. Can also act as a Gardening Glove, though the
interface takes an extra click.
Fertilizer [$750 for a bag of 5 treatments; limit 4
bags] Makes a plant grow one step in size (sprout to tiny to
medium to large).
Bug Spray [$1000 for a bottle of 5 treatments; limit
4 bottles] Protects full-grown plants from bugs for one day.
Mushroom Garden [$30,000] Allows mushroom plants to
grow. These are
more valuable than daytime
plants, sellable for $10,000 when full-grown. There is no reason to buy
the
Mushroom Garden until you have found a plant that grows there (the same
is true of the Aquarium Garden).
Aquarium Garden [$30,000] Allows aquatic plants to
grow. Also $10,000
each when full-grown.
Obviously aquatic plants don't need watering, though they will want
fertilizer and music.
Golden Watering Can [$10,000] Waters up to four
plants at a time,
if
arranged in a square in the daytime Zen Garden. Waters two
plants at a time if they are close together in the Mushroom Zen
Garden.
Phonograph [$15,000] Plays music for a plant, which
produces
a gold coin (three gold coins for Mushroom and Aquarium plants). Not
of any use unless you start collecting plants; if you sell plants as
soon as they are full-grown, they will never want music.
Stinky the Snail [$3,000] Collects coins slowly in
the daytime Zen
Garden, more
quickly if you feed him chocolate.
Chocolate Bars [free; limit 10] Once you
have bought
Stinky, chocolate bars will appear randomly in scenarios just as new
plants
do.
There seems to be a limit of 10 chocolate: once you have
accumulated 10 chocolate bars, no more appear until you use some.
Chocolate can also be fed to most
full-grown plants (in all 3 gardens!) when they are happy (happy plants
glow after they are watered, sprayed for bugs if needed, and music is
played for them). Plants which are fed chocolate produce coins
more rapidly for a while.
Tree of Wisdom [$10,000] Gives a playing tip each
time you feed it a
bag of
plant food ($2,500 each), up to 50 feet. Additional tips appear
at 100, 500, and 1000.
The Zombies
For each of the 26 zombies, we indicate where they first appear, as
well as any special characteristics.
Zombie [1-1] 10 peas to kill; loses its arm after 5
peas. Referred to
throughout this article as plain or regular zombies.
Flag Zombie [1-2] Identical to regular (or plain
Ducky Tube) zombie;
carries a flag to indicate the start of a new wave of zombies. You can
customize what the Flag Zombie looks like by creating a
Zombatar.
Conehead Zombie [1-3] 28 peas to kill
Pole Vaulting Zombie [1-6] 17 peas to kill; loses
its arm after 9 peas.
Moves about 2-1/2 times as fast as a normal zombie, then jumps over
the first plant it encounters, and starts walking at normal speed after
dropping its pole (it
can jump
even one-armed). Peas and other projectiles which reach it during its
leap will miss and pass
by (sometimes even butter from Kernel-pults).
Vulnerable to Squash (which will jump backwards to smash the PV after
it
jumps over the Squash). Cannot jump over Tall-nuts. Does not jump over
Spikeweed/Spikerock or ladders, but runs over them, still holding its
pole. Since it slows to normal speed after
it jumps, throw anything cheap
in its path. Jumps over empty Flower Pots in Roof scenarios. In early
Day scenarios, try to avoid PV's jumping over
your defensive
wall of Wall-nuts; double walls are good if you have time to build
them. In I, Zombie scenarios, if it does not encounter any
plants
to jump over, it will drop its pole and eat the brain at the end of its
lane.
Buckethead Zombie [1-8] 65 peas to kill. Vulnerable
to Magnets which
remove the bucket
from its head.
Newspaper Zombie [2-1] Once it takes enough damage
(eight hits from
peas, or a Wall-nut in Wall-Nut
Bowling),
it loses its newspaper and angrily starts moving
at about 2-1/2 times normal speed (about the same as a running
Pole Vaulter), taking nine more peas to destroy. While it carries
its newspaper, it is not slowed by Snow Peas; it moves at normal zombie
speed. But the frozen peas will keep it at about normal speed
once it drops the paper.
Screen Door Zombie [2-3] As tough against peas as a
Buckethead, but
vulnerable (equivalent to a standard zombie) to Fume-Shrooms,
Melon-pults, and Spikeweed. Also vulnerable from behind to
Split Pea, which can destroy it with five double-pea bursts.
Its screen door also makes it immune to the slowing
effects of Snow Peas (but not Winter Melons) until the screen door is
damaged enough that it drops it. In Wall-nut Bowling,
they are even tougher than Bucketheads, taking four direct hits from
regular Wall-nuts, but are destroyed immediately by any ricocheting
Wall-nuts.
Football Zombie [2-6] 80 peas to kill. Helmet is
initially dented at 24 peas and falls off at 72. If you remove
its helmet with a Magnet-shroom, it takes 10 more peas to kill it.
Dancing Zombie [2-8] Advances in its lane until
stopped by a plant, at
which it summons Backup Dancers in the squares in front of,
behind, and to both sides (in adjacent lanes). If a Dancer is stopped
by a Tall-nut (or Pumpkin or Wall-nut), the forward Backup Dancer will
appear beyond the Tall-nut. Useful in certain situations in I,
Zombie Endless:
an unattacked Dancer can help grab the brains in its lane and the two
adjoining ones, though it is not guaranteed to collect all of the Sun
in the adjoining lanes (and will rarely do so in columns 4 and 5).
Frequently seen in waves in Survival scenarios as well as in Wall-nut
Bowling 2.
Backup Dancer [2-8] They do not appear in previews,
but are implied by
the presence of Dancing zombies.
Ducky Tube Zombie [3-1] These ride inner tubes along
your two pool
lanes; they can be regular,
Flag, Conehead, or Buckethead zombies (depending on what land-based
zombies show up
in the preview: e.g. if there are no Bucketheads in the preview, Ducky
Tubes will not be Bucketheads either). During the Final Wave of most
Pool and Fog scenarios, two or three Inferi often
pop up simultaneously in the middle of a pool lane (often at least one
behind your row of Wall-nuts).
Snorkel Zombie [3-3] Stays partially submerged until
it reaches a Lily
Pad (with or without a plant on it). If it finishes eating, it
submerges again. Vulnerable while submerged to Melon-pults.
Zomboni [3-6] Drives forward along a lane, laying a
path of ice. Runs
over most plants, including Garlic, Wall-nuts and Tall-nuts. Destroyed
immediately by most
explosive plants as soon at it reaches them, including Squash,
Cherry Bomb, Potato Mine, Chomper, Spikeweed, or Spikerock. Can be
destroyed by a cluster of six or eight Cattails by the time it
reaches the fifth or sixth column. Immune to Ice-shroom
(they're used to the cold). An ice path will melt after about 30
seconds if no new Zombonis come along.
Zombie Bobsled Team [3-7] A Bobsled, carrying four
zombies, follows an ice path laid down by a Zomboni. Since
no plants can be placed within an ice path, the Bobsled will continue
until it reaches the end of the path (or is heavily damaged). The
Bobsled then disappears and the four Bobsledders get out and walk. The
Bobsled and its
occupants will be destroyed by a Potato Mine or Cherry Bomb, or eaten
by a Chomper, placed directly at the end of the ice path. A Jalapeño
placed anywhere in its lane will destroy the Bobsled and all of its
occupants (even if they have just disembarked). A
Squash, however, ignores the vehicle and waits to crush one or two
of the zombies after they get out. A Tall-nut or Wall-nut will
temporarily stop the four Bobsled zombies which
get out, but if not killed, four Bobsledders can eat a
Tall-nut in about 27 seconds.
Dolphin Rider Zombie [3-8] Extremely fast. Leaps
over the
first
plant it encounters in
a pool lane, similarly to a Pole Vaulting zombie on land. Stopped by
Tall-nut or Tangle Kelp, though a Tall-nut in the 9th column will not
block it, as it flips its dolphin into the pool in column 8.
Jack-in-the-Box Zombie [4-1] Plays "Pop Goes the
Weasel" on
its music box. During the fourth repetition, if the zombie
has not been destroyed yet, the song stops and the music box
explodes, blowing up its owner and every plant in a 3x3 area,
like a Cherry Bomb in reverse. A Jack-in-the-Box
can be hypnotized if you play a Hypno-shroom on it before the
music box stops; it will turn and try to use its
exploding music box against the other zombies. It takes 17 peas
to destroy a Jack-in-the-Box. In
Vasebreaker,
as soon as its vase is broken, it will blow up every adjacent vase
(leaving the zombies intact and the plants ready to plant), but will
destroy any adjacent plants already placed. It can even destroy a
Squash which is in mid-leap before it can crush a zombie. There
is one Jack-in-the-Box per level in Vasebreaker
Endless, and eight each in Chain Reaction and
Another Chain Reaction.
Balloon Zombie [4-3] Floats quickly (about the same
speed as running
Pole Vaulters or angry
Newspapers) over most plants in its lane; destroyed by Cherry Bomb,
Jalapeño, Cob Cannon, and Doom-shroom in
their normal ranges. Cactus in the same lane to the left of it or
Cattails anywhere will
shoot it down with a single dart, making it a priority target even if
some other zombie is closer. Slowed down only slightly by Ice-shroom.
Balloon zombies shot down
in grass lanes will land and walk at normal speed, and take 10 peas to
kill, the same as a plain zombie.
Balloons shot down over water simply disappear.
Balloons in the air anywhere are blown backwards off the screen by
Blover.
Digger Zombie [4-6] Tunnels under everything except
Potato Mines (which
blow it up) until it reaches the leftmost square in its lane, or until
a Magnet-shroom grabs its pick.
Can also be destroyed by a Cherry Bomb or Jalapeño while tunneling. A
Digger while tunneling to the left will stop and eat a Potato Mine
which has not charged yet.
If it reaches the far left square, it emerges and turns back
to the right, eating whatever it encounters until it is destroyed.
Vulnerable to everything
once it emerges; Cattails are particularly effective. It takes
15 peas to destroy a Digger; its helmet is dented at 4, falls off
at 5, and it loses an arm at 10. A hypnotized Digger still continues
moving to the right,
but no longer eats any plants.
Pogo Zombie [4-8] Hops over nearly everything except
Tall-nuts;
Wall-nut, Pumpkin, and Garlic are useless against
it. A Pogo will crash into a Tall-nut and lose its pogo stick; it
is also vulnerable to Squash (which can even jump backwards
if necessary to smash the Pogo after it hops over it), Cherry Bomb (if
placed nearby at the right time), Jalapeño, and Magnet-shroom (which
grabs its pogo stick). Chompers are useless against Pogos in
the open but are effective behind a Tall-nut. A
hopping Pogo is only slowed down, not frozen, by Ice-shroom.
Top Secret Zombie Spoiler
Bungee Zombie [5-1] There are two different kinds of Bungees.
Stealing Bungees jump from out of the sky to steal a plant and
disappear. You get a few seconds warning (a cry and a red bullseye
marking the plant
they are about to steal). Dropping Bungees jump and land
anywhere, with a circular shadow marking the spot where they will land.
Dropping Bungees do not show up in the preview, and normally
appear only during a Final Wave (and in Adventure level 5-5).
All Bungees are stopped by an Umbrella Leaf in the same or an
adjacent square. A Stealing zombie can be destroyed by a Cherry Bomb,
Jalapeño, or Squash if placed just before or as they drop (timing is
critical), and will be eaten by a Chomper which happens to be
directly behind the plant it is trying to steal. It's usually
not worth expending anything valuable (i.e. a Cherry Bomb or Jalapeño)
to destroy a Stealing Bungee unless what it is about to steal is
valuable. A Stealing Bungee can steal a Chomper; it will be
slowed by a Snow Pea it is trying to steal but will usually have time
to steal it anyway (unless enough other plants are firing at it).
A Stealing Bungee will be squashed if it tries to steal a Squash (but
both will be gone anyway, just as if it had stolen the
Squash). Dropping Bungees (which normally are either plain,
Conehead,
or Buckethead) can be attacked as normal
after they land. Stealing Bungees are destroyed if they attempt
to steal an armed Potato Mine (so they can be used to remove Potato
Mines in I, Zombie,
though this is usually not an efficient tactic in terms of Sun).
Ladder Zombie [5-3]
Plants a ladder on a Wall-nut, Tall-nut, or Pumpkin, allowing it and
any
zombies behind it in the same lane to climb over it. When a
ladder is placed a plant, it is protected (along with its contents if a
Pumpkin) from being eaten, though it can still be crushed by
Gargantuars or vehicles. A Chomper behind a Tall-nut, Wall-nut,
or Pumpkin will not eat a Ladder zombie until it has placed its
ladder. A Ladder zombie
which reaches an
already placed ladder will climb over it and look for the next nut or
pumpkin to place its own ladder on. A Ladder can be grabbed by
Magnet-shroom either while a zombie is carrying it or after it
has been placed. Ladders which have already been placed are
destroyed by Cherry Bombs, Jalapeños, Cob Cannons,
and Doom-shrooms, or if the plant they are placed on is dug up
with a Shovel or replaced using Wall-nut First Aid. One strategy which
is somewhat useful against
Ladders is to build a double (or even triple, if you have time) wall of
Tall-nuts. A
Ladder zombie which is still carrying its ladder is not slowed by Snow
peas; this makes it a useful weapon in certain
I, Zombie
levels (including Endless). 17 peas are needed to kill a Ladder zombie
after it
loses or places its ladder; the ladder dents after 10 peas and the
zombie drops it after 25.
Catapult Zombie [5-6] Drives a catapult
which stops
in the eighth
column, and hurls basketballs at
the plants (presumably mostly Sunflowers) in the first column.
Basketballs can
only be stopped by an Umbrella Leaf in the same or adjacent squares.
It takes 5 basketballs to destroy any plant (and 5 more to
destroy the Flower Pot it was planted in). The catapult will
then target any plant in the second column of its lane. Each
catapult carries 20 basketballs; if all of them are used up before the
catapult is destroyed, it will start moving forward, crushing plants
like a Zomboni
(without the ice path). This happens rarely; keeping Tall-nuts
in the 7th column normally prevents them from being run over by
Catapults. Catapults will flatten anything in the 9th
column, and a Tall-nut or Pumpkin in the 8th column,
but will not
flatten an empty Pot or
most smaller plants (including Wall-nuts) in column 8. A
Flower Pot may be
placed in an empty
square in column 8 after the Catapult is already there, and a plant
subsequently placed in
it. Catapults themselves are vulnerable to the usual explosives:
Cherry Bombs, Squash, Potato Mines, Jalapeños, and Chompers.
Gargantuar [5-8] A giant zombie which lumbers
forward, smashing
everything in its path (including Garlic and Tall-nuts). It
can survive a
direct hit from anything, even a Cob Cannon or a Doom-Shroom, but a
second hit or a reasonable amount of additional damage (about 60 peas)
will destroy it. It takes the
equivalent of about 150 peas of damage to destroy it.
When it reaches half damage (about 75 peas), it
will fling the Imp it carries forward. It makes
a strangled roar when it is about to fall, so you know when
you do not need to attack it further (this is especially important
in Vasebreaker, to avoid wasting Cherry Bombs and
Squash). Although a Squash normally crushes everything in the
square it leaps in (or into), a Gargantuar in Vasebreaker can
sometimes
shield a Buckethead in the same square from damage.
Imp [5-8] A small, very fast zombie available in many
I, Zombie scenarios (including I, Zombie Endless)
as a cheap attacker to grab brains in undefended lanes, or to remove
Squash, Chompers, and Potato
Mines. Can only cross one Spikeweed without being destroyed; killed by
only three peas or the equivalent.
The Imp carried and thrown by Gargantuars in Vasebreaker
scenarios takes ten pea hits, like a regular zombie, before being
destroyed. An Imp eats about twice as fast as other zombies.
Dr. Zomboss [5-10] Dr. Edgar Zomboss is the
antagonist in
Adventure level 5-10 and the Minigame
Dr. Zomboss's Revenge. He operates a giant
mechanical zombie which generates a dangerous assortment of regular
zombies, plus iceballs and fireballs.
Giga-Gargantuar [S:E] Not found in
Adventure or regular
Survival levels; seen only in Survival: Endless. A
red-eyed
Gargantuar
which takes half again as much damage as normal Gargantuar (three hits
from Cob
Cannon, Squash, Cherry Bomb, or Jalapeño). Its appearance might be
triggered by early use of Cob Cannons; I played Survival:
Endless
many
times before I saw it for the first time.
Zombie Accessories
Grave [2-1] Found in Night
scenarios only, as well
as Whack-a-Zombie.
Zombies come out of every grave in the Final Wave of Night
scenarios, and randomly out of graves in Whack-a-Zombie.
Nothing can be planted in the same square except for a Grave Buster
plant, which destroys it in less than 5 seconds if no zombies eat it.
No zombies can come out of a grave once a Grave
Buster starts to work on it. Impervious to all other weapons,
surviving explosions from Cherry Bombs, Jalapeños,
Cob-Cannons, and even Doom-shrooms. The Garden
Rake might randomly appear in a grave square at the start of a Night
level. The new grave which appears randomly at the end of
each flag of Survival:
Night (normal and Hard) will usually appear in a blank square if
possible, but if all squares are occupied by plants, it will destroy a
plant in a random square and appear in the newly empty square (so it's
probably a good idea to leave one square, well to the right, free of
plants).
Fireball [5-10] Thrown by Dr. Zomboss's giant robot,
it destroys
everything in its lane,
including the Roof Cleaner, until stopped by an Ice-shroom placed
anywhere on the roof in an empty Flower Pot. It does not enter the
chimney to eat brains, but leaves its lane vulnerable to a later zombie
breakthrough. Found in Adventure Level 5-10 and Dr.
Zomboss's Revenge.
Iceball [5-10] Identical effects to Fireball, but
stopped by a Jalapeño anywhere in the same lane.
Recreational Vehicle [5-10] Thrown randomly by the
robot at any time after
it receives substantial damage in Level 5-10 or Dr.
Zomboss's Revenge.
The RV
smashes every plant
in an area two lanes wide and three columns deep. Somewhat
like the Imp thrown by a Gargantuar (after it passes 50%
damage), except
that the robot can throw an RV well before the halfway point,
and usually throws more than one RV during the scenario. They are
perhaps the zombies' most destructive weapon and there appears to be no
defense against them.
This article is copyright ©2019 by Michael Keller. All rights
reserved. It was most recently edited on May 15, 2019. All
screenshots were generated by me during actual play and images are used
by
permission of PopCap Games, Inc.
Plants vs. Zombies is ©2009-2012 by PopCap
Games, Inc. Used with permission. All rights reserved.
Plants vs. Zombies is a trademark of PopCap Games, Inc.
which may be registered in some countries.